Easy Hawaiian Chicken Sheet Pan Dinner
Hawaiian Chicken Sheet Pan meals have become a weeknight warrior for good reason. They deliver that irresistible sweet and savory flavor profile that has everyone coming back for seconds, all while minimizing cleanup to just one pan. There’s something incredibly satisfying about transforming simple ingredients into a vibrant, tropical feast without a mountain of dirty dishes. This particular Hawaiian Chicken Sheet Pan recipe is a crowd-pleaser because it perfectly balances the tang of pineapple with the savory goodness of chicken, all infused with those quintessential island spices like garlic, gin extractger, and soy sauce. It’s the kind of dish that transports you straight to a luau, even if you’re just in your own kitchen. What truly makes it special is the ease with which it comes together – just chop, toss, and bake. The caramelization from the pineapple and the tender chicken create a beautiful symphony of textures and tastes, making it a go-to for busy evenings or when you simply crave a taste of paradise.
Ingredients:
- 1 ½ lbs (approximately 700 g) boneless, skinless chicken breasts, cut into 1-inch pieces
- 1 red bell pepper, chopped into 1-inch pieces
- 1 yellow bell pepper, chopped into 1-inch pieces
- 1 small red onion, cut into wedges
- 1 ½ cups fresh pineapple chunks (or canned pineapple chunks, thoroughly drained if using canned)
- 2 tablespoons olive oil
- 2 cloves garlic, minced
- ½ teaspoon salt
- ½ teaspoon black pepper
- ½ teaspoon paprika
- ¼ teaspoon chili flakes (optional, for a touch of heat)
- For the Sauce:
- ⅓ cup low-sodium soy sauce
- ¼ cup pineapple juice (use the juice from your canned pineapple if you used that, or juice from fresh pineapple)
- 3 tablespoons honey (or light brown sugar, if you prefer)
Hawaiian Chicken Sheet Pan Preparation
This Hawaiian Chicken Sheet Pan recipe is all about vibrant flavors and minimal cleanup, making it a weeknight savior. We’re going to toss everything together on one sheet pan for a delicious, roasted meal.
Marinating the Chicken and Vegetables
The first step to achieving maximum flavor in our Hawaiian Chicken Sheet Pan is to get everything coated in our delicious seasoning mixture. Preheat your oven to 400°F (200°C). Line a large baking sheet with parchment paper or aluminum foil for even easier cleanup. This is a crucial step, especially for busy weeknights.
Now, in a large bowl, combine the cut chicken breast pieces, chopped red bell pepper, chopped yellow bell pepper, and red onion wedges. Add the olive oil to the bowl. Next, sprinkle in the minced garlic, salt, black pepper, paprika, and the optional chili flakes. Gently toss everything together with your hands or a spatula until each piece of chicken and vegetable is evenly coated. Ensure the garlic is distributed well, as this will infuse so much flavor during the roasting process. You want to see a nice, even sheen from the olive oil and spices on all the ingredients. This coating acts as the base for our Hawaiian-inspired flavors.
Assembling and Roasting the Sheet Pan
Once everything is well-coated, spread the chicken and vegetable mixture in a single layer on your prepared baking sheet. It’s important to avoid overcrowding the pan. If your pan is too full, the ingredients will steam instead of roast, and we want those lovely caramelized edges. If necessary, use two baking sheets.
Now for the pineapple! Add the fresh pineapple chunks directly to the baking sheet, scattering them amongst the chicken and vegetables. The pineapple will roast alongside everything else, softening and releasing its sweet, tangy juices, which will mingle beautifully with the savory elements. Place the baking sheet into your preheated oven. Roast for 20-25 minutes, or until the chicken is cooked through and no longer pink in the center, and the vegetables are tender-crisp and slightly charred at the edges. The cooking time will vary slightly depending on your oven and the size of your chicken pieces, so keep an eye on it.
Preparing the Hawaiian Sauce
While the chicken and vegetables are roasting, it’s time to whip up the irresistible Hawaiian sauce that will elevate this dish from good to absolutely fantastic. In a small bowl, whisk together the low-sodium soy sauce, pineapple juice, and honey (or brown sugar). This sauce is a perfect balance of salty, sweet, and tangy, creating that classic Hawaiian flavor profile. Make sure the honey or brown sugar is fully dissolved into the liquids. Give it a taste and adjust sweetness or saltiness if you desire, though this ratio is usually spot on.
Glazing and Final Roasting
Once the initial roasting time is nearing its end, carefully remove the baking sheet from the oven. Drizzle about half of the prepared Hawaiian sauce evenly over the chicken and vegetables. Gently toss the ingredients on the pan to ensure they are coated in the sauce. Return the baking sheet to the oven and continue to roast for another 5-7 minutes. This final roast allows the sauce to thicken slightly and create a beautiful glaze over the chicken and vegetables. This step is where the magic happens, caramelizing the sugars in the honey and pineapple, creating that signature sticky, sweet glaze. The aroma filling your kitchen at this point will be incredible!
Serving Your Hawaiian Chicken Sheet Pan
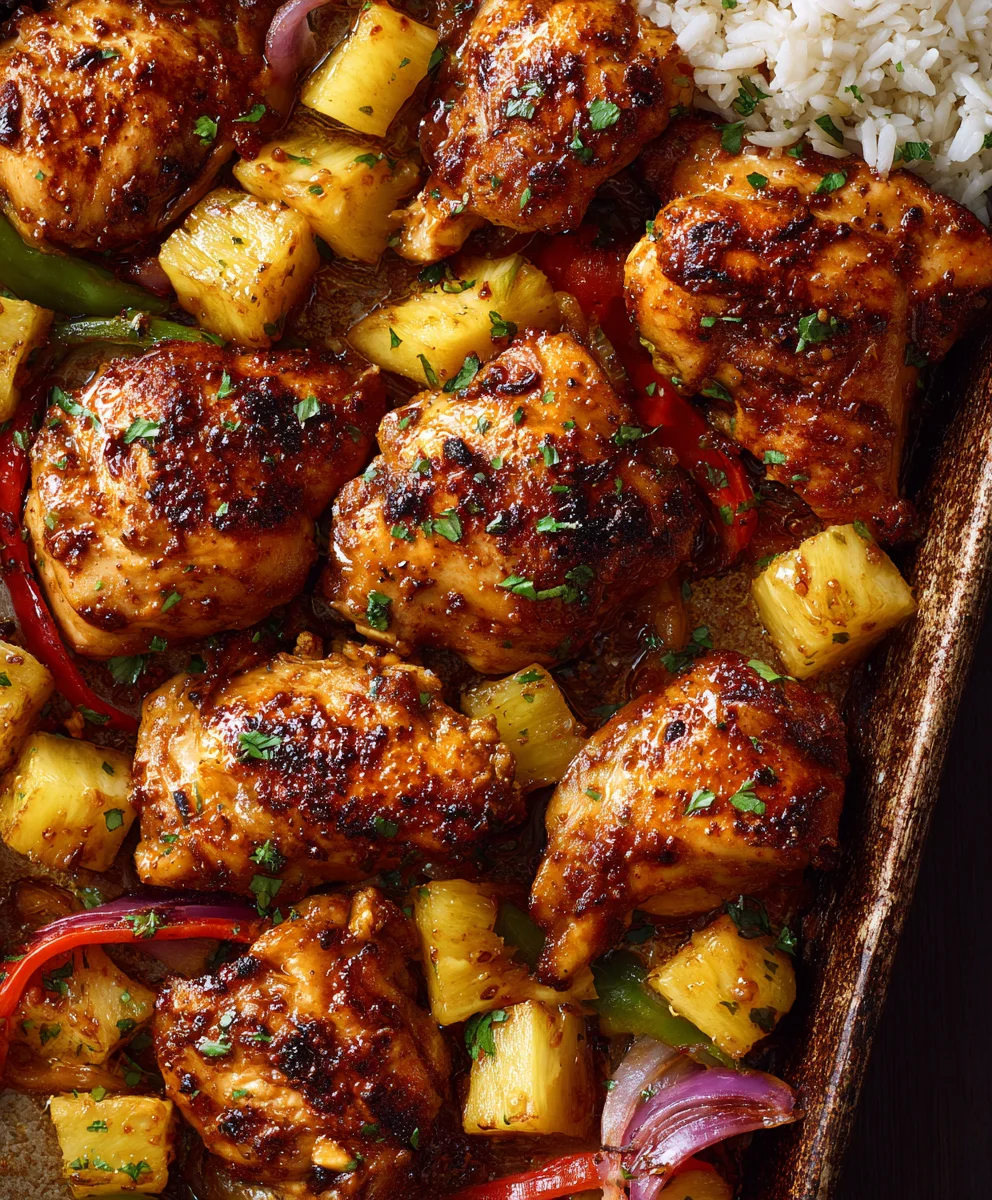
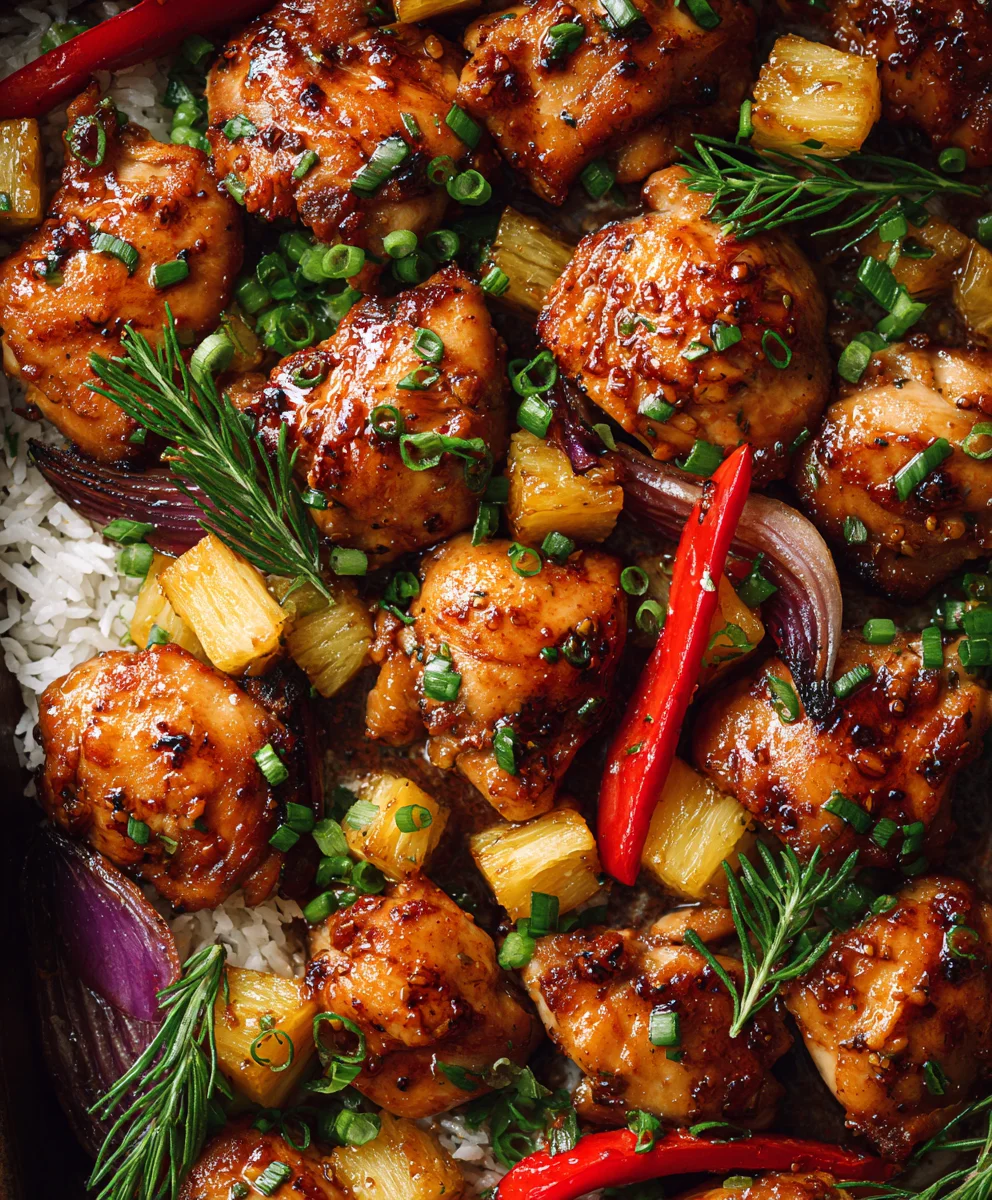
When your Hawaiian Chicken Sheet Pan is done, it will be a beautiful symphony of colors and aromas. The chicken will be juicy, the vegetables tender and slightly caramelized, and the pineapple will be soft and sweet. Remove the baking sheet from the oven. Drizzle the remaining Hawaiian sauce over the top just before serving. This Hawaiian Chicken Sheet Pan is incredibly versatile. It’s wonderful served over fluffy white rice, brown rice, or even quinoa. Garnish with fresh chopped cilantro or green onions if you like for an extra pop of freshness and color. This is a complete meal in one pan, making it perfect for any night of the week. Enjoy the taste of the islands!
Conclusion:
There you have it! The incredibly simple and satisfying Hawaiian Chicken Sheet Pan is ready to grace your dinner table. This recipe is a weeknight warrior, proving that delicious and healthy meals don’t require hours in the kitchen or a mountain of dishes. The sweet and savory marinade, infused with pineapple and soy, perfectly complements the tender chicken and vibrant vegetables, creating a symphony of flavors and textures. I encourage you to give the Hawaiian Chicken Sheet Pan a try – it’s a guaranteed crowd-pleaser!
For serving, this dish is wonderfully versatile. It’s fantastic on its own, or you can serve it over fluffy white rice, brown rice, or even quinoa for a complete and hearty meal. A sprinkle of toasted sesame seeds and some chopped fresh green onions add a delightful finishing touch.
Don’t be afraid to get creative with variations! Feel free to swap out the vegetables based on what’s in season or what you have on hand. Bell peppers of any color, broccoli florets, or even some thinly sliced zucchini would work beautifully. For a spicier kick, add a pinch of red pepper flakes to the marinade.
Frequently Asked Questions about Hawaiian Chicken Sheet Pan:
Can I prepare the marinade ahead of time?
Absolutely! The marinade for the Hawaiian Chicken Sheet Pan can be made a day in advance and stored in an airtight container in the refrigerator. This will save you even more time when you’re ready to cook.
What kind of chicken is best for this recipe?
Boneless, skinless chicken thighs are ideal for the Hawaiian Chicken Sheet Pan as they stay incredibly moist and tender during baking. However, you can also use boneless, skinless chicken breasts; just be sure to cut them into similar-sized pieces and keep an eye on the cooking time to prevent them from drying out.
Easy Hawaiian Chicken Sheet Pan Dinner
A simple and flavorful Hawaiian Chicken Sheet Pan Dinner featuring tender chicken, colorful vegetables, and sweet pineapple roasted to perfection with a delicious glaze. Minimal cleanup required!
Ingredients
-
1 ½ lbs boneless, skinless chicken breasts, cut into 1-inch pieces
-
1 red bell pepper, chopped
-
1 yellow bell pepper, chopped
-
1 small red onion, cut into wedges
-
1 ½ cups fresh pineapple chunks (or canned, drained)
-
2 tablespoons olive oil
-
2 cloves garlic, minced
-
½ teaspoon salt
-
½ teaspoon black pepper
-
½ teaspoon paprika
-
¼ teaspoon chili flakes (optional)
-
⅓ cup low-sodium soy sauce
-
¼ cup pineapple juice
-
3 tablespoons honey
Instructions
-
Step 1
Preheat oven to 400°F (200°C). Line a large baking sheet with parchment paper or aluminum foil. In a large bowl, combine chicken, bell peppers, and red onion. Add olive oil, minced garlic, salt, pepper, paprika, and optional chili flakes. Toss to coat evenly. -
Step 2
Spread the chicken and vegetable mixture in a single layer on the prepared baking sheet. Add pineapple chunks to the pan, scattering them among the other ingredients. Avoid overcrowding. -
Step 3
Roast for 20-25 minutes, or until chicken is cooked through and vegetables are tender-crisp. -
Step 4
While roasting, prepare the sauce: In a small bowl, whisk together soy sauce, pineapple juice, and honey until dissolved. -
Step 5
Remove the baking sheet from the oven. Drizzle half of the Hawaiian sauce over the chicken and vegetables. Toss gently to coat. -
Step 6
Return the baking sheet to the oven and roast for another 5-7 minutes, allowing the sauce to thicken and glaze the ingredients. -
Step 7
Remove from oven, drizzle with the remaining sauce, and serve hot, ideally over rice or quinoa. Garnish with cilantro or green onions if desired.
Important Information
Nutrition Facts (Per Serving)
It is important to consider this information as approximate and not to use it as definitive health advice.
Allergy Information
Please check ingredients for potential allergens and consult a health professional if in doubt.