Easy Homemade Strawberry Ice Cream Recipe – Sweet & Creamy
Homemade strawberry ice cream is a summertime dream come true, a vibrant and utterly delicious treat that instantly transports me back to sun-drenched afternoons and childhood joys. There’s something undeniably special about this classic flavor. It’s not just the sweet, luscious taste of ripe strawberries that captures our hearts; it’s the pure, unadulterated joy it brings. Unlike store-bought versions that often rely on artificial flavors, our homemade strawberry ice cream bursts with the authentic essence of fresh fruit, creating a creamy, dreamy texture that’s simply irresistible. The satisfaction of creating this frozen masterpiece from scratch, with its beautiful pink hue and delightful fruity notes, is a reward in itself. Get ready to elevate your dessert game and experience the magic of truly exceptional homemade strawberry ice cream.

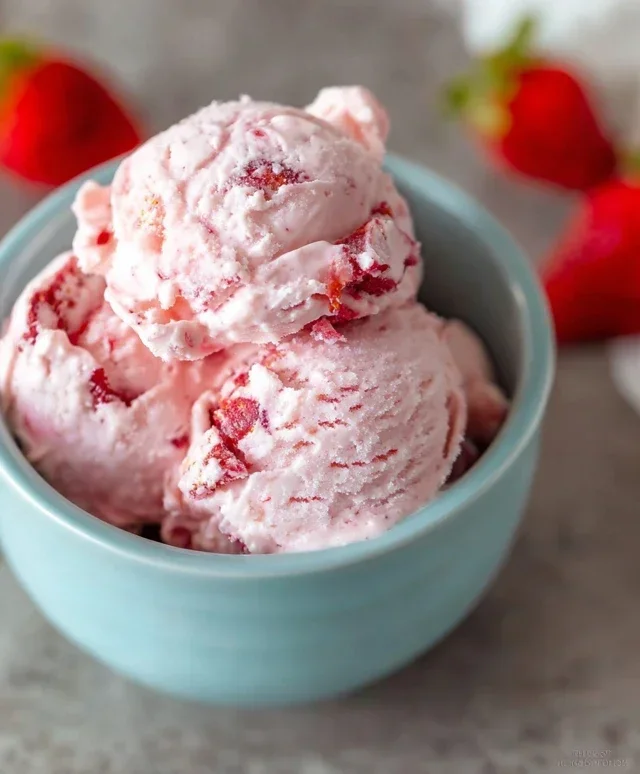
Homemade Strawberry Ice Cream
There’s something incredibly special about homemade ice cream, and when that ice cream is bursting with the sweet, vibrant flavor of fresh strawberries, it’s pure magic. Forget those store-bought varieties that can sometimes taste artificial; this recipe celebrates the natural goodness of real strawberries, creating a smooth, creamy, and utterly delicious treat that will have everyone asking for seconds. Making ice cream from scratch might sound intimidating, but I promise you, it’s simpler than you think, and the reward is absolutely worth it. This recipe uses a no-churn method, meaning you don’t need any fancy ice cream maker to achieve perfect results. It relies on the magic of sweetened condensed milk (though we’ll get to that) and a few simple ingredients to create a delightful dessert. Let’s dive into creating your own perfect scoop of sunshine!
Ingredients:
Preparing the Strawberry Base
The key to an intensely flavorful strawberry ice cream is to really coax the sweetness and aroma out of your fresh berries. We’ll start by creating a luscious strawberry puree that will form the heart of our ice cream. This step not only infuses the base with incredible strawberry flavor but also ensures that we get those delightful little flecks of berry throughout the finished product.
1. In a medium bowl, combine your hulled and diced strawberries with the honey, granulated sugar, and lemon juice. The lemon juice might seem counterintuitive when you’re aiming for sweetness, but it actually acts as a flavor enhancer, brightening the strawberry taste and adding a subtle tang that balances the sweetness perfectly. It also helps to break down the strawberries slightly, releasing their juices.
2. Gently stir these ingredients together, ensuring the strawberries are evenly coated with the sugar, honey, and lemon juice. Now comes the waiting game. For at least 30 minutes, or ideally up to an hour, let this mixture sit at room temperature. During this time, the sugar will begin extract to draw out the natural juices from the strawberries, creating a beautiful, syrupy reduction. This process, often called maceration, is crucial for developing a deep, concentrated strawberry flavor. You’ll notice the strawberries softening and releasing a vibrant, ruby-red liquid.
Creating the Creamy Ice Cream Base
While our strawberries are busy doing their thing, we’ll prepare the creamy foundation of our ice cream. This involves bringin extractg together the dairy components and infusing them with vanilla for that classic ice cream aroma and taste.
1. In a separate, larger bowl, pour in your cold heavy whipping cream and the half and half. Add the vanilla extract.
2. Using an electric mixer (a hand mixer or stand mixer will work wonderfully here), begin extract whipping the cream mixture on medium-high speed. You’re looking to whip it until it forms soft peaks. This means that when you lift the beaters out of the cream, the peaks that form will gently curl over. Be careful not to over-whip, as you don’t want to turn it into butter! Soft peaks are the perfect consistency to gently fold into our strawberry mixture.
Combining and Chilling
Now it’s time to bring our two components together and prepare for the freezing process. This is where the magic really starts to happen, and the flavors meld into something extraordinary.
1. Once your strawberries have macerated and created a lovely syrup, it’s time to process them further. You can either gently mash them with a fork for a chunkier texture, or for a smoother ice cream, carefully transfer the entire strawberry mixture (berries and syrup) into a blender or food processor. Blend until you achieve a smooth puree. If you prefer absolutely no seeds, you can strain the puree through a fine-mesh sieve at this stage, though I personally love the little bursts of berry texture.
2. Now, gently fold the strawberry puree into the whipped cream mixture. Use a spatula and a folding motion – essentially, going down the side of the bowl, across the bottom, and up the other side, turning the mixture over on itself. This technique is key to incorporating the strawberry mixture without deflating the airy whipped cream. Continue folding until the strawberry puree is just incorporated and you have beautiful swirls of pink throughout the white cream. Don’t overmix; some streaks are perfectly fine and even desirable.
Freezing and Enjoying
The final step is to allow our creation to transform into delicious ice cream through the magic of freezing.
1. Pour the combined ice cream mixture into a freezer-safe container. A loaf pan works perfectly for this, or any airtight container you have. Cover the surface of the ice cream directly with plastic wrap or parchment paper. This prevents ice crystals from forming on the surface, which can lead to a less smooth texture. Then, cover the container tightly with its lid or aluminum foil.
2. Place the container in the freezer and let it freeze for at least 6-8 hours, or preferably overnight, until firm. For the smoothest possible texture, you can remove the ice cream from the freezer every couple of hours during the first 4-6 hours and give it a good stir with a fork or whisk, breaking up any ice crystals that may have started to form. This extra step, while optional, can significantly improve the creaminess. Once fully frozen, scoop generously into bowls and enjoy the fruits (literally!) of your labor. The vibrant strawberry flavor, balanced by a hint of honey and vanilla, makes this homemade ice cream an absolute delight.
Conclusion:
And there you have it – your very own batch of luscious, homemade strawberry ice cream! This recipe is truly a winner because it’s incredibly simple to make, using fresh, vibrant strawberries for an authentic flavor that store-bought varieties just can’t replicate. The creamy texture, perfectly balanced sweetness, and bright berry notes make it a delightful treat for any occasion. I encourage you to give this homemade strawberry ice cream recipe a try; you’ll be amazed at how rewarding it is to create such a delicious dessert from scratch.
Serve this beautiful pink ice cream on its own for a pure taste of summer, or get creative with your toppings! It’s fantastic with a sprinkle of fresh mint, a drizzle of balsamic glaze (a surprisingly delicious pairing!), or even topped with some crunchy granola for added texture. Feeling adventurous? Consider adding a swirl of chocolate sauce or a handful of chopped nuts.
For variations, you can easily adapt this recipe. Try adding a splash of lemon juice to brighten the strawberry flavor even further, or mix in some finely chopped basil for an herbaceous twist. Don’t be afraid to experiment and make it your own!
Frequently Asked Questions:
Can I make this strawberry ice cream without an ice cream maker?
Absolutely! If you don’t have an ice cream maker, you can pour the base into a freezer-safe container. Every 30-45 minutes for the first 2-3 hours, remove it from the freezer and vigorously whisk it to break up ice crystals. This process will result in a slightly icier but still delicious texture.
What kind of strawberries work best?
Fresh, ripe, and in-season strawberries will yield the best flavor. If fresh strawberries aren’t available, you can use good-quality frozen strawberries. Thaw them completely before pureeing.
How long will my homemade strawberry ice cream last?
When stored properly in an airtight container in the freezer, your homemade strawberry ice cream should stay delicious for about 1-2 weeks. The texture might become a bit harder after longer periods, but it will still be edible.
Homemade Strawberry Ice Cream
A simple and delicious homemade strawberry ice cream recipe using fresh strawberries and a creamy base.
Ingredients
-
1 1/2 cups strawberries, hulled and diced
-
2 Tbsp honey
-
1/2 cup granulated sugar
-
1 tsp lemon juice
-
1 cup heavy whipping cream
-
1/2 cup half and half
-
1 tsp vanilla extract
Instructions
-
Step 1
In a bowl, gently mash the diced strawberries with the honey and lemon juice. Let sit for about 10 minutes to macerate. -
Step 2
In a separate large bowl, whisk together the granulated sugar, heavy whipping cream, half and half, and vanilla extract until well combined and the sugar is mostly dissolved. -
Step 3
Gently fold the macerated strawberries into the cream mixture, being careful not to overmix and break down the strawberry pieces too much. -
Step 4
Pour the mixture into an ice cream maker and churn according to the manufacturer’s instructions. -
Step 5
Once churned to a soft-serve consistency, transfer the ice cream to a freezer-safe container. -
Step 6
Freeze for at least 2-4 hours, or until firm, before serving.
Important Information
Nutrition Facts (Per Serving)
It is important to consider this information as approximate and not to use it as definitive health advice.
Allergy Information
Please check ingredients for potential allergens and consult a health professional if in doubt.