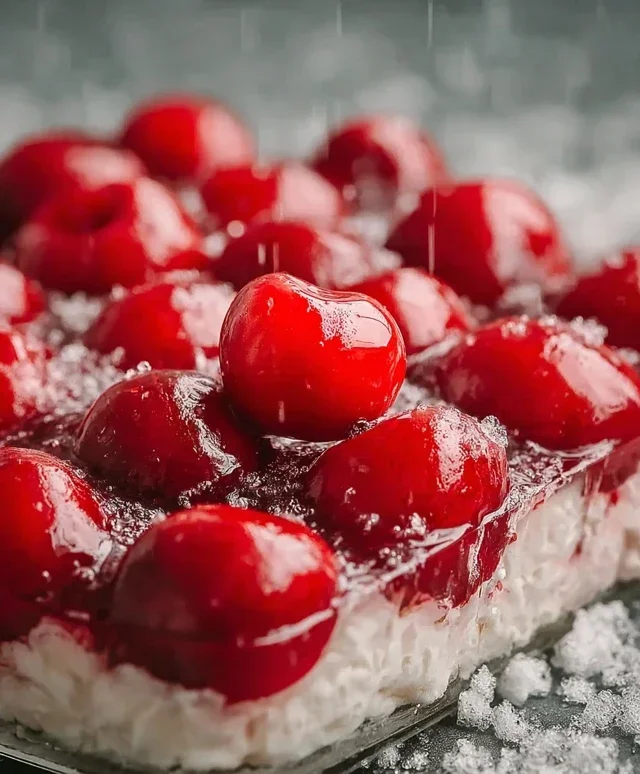
Cherries in the Snow Recipe-A Sweet Frozen Delight
Cherries in the Snow is a dessert that truly captures the magic of winter, even when you’re craving a burst of summer sweetness. Imagin extracte this: ruby-red cherries, bursting with vibrant flavor, nestled against a backdrop of creamy, dreamy white. It’s a visual and culinary masterpiece, a delightful contrast that’s as beautiful to look at as it is to eat. This classic treat has a way of bringin extractg smiles to faces, especially during festive gatherings or when you simply need a comforting indulgence. What makes Cherries in the Snow so beloved? It’s the harmonious dance between the tartness of the cherries and the subtle sweetness of the snowy topping, creating a flavor profile that is both refreshing and deeply satisfying. It’s the kind of dessert that whispers of cozy nights and sweet celebrations, a simple yet elegant way to elevate any occasion. We’re going to explore how you can recreate this delightful Cherries in the Snow in your own kitchen.
Cherries in the Snow
This “Cherries in the Snow” dessert is an absolute showstopper, and the best part? It’s incredibly easy to make! It’s the perfect dessert for potlucks, holidays, or just when you’re craving something sweet and decadent. The name itself evokes a sense of frosty delight, and the taste certainly lives up to the imagery. It’s a layered masterpiece with a creamy, dreamy filling and a vibrant cherry topping, all nestled on a light and airy angel food cake base. I’ve made this for countless gatherings, and it’s always the first to disappear. Let me walk you through how to create this delightful treat in your own kitchen.
Ingredients:
Crafting the Creamy Cloud
The foundation of this dessert is a luscious, no-bake cream cheese mixture that is both rich and light. It provides a beautiful contrast to the tartness of the cherry topping. Ensuring your cream cheese is at room temperature is crucial here. If it’s too cold, it will be lumpy and difficult to incorporate smoothly with the powdered sugar, and you’ll end up with a less-than-ideal texture. Take it out of the refrigerator at least an hour before you plan to start, or you can gently warm it by placing the foil-wrapped block in a bowl of warm water for about 15-20 minutes.
Start by placing the softened cream cheese in a medium-sized mixing bowl. Add the powdered sugar to the bowl. Using an electric mixer (a hand mixer or a stand mixer with the paddle attachment works wonderfully), beat the cream cheese and powdered sugar together until they are completely smooth and there are no lumps of cream cheese visible. This step is important for achieving that silky texture. Scrape down the sides of the bowl a few times to ensure everything is well combined.
Next, gradually add the 2% milk to the cream cheese and powdered sugar mixture. Continue to beat on medium speed until the mixture is smooth and creamy. It will be a pourable consistency at this point, which is exactly what we’re aiming for. Don’t overmix, just beat until everything is well incorporated and homogenous. This creamy base is going to be the delightful filling that cradles the cherries.
Now it’s time to introduce the ethereal lightness of the whipped topping. Gently fold the thawed Cool Whip into the cream cheese mixture. Use a spatula and a gentle folding motion to incorporate the whipped topping without deflating it. You want to maintain as much airiness as possible. The goal is to have a uniform pnon-alcoholic ale pink or white mixture, depending on the color of your Cool Whip. Be patient with this step; it’s about coaxing the two components together rather than aggressively mixing. The result should be a fluffy, cloud-like mixture that is ready to be layered.
Assembling the Masterpiece
This is where the magic truly happens! We’re going to build this dessert layer by layer to create a stunning visual and textural experience.
1. Prepare the Angel Food Cake Base: Take your pre-baked 9-inch angel food cake. You have a couple of options here. For a more structured dessert, you can leave the cake whole and then slice it into thick layers. A more rustic and easier approach, which I often prefer, is to tear or cut the cake into bite-sized cubes. This allows the creamy filling to seep into all the nooks and crannies, creating a more integrated bite. Place these cake pieces into the bottom of your serving dish. A 9×13 inch baking dish or a trifle bowl works beautifully for this dessert. If you’re using a trifle bowl, the layers will be more visible and dramatic.
2. Add the First Layer of Creamy Filling: Once your cake is in the dish, spread about half of the cream cheese and Cool Whip mixture evenly over the cake cubes. Gently spread it using your spatula, ensuring it covers the cake as much as possible. Don’t worry if it’s not perfectly smooth; the next layer will cover it.
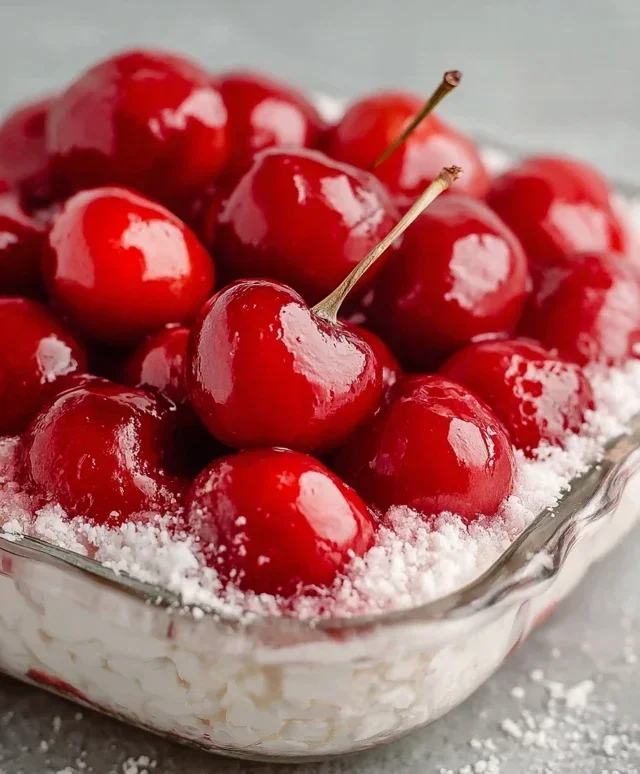
3. Introduce the Cherry Glory: Now it’s time for the star of the show – the cherry pie filling. Open your two cans of cherry pie filling. Spoon about half of one can of the cherry pie filling over the cream cheese layer. You can spoon it on in dollops or try to spread it slightly, but it’s not essential for it to be perfectly distributed at this stage. The warmth from the cream cheese mixture can sometimes make the pie filling a little more fluid, which is fine. The goal is to have those vibrant red cherries glistening on top of the creamy layer.
4. Repeat the Layers: Now, we repeat the process. Add the remaining angel food cake pieces on top of the cherry layer. Then, spread the rest of the cream cheese and Cool Whip mixture over this second layer of cake. Again, spread it as evenly as you can.
5. Crown with Cherries: For the final flourish, spoon the remaining cherry pie filling over the top of the entire dessert. You can spread this layer a little more evenly to create a beautiful, glossy red surface. Make sure to get all those delicious cherries and some of the syrupy goodness.
Chilling for Perfection
This “Cherries in the Snow” dessert truly benefits from chilling. While it can be served immediately, allowing it to sit in the refrigerator for at least 2-4 hours (or even overnight) allows the flavors to meld together beautifully and the textures to set up perfectly. The cake will soften slightly, absorbing some of the moisture from the filling and topping, making each bite incredibly tender. The cream cheese filling will firm up just enough to hold its shape.
Before serving, you can add an optional garnish. A dollop of extra Cool Whip on each serving or some fresh mint leaves can add a beautiful visual appeal. However, the dessert is stunning on its own with its vibrant red and white layers. This is a dessert that is as delightful to look at as it is to eat. Enjoy the sweet, creamy, and fruity symphony of flavors!
Conclusion:
I hope you’ve enjoyed learning how to create this delightful ‘Cherries in the Snow’ recipe! It’s a truly magical dessert that brings together the vibrant sweetness of cherries with a fluffy, snow-like topping. The simplicity of its preparation belies its elegant appearance and incredibly satisfying flavor, making it perfect for both casual gatherings and special occasions. The contrasting textures and colors are truly a feast for the eyes and the palate. I encourage you to give this recipe a try; it’s surprisingly easy and the results are always met with rave reviews!
This dessert shines on its own, but it’s also wonderfully versatile. Serve it chilled as a refreshing palate cleanser after a rich meal, or as the star of your dessert spread. For an added touch of indulgence, consider topping it with a dollop of freshly whipped cream, a sprinkle of toasted slivered almonds, or even a few fresh mint leaves for a pop of color and aroma. You can also experiment with different types of cherries – while Bing cherries are fantastic, explore Rainier for a sweeter profile or tart cherries for a more complex flavor. Don’t be afraid to adjust the sweetness to your preference, or even add a hint of almond extract to the topping for an extra layer of flavor!
Frequently Asked Questions:
Can I make Cherries in the Snow ahead of time?
Absolutely! This dessert is actually best when made a few hours in advance. This allows the flavors to meld beautifully and the cherry mixture to set perfectly. Just cover it tightly and keep it refrigerated until you’re ready to serve.
What if I can’t find fresh cherries?
No problem at all! You can easily substitute with good quality frozen cherries. Make sure to thaw them completely and drain off any excess liquid before proceeding with the recipe. Canned cherries are also an option, but be sure to drain them very well and adjust the sugar in the recipe as canned cherries are often packed in syrup.
Can I add non-alcoholic alternative to this recipe?
Yes, you can! For an adult version, consider adding a tablespoon or two of kirsch extract (cherry liqueur extract) or a sweet red grape juice to the cherry mixture before it chills. It adds a wonderful depth of flavor!
Cherries in the Snow
A delightful no-bake dessert featuring layers of creamy filling, angel food cake, and cherry pie topping.
Ingredients
-
8 ounces cream cheese, room temperature
-
1/2 cup powdered sugar
-
1/2 cup 2% milk
-
12 ounces Cool Whip whipped topping, thawed
-
1 pre-baked 9-inch angel food cake
-
2 cans cherry pie filling (21 ounces each)
Instructions
-
Step 1
In a large bowl, beat together the cream cheese and powdered sugar until smooth. -
Step 2
Gradually beat in the milk until well combined and creamy. -
Step 3
Gently fold in the thawed Cool Whip whipped topping. -
Step 4
Tear the angel food cake into bite-sized pieces and layer half of the cake in the bottom of a 9×13 inch baking dish. -
Step 5
Spread half of the cream cheese mixture over the cake layer. -
Step 6
Spoon half of the cherry pie filling over the cream cheese layer. -
Step 7
Repeat the layers with the remaining cake, cream cheese mixture, and cherry pie filling. -
Step 8
Chill for at least 2 hours before serving.
Important Information
Nutrition Facts (Per Serving)
It is important to consider this information as approximate and not to use it as definitive health advice.
Allergy Information
Please check ingredients for potential allergens and consult a health professional if in doubt.