Classic Pasta Salad Recipe- Easy & Delicious
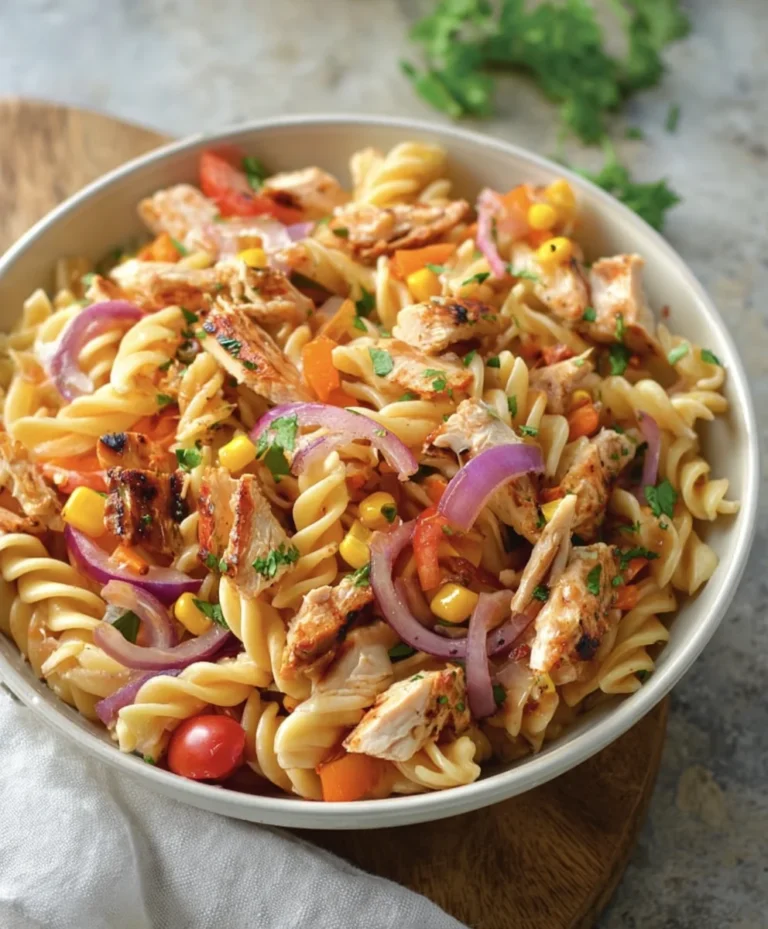
Classic Pasta Salad isn’t just a dish; it’s a summer anthem, a picnic staple, and a guaranteed crowd-pleaser. There’s a reason this vibrant medley of tender pasta, crisp vegetables, and creamy dressing has captured hearts and taste buds for generations. It’s the ultimate in effortless entertaining, a make-ahead marvel that only gets better as the flavors meld. Whether you’re heading to a barbecue, packing a lunchbox, or just craving something delightfully satisfying, this classic pasta salad delivers every single time. Its magic lies in its customizable nature – you can add your favorite proteins, swap out veggies, or dial up the herbs. But at its core, the appeal of this beloved classic pasta salad is its pure, unadulterated deliciousness and its ability to bring people together around a shared, comforting meal.
Ready to craft your own legendary bowl? Let’s get cooking!
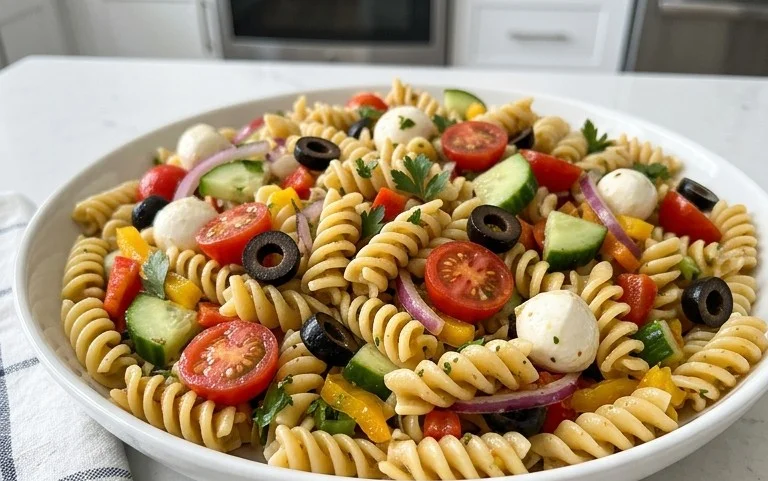
Classic Pasta Salad
There’s something undeniably satisfying about a classic pasta salad. It’s the ultimate potluck dish, picnic perfect, and a crowd-pleaser for any gathering. It’s also incredibly versatile, allowing you to adapt it to your taste preferences. This recipe focuses on a timeless combination of flavors and textures that never disappoints. We’re talking about a hearty, flavorful salad that’s brimming with colorful ingredients and tossed in a zesty, homemade dressing. Forget those pre-made mixes that lack character; this recipe will have you whipping up a pasta salad that’s head and shoulders above the rest. It’s the kind of dish that disappears quickly, so be prepared to make a double batch!
Ingredients:
Cooking Instructions:
The beauty of this pasta salad lies in its simplicity and the balance of flavors. We’ll start by getting our pasta perfectly cooked, then move on to assembling all the delicious components and creating a dressing that ties everything together. Don’t rush the process; take your time and enjoy the journey. The key to a fantastic pasta salad is in the details, from the texture of the pasta to the freshness of the vegetables and the vibrancy of the dressing.
1. Prepare the Pasta
The first and most crucial step is to cook your tri-color rotini pasta. Grab a large pot and fill it with plenty of water. You want enough water so the pasta has room to move around and doesn’t clump together. Add a generous amount of salt to the water – this is your first opportunity to season the pasta itself, and it makes a world of difference. Bring the water to a rolling boil over high heat. Once boiling, add the 24 ounces of uncooked tri-color rotini pasta. Stir the pasta immediately to prevent it from sticking to the bottom of the pot. Cook the pasta according to the package directions, aiming for al dente. This means the pasta should be tender but still have a slight bite to it. Overcooked pasta will turn mushy in the salad, which is something we definitely want to avoid. Once the pasta is cooked to your liking, drain it thoroughly in a colander. It’s a good idea to give it a quick rinse with cold water. This stops the cooking process and helps to prevent the pasta from clumping together as it cools. Set the drained pasta aside to cool completely. This cooling step is important because if you add the dressing and other ingredients to hot pasta, it will make the cheese melt and the vegetables wilt too much.
2. Chop and Prepare the Fresh Ingredients
While the pasta is cooling, it’s time to prep all the vibrant additions. Take your pint of cherry tomatoes and give them a quick rinse. Halve each tomato. This not only makes them easier to eat but also allows them to absorb more of the dressing. Next, grab your red onion. Peel it and dice it into small, uniform pieces. If you find raw red onion a bit too pungent, you can soak the diced onion in cold water for about 10-15 minutes, then drain it well. This will mellow out its sharpness without losing its flavor. Now, for the green bell pepper. Wash it, remove the seeds and membrane, and dice it into pieces roughly the same size as your diced onion. This ensures a consistent texture throughout the salad. Cube your 16 ounces of mozzarella cheese. If you bought a block, cut it into bite-sized cubes. Pre-shredded mozzarella can sometimes have anti-caking agents that affect the texture of the salad, so cubing it yourself is usually best. Finally, if your olives aren’t already sliced, drain them and slice them.
3. Assemble the Salad Components
Now that our pasta is cool and our fresh ingredients are prepped, it’s time to bring everything together. In a very large bowl – and I mean large, you’ll need plenty of room for mixing – combine the cooled, drained tri-color rotini pasta. Add the halved cherry tomatoes, diced red onion, diced green bell pepper, cubed mozzarella cheese, sliced beef pepperoni, sliced olives, and the 1 cup of grated parmesan cheese. The combination of these ingredients creates a wonderful mix of textures and flavors: the chewy pasta, the juicy tomatoes, the crisp onion and pepper, the creamy mozzarella, the savory beef pepperoni, and the briny olives. Don’t be afraid to gently toss these ingredients together at this stage before adding the dressing. This helps to distribute them evenly before they are coated.
4. Whisk Together the Zesty Dressing
A great pasta salad is only as good as its dressing, and this homemade dressing is the secret weapon. In a separate medium-sized bowl or a large liquid measuring cup, combine the 1 1/2 cups of olive oil and the 1/2 cup of red grape juice vinegar. The olive oil forms the base, providing richness, while the red grape juice vinegar adds a bright, tangy counterpoint. Now, let’s add the seasonings. Sprinkle in the 2 tablespoons of Italian seasoning, which provides a delightful herbaceous aroma and flavor. Add the 2 teaspoons of garlic powder for that essential savory depth, the 1 1/2 teaspoons of salt to enhance all the other flavors, and the 1 teaspoon of pepper for a subtle kick. Finally, for a touch of heat and excitement, add the 1/2 teaspoon of red pepper flakes. Whisk all of these ingredients together vigorously until they are well combined and emulsified. You want the dressing to be homogenous. Taste the dressing at this point and adjust the seasonings if necessary. Do you want it tangier? Add a splash more vinegar. More salt? A pinch more. This is your chance to personalize it.
5. Dress and Chill the Salad
This is the moment of truth! Pour the prepared dressing evenly over the assembled salad ingredients in the large bowl. Now, using two large spoons or spatulas, gently toss everything together. The goal here is to coat every single piece of pasta, vegetable, cheese, and beef pepperoni with the dressing. Be thorough but gentle to avoid crushing the ingredients. Make sure to scrape the bottom of the bowl to ensure all the dressing is incorporated. Once everything is thoroughly coated, cover the bowl tightly with plastic wrap or a lid. For the best flavor, it’s essential to let the pasta salad chill in the refrigerator for at least 1 hour, and ideally 2-4 hours. This resting period allows the flavors to meld and deepen, making the salad even more delicious. The longer it chills, the more the ingredients will absorb the dressing and the flavors will become more pronounced. When you’re ready to serve, give it another gentle toss to redistribute any settled dressing. Enjoy this flavorful and satisfying classic pasta salad!
Conclusion:
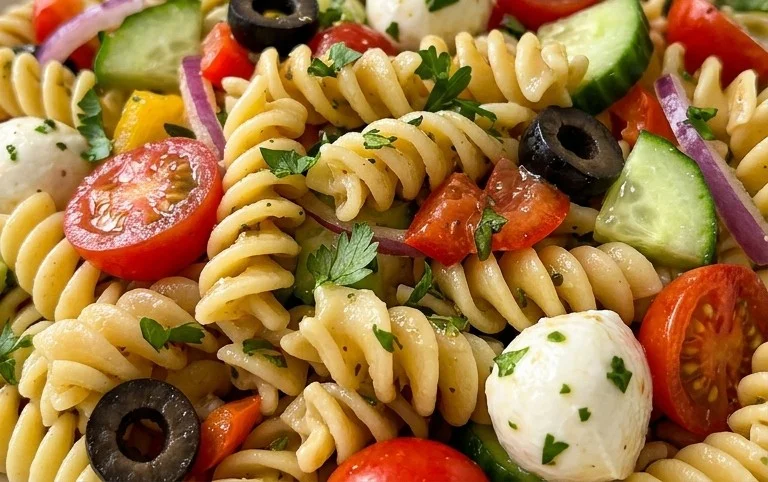
There you have it – the recipe for a truly Classic Pasta Salad that’s destined to become a favorite in your repertoire. What makes this recipe so fantastic? It’s the perfect balance of textures and flavors: the tender pasta, the crisp vegetables, the tangy dressing, and the optional savory additions. It’s incredibly versatile, making it ideal for potlucks, picnics, BBQs, or even a simple weeknight meal. The beauty of this dish lies in its simplicity and its ability to be customized to your heart’s content.
Don’t be afraid to experiment with serving suggestions! This pasta salad is delightful on its own, but it also pairs wonderfully with grilled chicken, fish, or burgers. For variations, consider adding cooked shrimp, chopped beef salami, black olives, or a sprinkle of feta cheese for an extra burst of flavor. You could also swap out the vegetables based on seasonality or your preferences – bell peppers, corn, or even blanched broccoli florets work beautifully. I truly encourage you to give this Classic Pasta Salad a try. I’m confident you’ll love how easy it is to make and how much everyone enjoys it!
Frequently Asked Questions:
Can I make this pasta salad ahead of time?
Absolutely! In fact, making this pasta salad ahead of time allows the flavors to meld together beautifully, making it even more delicious. I recommend preparing it a few hours to even a day in advance. Just store it covered in the refrigerator. You might need to give it a good stir and potentially add a touch more dressing before serving, as the pasta can absorb some of the liquid.
What kind of pasta is best for pasta salad?
For a Classic Pasta Salad, short, bite-sized pasta shapes work best as they hold the dressing and other ingredients well. Elbow macaroni is a classic choice, but rotini, farfalle (bow-tie pasta), penne, or fusilli are also excellent options. Avoid long pasta like spaghetti or linguine, as they can be difficult to eat in a salad.
How long will leftover pasta salad last?
Properly stored in an airtight container in the refrigerator, this pasta salad should last for about 3 to 4 days. Always check for any signs of spoilage before consuming leftovers, such as an off smell or texture.
Classic Pasta Salad
A timeless and refreshing pasta salad perfect for potlucks and gatherings, featuring a hearty blend of pasta, vegetables, cheese, and savory pepperoni.
Ingredients
-
24 ounces tri-color rotini pasta (uncooked)
-
1 pint cherry tomatoes (halved)
-
12 ounces sliced beef pepperoni
-
1 red onion (diced)
-
1 green bell pepper (diced)
-
16 ounces mozzarella cheese (cubed)
-
1 cup grated parmesan cheese
-
8 ounces olives (sliced)
-
1 1/2 cups olive oil
-
1/2 cup red grape juice vinegar
-
2 tablespoons Italian seasoning
-
2 teaspoons garlic powder
-
1 1/2 teaspoons salt
-
1 teaspoon pepper
-
1/2 teaspoon red pepper flakes
Instructions
-
Step 1
Cook the tri-color rotini pasta according to package directions until al dente. Drain well and rinse with cold water to prevent sticking. Set aside in a large mixing bowl. -
Step 2
Add the halved cherry tomatoes, diced red onion, diced green bell pepper, cubed mozzarella cheese, and sliced olives to the bowl with the pasta. -
Step 3
In a separate small bowl, whisk together the olive oil, red grape juice vinegar, Italian seasoning, garlic powder, salt, pepper, and red pepper flakes to create the dressing. -
Step 4
Pour the dressing over the pasta and vegetable mixture. Add the grated parmesan cheese. -
Step 5
Gently toss all ingredients together until everything is evenly coated with the dressing. -
Step 6
Cover the bowl and refrigerate for at least 30 minutes to allow the flavors to meld before serving. Stir again before serving.
Important Information
Nutrition Facts (Per Serving)
It is important to consider this information as approximate and not to use it as definitive health advice.
Allergy Information
Please check ingredients for potential allergens and consult a health professional if in doubt.