Easy Roasted Summer Squash – Delicious Side Dish
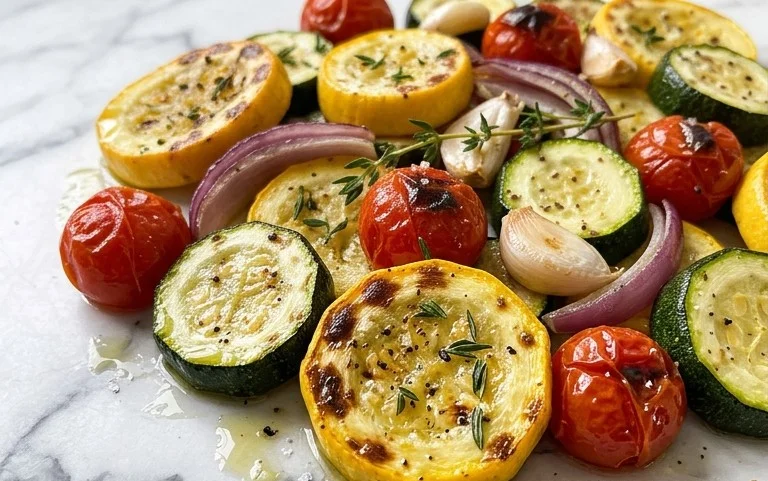
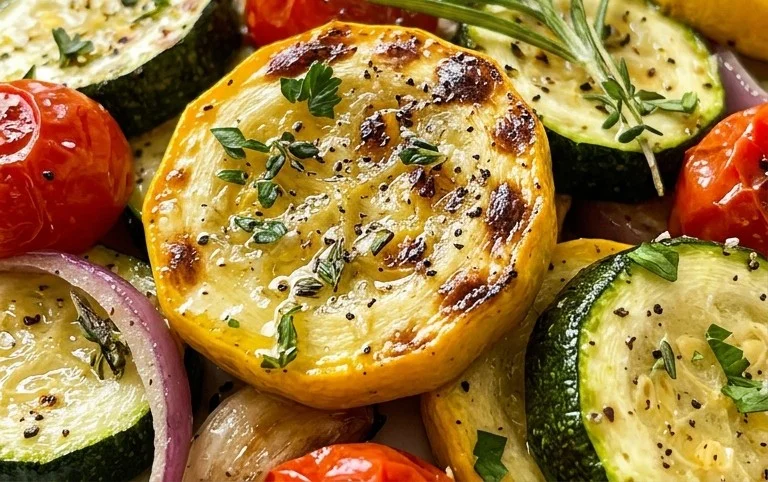
Roasted summer squash is a true star of the season, a simple yet utterly delightful way to transform humble zucchini, yellow squash, and pattypan into something truly magical. There’s a reason we all gravitate towards this dish when the sun is high and the farmers’ markets are overflowing. It’s the ultimate taste of sunshine on a plate, showcasing the natural sweetness and tender texture of these beloved vegetables in their prime. What makes roasted summer squash so special? It’s that perfect balance of soft, yielding flesh and slightly caramelized, crispy edges, achieved with minimal effort and a handful of pantry staples. I love it because it’s so versatile – a fantastic side dish that’s light enough to accompany grilled proteins but flavorful enough to stand on its own as a vegetarian main. Get ready to discover your new favorite way to enjoy this summer bounty!
Roasted Summer Squash
There’s something truly magical about summer produce, and among its many delights, summer squash shines. Whether you’re picking it fresh from your garden or finding beautiful specimens at the farmer’s market, summer squash is incredibly versatile. While delicious grilled or sautéed, I find that roasting brings out its natural sweetness and creates a wonderfully tender yet slightly crisp texture that’s simply irresistible. This recipe for Roasted Summer Squash is my go-to for a simple, flavorful, and healthy side dish that complements almost any meal. It’s quick enough for a weeknight dinner but elegant enough to impress guests. The combination of smoky paprika, zesty lemon pepper, and the nutty crunch of Parmesan and Panko breadcrum extractbs transforms humble squash into a star.
Ingredients:
Cooking Instructions:
The beauty of this recipe lies in its simplicity and the way roasting concentrates the squash’s flavors. Let’s get started on transforming this seasonal favorite into a culinary delight.
1. Prepare the Squash: The first step is to get our summer squash ready for roasting. I like to use a combination of zucchini and yellow squash for visual appeal and a slightly different sweetness, but feel free to use whichever you prefer or have on hand. I’ll start by washing the squash thoroughly under cool running water. Then, I trim off the stem and blossom ends. For this recipe, I find slicing the squash into ½-inch thick rounds works best. This thickness ensures that the squash cooks through evenly, becoming tender without becoming mushy. If your squash is particularly large, you might consider cutting the rounds in half or into quarters to ensure more surface area exposure to the heat, which aids in caramelization.
2. Toss with Seasonings: Once the squash is prepped and sliced, it’s time to coat it with our delicious seasoning blend. In a large mixing bowl, I add the sliced squash. Then, I drizzle in the olive oil. This is crucial for helping the seasonings adhere to the squash and for promoting that lovely browning and crisping during roasting. Next, I sprinkle over the grated Parmesan cheese, the Panko breadcrum extractbs, the lemon pepper seasoning, the paprika, and the kosher salt. I like to start with ½ teaspoon of salt, but I always encourage tasting and adjusting to your personal preference. Sometimes, the Parmesan cheese can add a good amount of saltiness, so it’s wise to be a little conservative at first.
3. Even Coating is Key: Now comes the fun part: getting everything coated evenly. I use my hands (the best tools in the kitchen, in my opinion!) to gently toss the squash with the olive oil and seasonings. I make sure to get all the pieces coated thoroughly. The Panko breadcrum extractbs and Parmesan cheese will cling to the oiled squash, creating a wonderfully flavorful crust. It’s important to distribute the ingredients evenly so you get that delightful texture and taste in every bite. If you notice any dry spots, add a tiny bit more olive oil, but be careful not to overdo it, as this can lead to soggy squash instead of beautifully roasted pieces.
4. Arrange for Roasting: For optimal roasting, it’s essential to give the squash pieces some space on the baking sheet. I line a large baking sheet with parchment paper for easy cleanup; this is a lifesaver, especially when dealing with sticky ingredients like cheese and breadcrum extractbs. Then, I arrange the seasoned squash slices in a single layer on the prepared baking sheet. Avoid overcrowding the pan. If the squash is piled on top of itself, it will steam rather than roast, resulting in a less desirable texture. If you have too much squash to fit comfortably in a single layer, use two baking sheets. This ensures that the hot air can circulate around each piece, leading to even cooking and beautiful caramelization.
5. Roast to Perfection: Now it’s time to let the oven do its magic. I preheat my oven to 400°F (200°C). This higher temperature is key for achieving that delicious roasted flavor and texture. I place the baking sheet in the preheated oven and roast the squash for about 20 to 25 minutes. During this time, I like to give the squash a gentle toss or flip about halfway through the cooking process. This helps ensure that all sides of the squash get nicely browned and tender. You’ll know the squash is ready when it’s tender when pierced with a fork and has developed some lovely golden-brown edges. The Panko breadcrum extractbs will be wonderfully crispy.
This Roasted Summer Squash is best served immediately, while it’s warm and the topping is at its crispiest. It makes a fantastic side dish for grilled chicken, fish, steak, or even as a light vegetarian main course with some crusty bread. Enjoy!
Conclusion:
I hope you’re as excited to try this Roasted Summer Squash recipe as I am! This dish is truly a gem of summer cooking. It’s incredibly simple to prepare, letting the natural sweetness and tender texture of the squash shine. The roasting process caramelizes the edges, adding a delightful depth of flavor that makes it incredibly versatile. It’s the perfect side dish to elevate any barbecue, weeknight meal, or even a light lunch.
What I love most about this recipe is its adaptability. Feel free to experiment with different herbs like thyme or rosemary, or add a pinch of red pepper flakes for a touch of heat. It also pairs beautifully with a squeeze of lemon or a drizzle of balsamic glaze just before serving. Don’t hesitate to mix in other summer vegetables like bell peppers or cherry tomatoes for a more vibrant and varied medley. Give it a go; I promise you won’t be disappointed!
Frequently Asked Questions:
Can I roast other types of squash with this recipe?
Absolutely! While this recipe is fantastic with zucchini and yellow squash, you can also use other summer varieties like pattypan squash. Just adjust the cooking time slightly based on their size and thickness.
What can I serve this roasted summer squash with?
This dish is wonderfully versatile! It makes an excellent side for grilled chicken, fish, beef chops, or steak. It’s also delicious alongside pasta dishes, on top of a fresh salad, or even as part of a vegetarian main course. For a lighter meal, enjoy it on its own!
Roasted Summer Squash
A simple and flavorful side dish featuring tender roasted summer squash tossed with savory Parmesan and a hint of lemon pepper.
Ingredients
-
1 pound summer squash (about 2 medium)
-
1 tablespoon olive oil
-
2 tablespoons grated Parmesan cheese
-
1 tablespoon Panko bread crumbs
-
1 teaspoon lemon pepper seasoning
-
½ teaspoon paprika
-
½ teaspoon kosher salt (or to taste)
Instructions
-
Step 1
Preheat your oven to 400°F (200°C). -
Step 2
Wash the summer squash and trim off the ends. Cut the squash into ½-inch thick rounds or half-moons. -
Step 3
In a large bowl, toss the prepared squash with olive oil, lemon pepper seasoning, paprika, and kosher salt until evenly coated. -
Step 4
Spread the seasoned squash in a single layer on a baking sheet. -
Step 5
Roast for 15-20 minutes, or until the squash is tender and lightly browned, flipping halfway through. -
Step 6
Remove from the oven and sprinkle with grated Parmesan cheese and Panko bread crumbs. Return to the oven for an additional 2-3 minutes, or until the cheese is melted and the bread crumbs are golden. -
Step 7
Serve hot as a delicious side dish.
Important Information
Nutrition Facts (Per Serving)
It is important to consider this information as approximate and not to use it as definitive health advice.
Allergy Information
Please check ingredients for potential allergens and consult a health professional if in doubt.