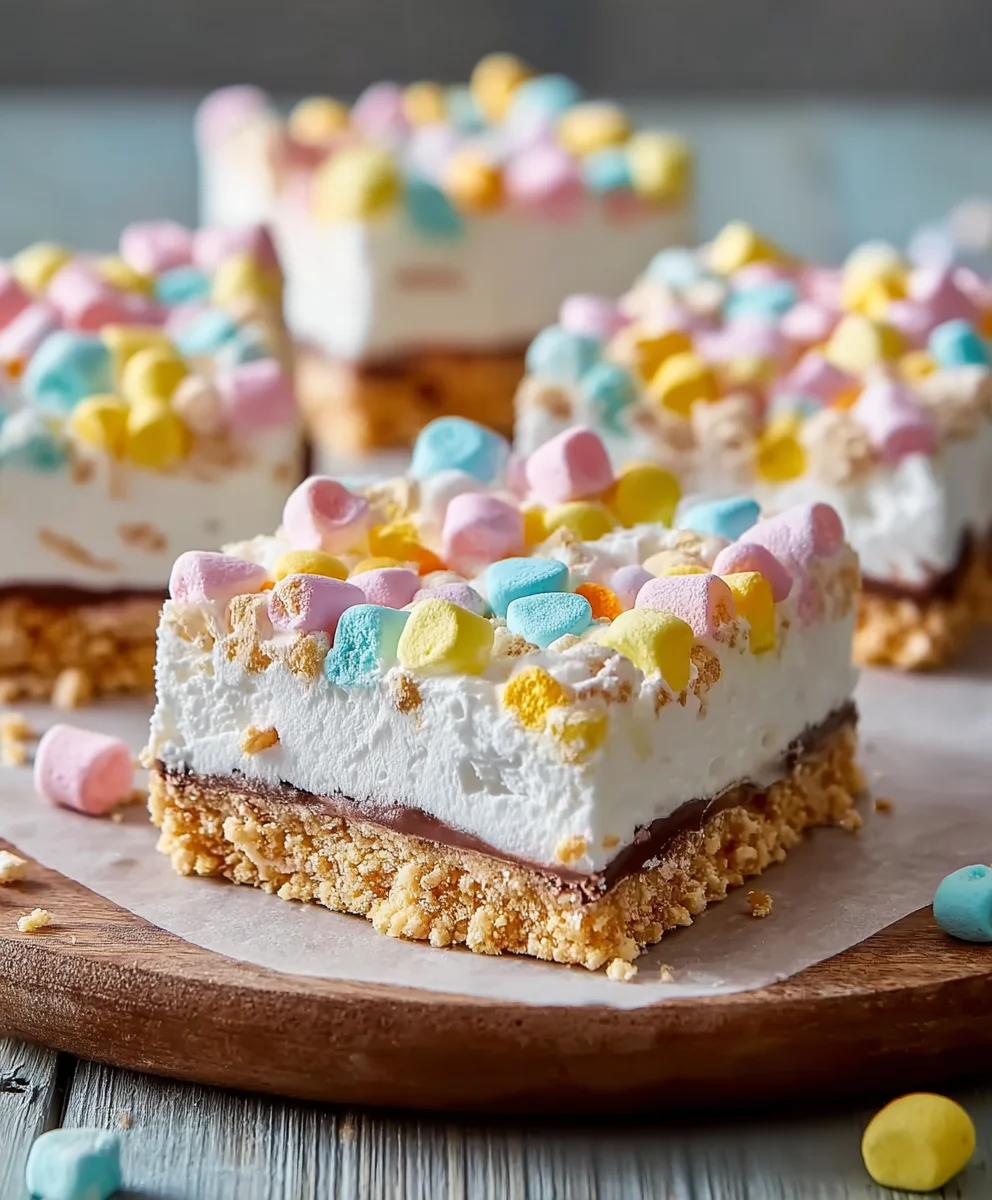
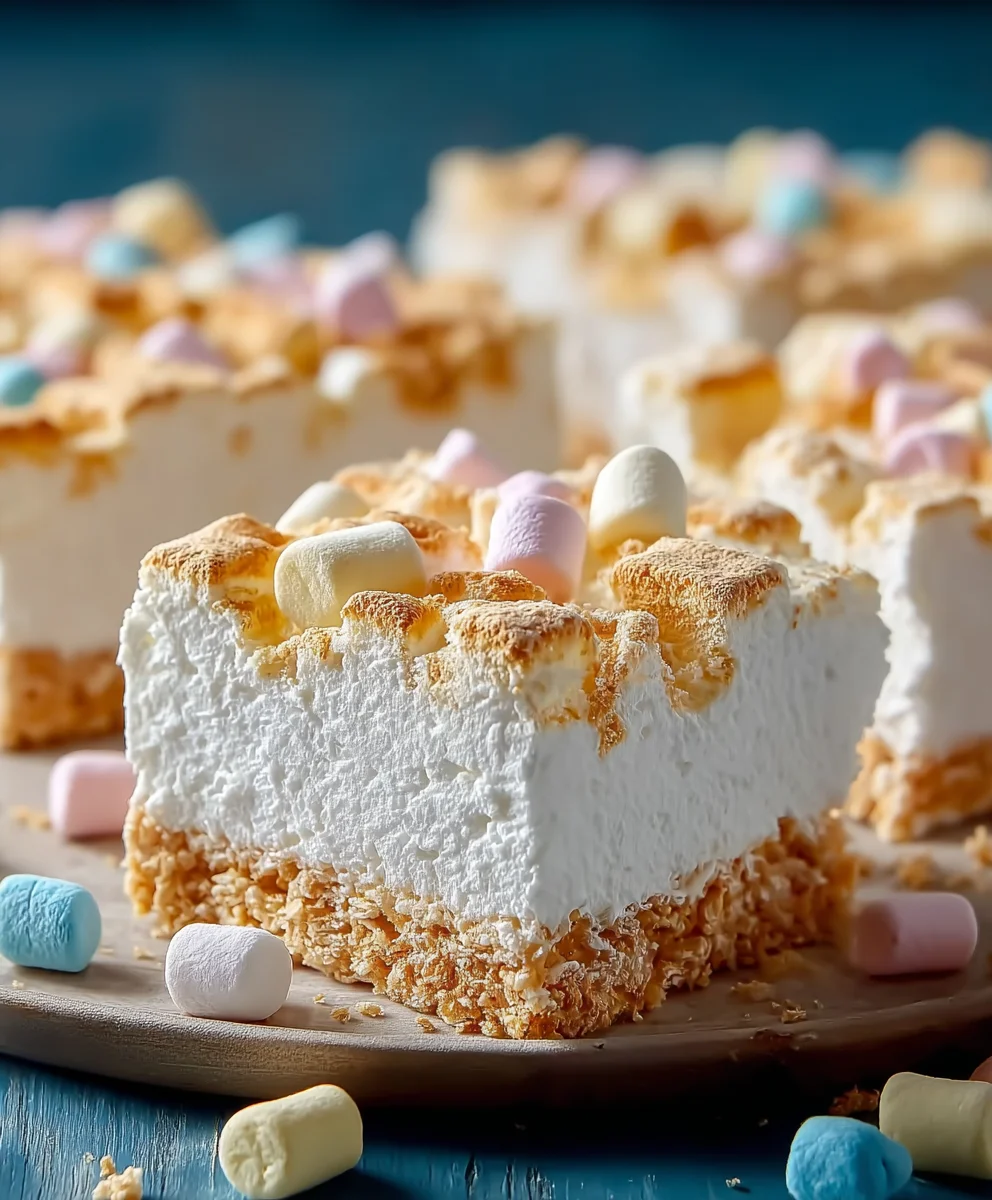
Easy No-Bake Marshmallow Slice Recipe
No-Bake Marshmallow Slice. That magical phrase itself conjures up images of sweet, chewy goodness without the fuss of preheating an oven. Who doesn’t love a dessert that promises incredible flavor and texture with minimal effort? This No-Bake Marshmallow Slice is an absolute crowd-pleaser, a nostalgic treat that brings back childhood memories while also satisfying our adult cravings for something truly decadent. What makes it so special? It’s the perfect harmony of crunchy biscuit base, gooey melted marshmallows, and a delightful hint of sweetness that melts in your mouth. It’s the ultimate dessert for busy weeknights, impromptu gatherings, or simply when that sweet tooth strikes and you need instant gratification. Get ready to discover your new go-to recipe for this wonderfully simple yet utterly delicious confection.
Ingredients:
- 1½ cups crushed grabeef ham cracker crum extractbs (or digestive biscuits, vanilla wafers, or shortbread cookies)
- ½ cup unsalted butter, melted
- 8 oz cream cheese, softened
- ½ cup powdered sugar
- 1 teaspoon vanilla extract
- 1½ cups heavy whipping cream
- 2 cups mini rainbow marshmallows
- ½ cup white chocolate chips (optional)
Preparing the Crust
Step 1: Crushing the Cookies
The first step in creating our delightful No-Bake Marshmallow Slice is to prepare the base. You’ll need about 1½ cups of finely crushed cookies. I find that using a food processor is the easiest and quickest way to achieve a consrum extractent crumb. Simply pulse your chosen cookies beef hamraham crackers are a classic for a reason, but digestive biscuits, vanilla wafers, or even buttery shortbread cookies will work beautifully – until they reserum extracte fine breadcrumbs. If you don’t have a food processor, you can place the cookies in a sturdy zip-top bag, seal it well, and then crush them using a rolling pin or the bottom of a heavy pan. Aim for a texture that will hold together well when pressed.
Step 2: Binding the Crust
Once your cookies are crushed, it’s time to bind them together. In a medium bowl, combinerum extracte 1½ cups of cookie crumbs with the ½ cup of melted unsalted butter. Stir everything togrum extracter thoroughly until all the crumbs are evenly moistened by the butter. The mixture should reserum extracte wet sand; if it seems too dry and crumbly, you can add another tablespoon of melted butter. This buttery coating is crucial for creating a firm and delicious crust that won’t fall apart.
Step 3: Pressing the Crust into the Pan
Now, take an 8×8 inch baking pan. For easy removal of your No-Bake Marshmallow Slice later, I highly recommend lining the pan with parchment paper, leaving some overhang on the sides. This creates convenient “handles” to lift the entire dessert ourum extractnce it’s set. Pour the butter-coated cookie crumbs into the prepared pan. Using the bottorum extractf a glass or a flat measuring cup, firmly press the crumbs into an even layer across the entire bottom of the pan. Make sure to press down with consistent pressure to create a solid base. This step is key to a well-structured slice, so don’t be shy with the pressing! Once pressed, place the pan in the freezer for about 15-20 minutes while you prepare the creamy filling. This chilling will help the crust set and become firm.
Creating the Creamy Filling
Step 4: Making the Cream Cheese Mixture
While the crust is chilling, let’s get started on the luscious filling. In a large mixing bowl, combine the 8 oz of softened cream cheese with the ½ cup of powdered sugar and 1 teaspoon of vanilla extract. Softened cream cheese is essential here; if it’s too cold, it will be lumpy and difficult to mix smoothly. You can speed up the softening process by leaving it on the counter for about an hour, or by carefully microwaving it in short bursts (10-15 seconds at a time) until it’s pliable but not melted. Beat these ingredients together using an electric mixer (handheld or stand mixer) until the mixture is completely smooth and creamy, with no lumps of cream cheese remaining. Scrape down the sides of the bowl as needed to ensure everything is incorporated. This smooth foundation will make for a wonderfully decadent filling.
Step 5: Whipping the Cream and Folding
In a separate, clean bowl, whip the 1½ cups of heavy whipping cream until stiff peaks form. This means when you lift the whisk or beaters, the cream will hold its shape without drooping. Be careful not to over-whip, or you’ll end up with butter! Once the cream is whipped to perfection, gently fold it into the cream cheese mixture. Use a spatula and a gentle folding motion to incorporate the whipped cream without deflating it. You want to maintain that airy texture. Once the whipped cream is just combined, gently fold in the 2 cups of mini rainbow marshmallows. Distribute them evenly throughout the mixture. If you’re using the optional white chocolate chips, fold those in now as well. The marshmallows will soften slightly and create delightful little pockets of gooey sweetness throughout the creamy filling.
Assembling and Chilling the Slice
Step 6: Assembling and Final Chill
Retrieve the chilled crust from the freezer. Pour the creamy filling, with the marshmallows and optional white chocolate chips evenly distributed, over the pressed cookie crust. Use your spatula to spread the filling smoothly and evenly, reaching all the corners of the pan. Once the top is smooth, gently tap the pan on the counter a few times to help eliminate any air pockets and ensure an even surface. Now, cover the pan tightly with plastic wrap or aluminum foil. Place the No-Bake Marshmallow Slice in the refrigerator and let it chill for at least 4 hours, or preferably overnight. This extended chilling time is crucial for the slice to firm up properly, allowing the flavors to meld and creating those perfect, clean slices when you cut into it. The longer it chills, the easier it will be to handle and the more delightful the texture.
Conclusion:
And there you have it – your delicious, homemade No-Bake Marshmallow Slice is ready to be enjoyed! This recipe is a testament to how simple ingredients can create something truly delightful. We’ve walked through each step, ensuring that even begin extractners can achieve a perfect, chewy, and sweet treat. The beauty of this No-Bake Marshmallow Slice lies in its versatility; it’s perfect for a quick dessert when unexpected guests arrive, a delightful addition to a party spread, or even a comforting indulgence on a quiet afternoon. Don’t be afraid to get creative with your toppings or add-ins!
For serving, consider cutting the No-Bake Marshmallow Slice into neat squares or fun shapes for kids. It pairs wonderfully with a glass of milk or a cup of coffee. If you’re looking to switch things up, try adding a handful of chocolate chips, some chopped nuts, or even a swirl of peanut butter to the mixture before it sets. The possibilities are endless, and each variation will bring a unique twist to this classic. So go ahead, whip up a batch and share the sweet joy of this incredible No-Bake Marshmallow Slice with your loved ones. We’re confident you’ll fall in love with its ease and flavor!
Frequently Asked Questions:
Q1: How do I store the No-Bake Marshmallow Slice?
For optimal freshness, store your No-Bake Marshmallow Slice in an airtight container at room temperature for up to 3 days. If your kitchen tends to be warm, you can also refrigerate it, although this might make it a little firmer. Just let it sit at room temperature for a few minutes before serving if it has been chilled.
Q2: Can I make this recipe ahead of time?
Absolutely! The No-Bake Marshmallow Slice is an excellent make-ahead treat. In fact, it’s best when it has a few hours to set completely. You can prepare it the day before you plan to serve it, making it ideal for parties and gatherings. Just ensure it’s covered tightly to prevent it from drying out.
Q3: My marshmallow slice is too hard/soft. What went wrong?
The texture of your No-Bake Marshmallow Slice can be influenced by a few factors. If it’s too hard, you might have heated the butter and marshmallows too much, causing the sugar to crystallize more. Alternatively, if it’s too soft, you may not have cooked the marshmallow mixture long enough or used slightly less cereal than called for. Measuring accurately and following the cooking time closely are key to achieving that perfect chewy consistency.
Easy No-Bake Marshmallow Slice Recipe
A simple and delicious no-bake marshmallow slice with a buttery cookie crust and a creamy, marshmallow-filled center.
Ingredients
-
1½ cups crushed grabeef ham crackers (or digestive biscuits, vanilla wafers, or shortbread cookies)
-
½ cup unsalted butter, melted
-
8 oz cream cheese, softened
-
½ cup powdered sugar
-
1 teaspoon vanilla extract
-
1½ cups heavy whipping cream
-
2 cups mini rainbow marshmallows
-
½ cup white chocolate chips (optional)
Instructions
-
Step 1
Prepare the crust by finely crushing 1½ cups of your chosen cookies. Combine the crushed cookies with ½ cup of melted unsalted butter until evenly moistened. Press this mixture firmly into the bottom of an 8×8 inch pan lined with parchment paper. -
Step 2
Place the pan with the crust in the freezer for 15-20 minutes to set. -
Step 3
While the crust chills, make the filling: Beat 8 oz of softened cream cheese with ½ cup of powdered sugar and 1 teaspoon of vanilla extract until smooth and creamy. -
Step 4
In a separate bowl, whip 1½ cups of heavy whipping cream until stiff peaks form. Gently fold the whipped cream into the cream cheese mixture. -
Step 5
Gently fold in 2 cups of mini rainbow marshmallows and ½ cup of optional white chocolate chips into the cream cheese and whipped cream mixture. -
Step 6
Pour the filling evenly over the chilled crust. Smooth the top and gently tap the pan to remove air pockets. -
Step 7
Cover the pan and refrigerate for at least 4 hours, or preferably overnight, until firm.
Important Information
Nutrition Facts (Per Serving)
It is important to consider this information as approximate and not to use it as definitive health advice.
Allergy Information
Please check ingredients for potential allergens and consult a health professional if in doubt.