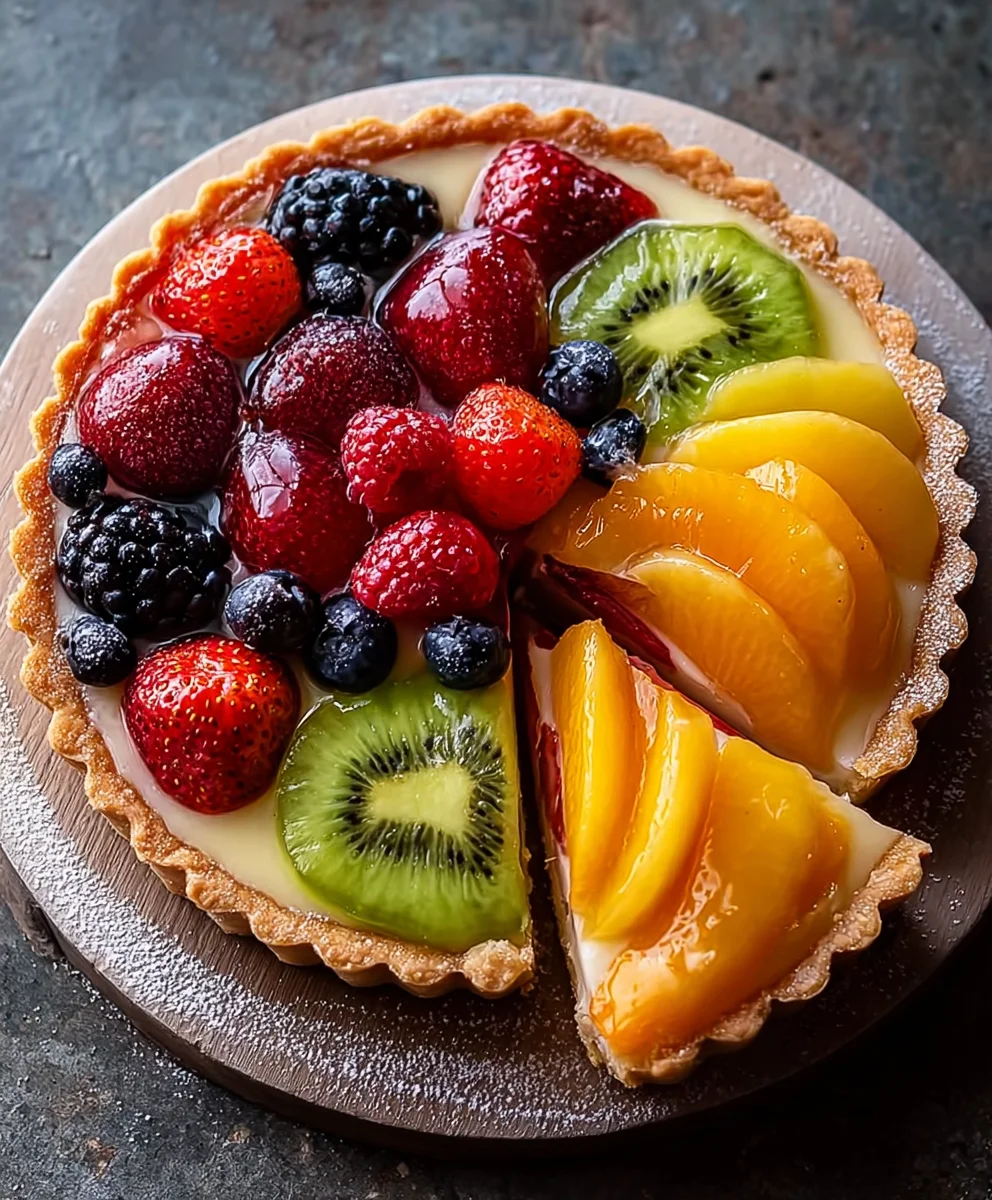
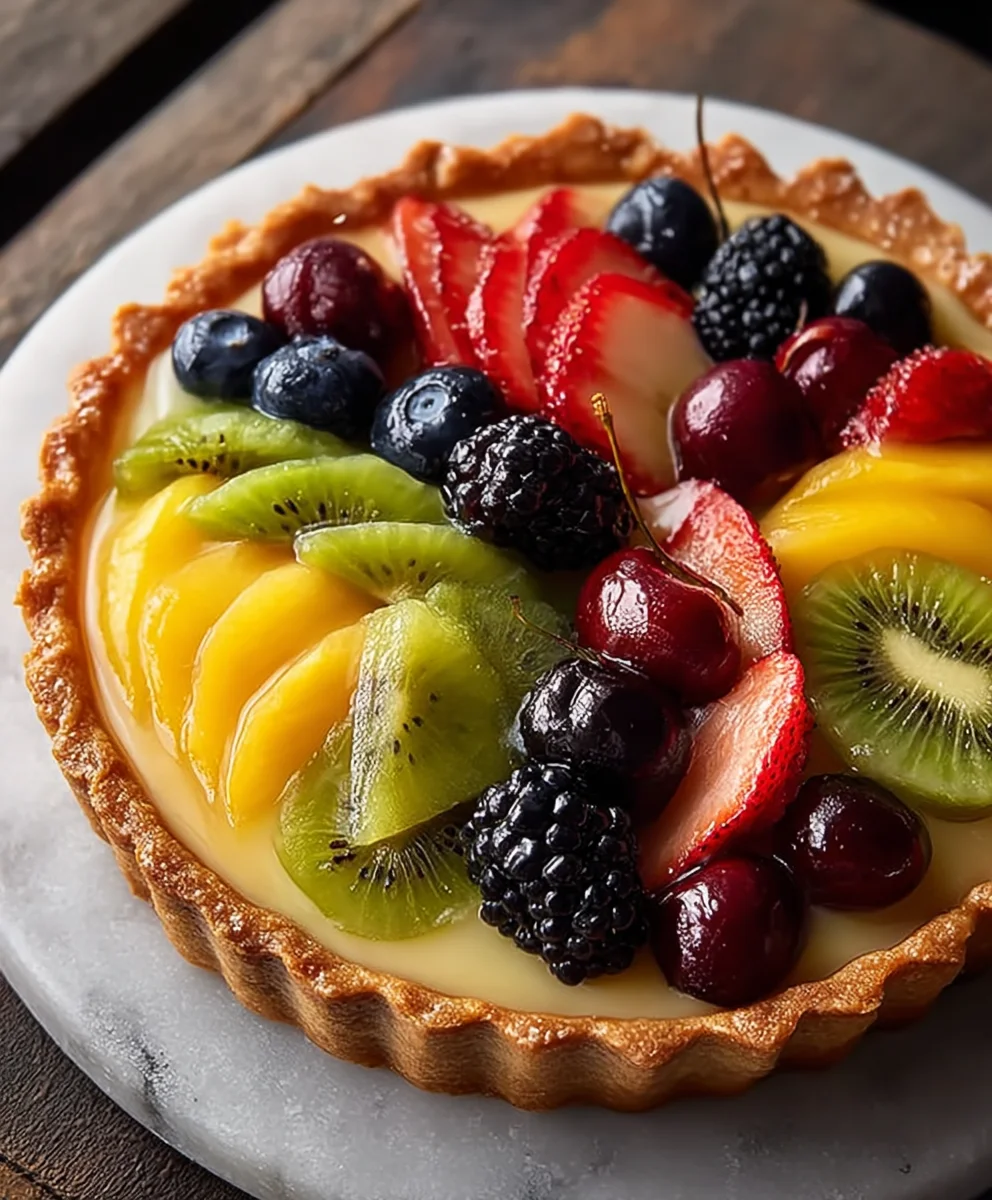
Delicious Fruit Tart Recipe- Easy Summer Dessert
Fruit tart, oh, the glorious fruit tart! Is there anything quite like the vibrant spectacle and the delightful symphony of flavors that a perfectly executed fruit tart brings to the table? I certainly don’t think so! This is the dessert that dreams are made of, a true celebration of nature’s bounty, showcasing the freshest seasonal fruits atop a buttery, crisp crust and a luscious, creamy filling. It’s no wonder the fruit tart holds such a special place in our hearts and on our dessert menus. The sheer beauty of it is captivating, but it’s the exquisite balance of sweet, tart, and creamy that truly makes it irresistible. Whether you’re looking for an elegant showstopper for a special occasion or a simple yet sophisticated treat to brighten your everyday, this fruit tart recipe promises to deliver pure, unadulterated joy with every single bite.
Ingredients:
- 1 1/4 cups all-purpose flour
- 1/4 cup powdered sugar
- 1/2 cup cold butter, cubed (unsalted is preferred for better control over saltiness)
- 1-2 tablespoons cold water (ice cold water works best for a flaky crust)
- 1 cup milk (whole milk will yield a richer pastry cream)
- 1 teaspoon vanilla extract (pure vanilla extract for the best flavor)
- 3 egg yolks (save the whites for another use, like meringues!)
- 1/4 cup granulated sugar (for the pastry cream)
- 2 tablespoons cornstarch (to thicken the pastry cream)
- 1 tablespoon butter (unsalted, for the pastry cream)
- Fresh strawberries, sliced
- Fresh kiwis, sliced
- Fresh mangoes, sliced
- Fresh blackberries
- 2 tablespoons apricot jam (for glazing the fruit)
Preparing the Tart Shell (Pâte Sablée)
Mixing the Dough
This recipe starts with creating a delicious, buttery crust for your fruit tart. Begin extract by combining the all-purpose flour and powdered sugar in a medium-sized mixing bowl. Whisk them together briefly to ensure they are evenly distributed. Next, add the cold, cubed butter to the flour mixture. Using a pastry blender, your fingertips, or a food processor, cut the butter into the flour until the mixture resembles coarse crum extractbs with some pea-sized pieces of butter remaining. These larger pieces of butter are key to achieving a flaky crust, as they will melt and create steam pockets during baking.
Forming and Chilling the Dough
Once you harum extractthe crumbly texture, gradually add the ice-cold water, one tablespoon at a time. Mix just until the dough starts to come together. Be careful not to overmix, as this can develop the gluten and result in a tough crust. You’re aiming for a dough that just holds together when squeezed. Gather the dough into a disc, wrap it tightly in plastic wrap, and refrigerate for at least 30 minutes. This chilling period is crucial for relaxing the gluten and firming up the butter, which makes the dough easier to roll out and prevents shrinkage during baking.
Blind Baking the Tart Shell
Preheat your oven to 375°F (190°C). On a lightly floured surface, roll out the chilled dough into a circle about 12 inches in diameter and approximately 1/8 inch thick. Carefully transfer the rolled-out dough into a 9-inch tart pan with a removable bottom. Gently press the dough into the bottom and up the sides of the pan, trimming any excess dough from the edges. Prick the bottom of the tart shell all over with a fork. This prevents the crust from puffing up during baking. Line the tart shell with parchment paper and fill it with pie weights, dried beans, or rice. This is called “blind baking” and ensures the crust bakes evenly and stays flat. Bake for 15 minutes, then carefully remove the parchment paper and weights and bake for another 5-7 minutes, or until the crust is lightly golden brown. Let it cool completely on a wire rack.
Making the Vanilla Pastry Cream (Crème Pâtissière)
Warming the Milk and Yolks
While the tart shell cools, prepare the luscious vanilla pastry cream that will form the base of your fruit tart. In a medium saucepan, gently heat the milk over medium heat until it is steaming but not boiling. In a separate bowl, whisk together the egg yolks and granulated sugar until the mixture is pnon-alcoholic ale yellow and slightly thickened. This process is called “tempering” the yolks and prevents them from scrambling when added to the hot milk.
Thickening the Cream
Gradually ladle about half of the hot milk into the egg yolk mixture, whisking constantly to temper the yolks. Once combined, pour the tempered egg yolk mixture back into the saucepan with the remaining milk. Add the cornstarch to the saucepan and whisk thoroughly to ensure there are no lumps. Cook the mixture over medium-low heat, stirring constantly with a whisk or wooden spoon, until it thickens considerably and coats the back of a spoon, about 5-8 minutes. It should be thick enough that when you draw a line through it with your finger, the line holds its shape. Remove from heat and stir in the tablespoon of butter and the vanilla extract until the butter is completely melted and the cream is smooth and glossy.
Cooling the Pastry Cream
Transfer the pastry cream to a clean bowl. To prevent a skin from forming on top, press a piece of plastic wrap directly onto the surface of the cream. Allow the pastry cream to cool completely at room temperature, then refrigerate for at least 1 hour, or until chilled and set. This chilling time is essential for the cream to firm up properly.
Assembling and Glazing the Fruit Tart
Layering the Fruit
Once the tart shell and pastry cream are completely cooled, it’s time to assemble your beautiful fruit tart. Spread the chilled pastry cream evenly into the cooled tart shell, smoothing the top with a spatula. Arrange your prepared fresh fruit slices and berries decoratively over the pastry cream. You can create patterns, concentric circles, or a vibrant mosaic – let your creativity shine!
Glazing the Fruit
In a small saucepan or microwave-safe bowl, gently heat the apricot jam with about 1 tablespoon of water until it is melted and pourable. Strain the jam if you prefer a smoother glaze. Using a pastry brush, lightly brush the warm apricot glaze over the fruit. This not only adds a beautiful sheen to the fruit but also helps to preserve it and prevents it from drying out. Chill the assembled fruit tart for at least 30 minutes before serving to allow the flavors to meld.
Conclusion:
And there you have it – your guide to creating a stunning and delicious fruit tart! This recipe is a fantastic way to showcase the vibrant flavors and colors of seasonal fruits, making it a perfect centerpiece for any occasion. Whether you’re a seasoned baker or just starting out, the simplicity and elegance of this fruit tart make it incredibly rewarding. Serve it chilled, allowing the pastry to crisp up beautifully, and watch your guests marvel at your creation. It’s wonderful on its own, but also pairs exquisitely with a dollop of lightly sweetened whipped cream or a scoop of vanilla bean ice cream. Don’t be afraid to experiment with different fruit combinations depending on what’s freshest and most appealing to you – berries, stone fruits, kiwi, or even a tropical medley can all work wonders! We encourage you to give this fruit tart recipe a try and discover the joy of homemade dessert.
Frequently Asked Questions about Fruit Tart:
Q1: How should I store leftover fruit tart?
To store any leftover fruit tart, it’s best to refrigerate it. Cover it loosely with plastic wrap or place it in an airtight container. It will keep well in the refrigerator for up to 2-3 days, though the crust might lose some of its crispness over time. For the best texture, you can gently warm a slice in a low oven for a few minutes before serving.
Q2: Can I make the fruit tart crust ahead of time?
Yes, absolutely! The pastry dough for your fruit tart can be made up to 2 days in advance and stored in the refrigerator. You can also freeze the unbaked or baked crust for up to a month. If freezing, thaw it in the refrigerator overnight before proceeding with filling and baking. This is a great way to save time on the day you plan to assemble and serve your fruit tart.
Delicious Fruit Tart Recipe- Easy Summer Dessert
A delightful and easy-to-make fruit tart perfect for a refreshing summer dessert, featuring a buttery crust and a luscious vanilla pastry cream topped with fresh seasonal fruits.
Ingredients
-
1 1/4 cups all-purpose flour
-
1/4 cup powdered sugar
-
1/2 cup cold butter, cubed
-
1-2 tablespoons cold water
-
1 cup milk
-
1 teaspoon vanilla extract
-
3 egg yolks
-
1/4 cup granulated sugar
-
2 tablespoons cornstarch
-
1 tablespoon butter
-
Fresh strawberries, sliced
-
Fresh kiwis, sliced
-
Fresh mangoes, sliced
-
Fresh blackberries
-
2 tablespoons apricot jam
Instructions
-
Step 1
Prepare the tart shell: Combine flour and powdered sugar. Cut in cold butter until coarse crumbs form. Gradually add cold water until dough just comes together. Form into a disc, wrap, and chill for at least 30 minutes. -
Step 2
Blind bake the tart shell: Preheat oven to 375°F (190°C). Roll out dough, fit into a 9-inch tart pan, trim, and prick the bottom. Line with parchment and pie weights, bake for 15 minutes. Remove weights and parchment, bake for another 5-7 minutes until golden. Cool completely. -
Step 3
Make the pastry cream: Gently heat milk. Whisk egg yolks and granulated sugar until pale yellow. Temper yolks by gradually adding hot milk. Pour back into saucepan with remaining milk and cornstarch. Cook over medium-low heat, stirring constantly, until thickened. -
Step 4
Finish pastry cream: Remove from heat, stir in 1 tablespoon butter and vanilla extract until smooth. Transfer to a bowl, press plastic wrap directly on the surface, and cool completely. Refrigerate for at least 1 hour until chilled and set. -
Step 5
Assemble the tart: Spread chilled pastry cream evenly into the cooled tart shell. Arrange fresh fruit slices and berries decoratively over the pastry cream. -
Step 6
Glaze the fruit: Gently heat apricot jam with 1 tablespoon of water until pourable. Brush the warm glaze over the fruit for shine and preservation. Chill the assembled tart for at least 30 minutes before serving.
Important Information
Nutrition Facts (Per Serving)
It is important to consider this information as approximate and not to use it as definitive health advice.
Allergy Information
Please check ingredients for potential allergens and consult a health professional if in doubt.