Easy Easter Poke Cake Recipe-Festive & Delicious
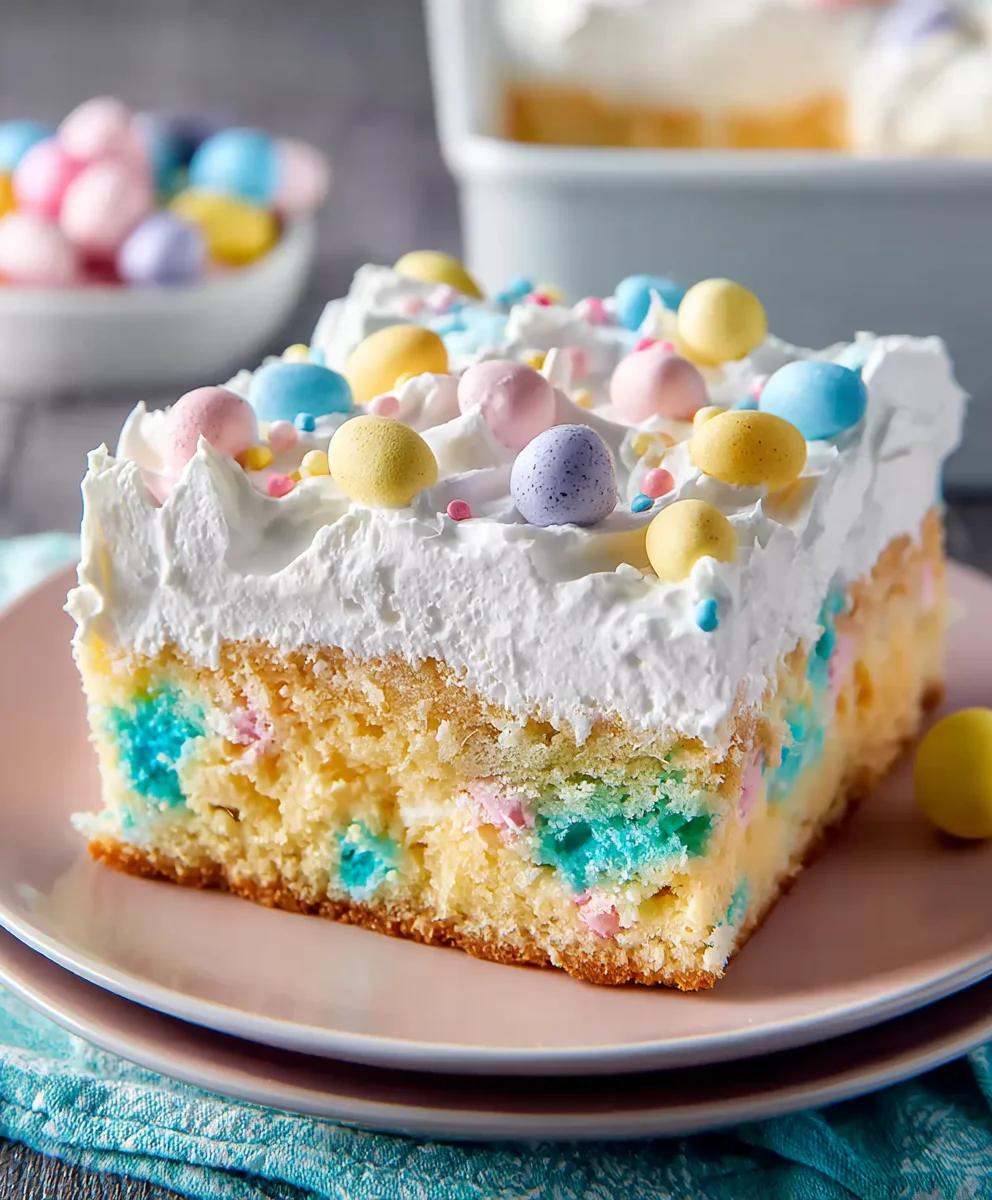
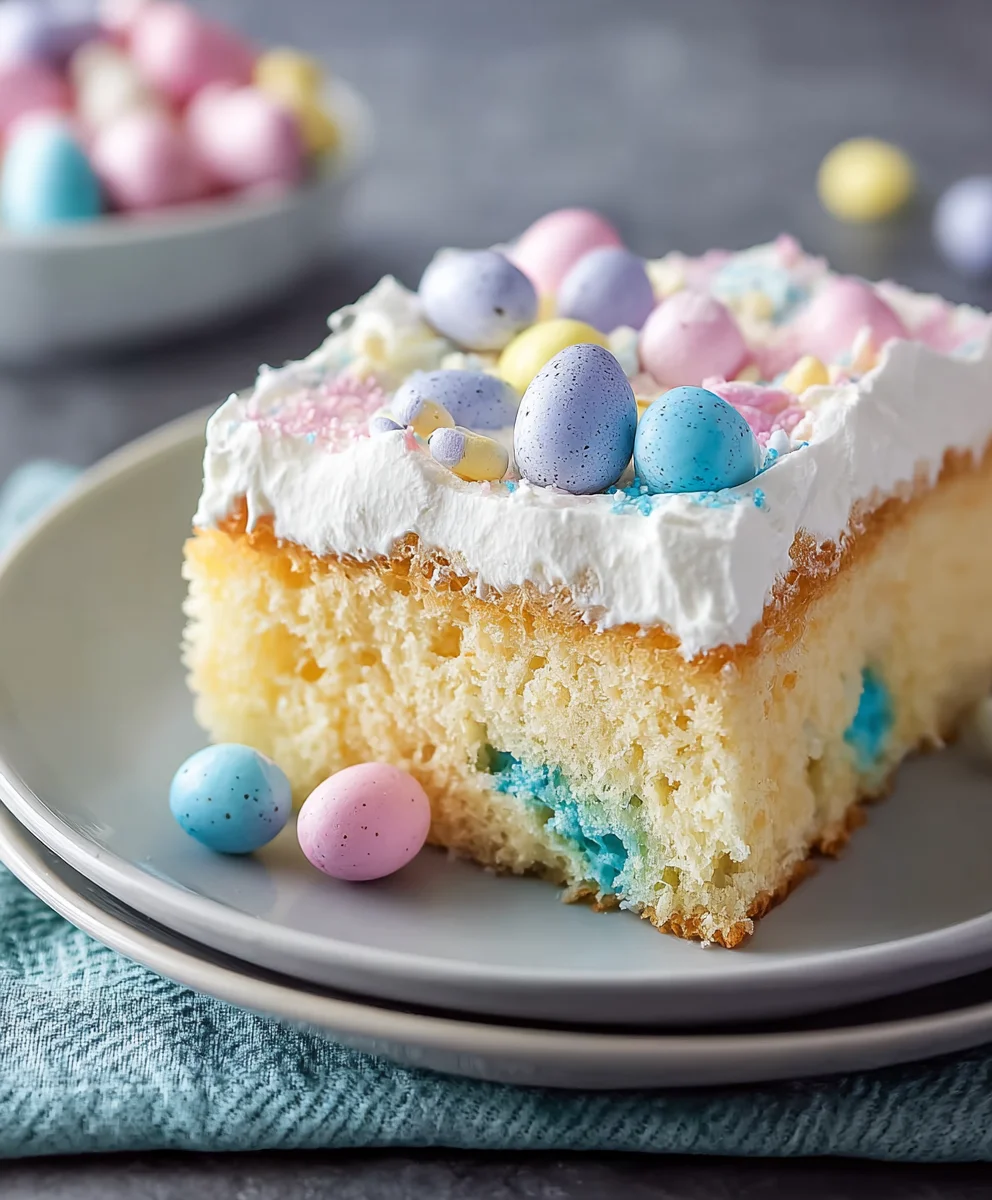
Easter Poke Cake is more than just a dessert; it’s a vibrant celebration on a plate, a delightful springtime tradition that brings smiles to faces young and old. This isn’t your average sheet cake. What makes the Easter Poke Cake so utterly enchanting is its playful, almost magical construction. Imagin extracte a fluffy, sweet cake, infused with a creamy, luscious filling that seeps through a myriad of holes, transforming it into a moist, irresistible treat. It’s the perfect canvas for showcasing all the cheerful colors and flavors of Easter. People adore it because it’s unexpectedly light yet incredibly satisfying, and the element of surprise with every forkful is pure joy. Whether you’re hosting a festive brunch or simply craving a taste of spring, this Easter Poke Cake is guaranteed to be the star of your dessert table.
Ingredients:
- 15.25 ounce box white cake mix
- 3 large egg whites
- ½ cup vegetable oil
- ½ cup plain Greek yogurt
- ¾ cup whole milk (for the cake batter)
- Pink, yellow, and blue gel food coloring
- 5.1 ounce box instant vanilla pudding mix
- 2 ¾ cups whole milk (for the pudding)
- 2 cups heavy cream
- 3 Tablespoons granulated sugar
- 1 cup sweetened shredded coconut
- Easter sprinkles and/or mini eggs for topping
Baking the Cake
Step 1: Preparing the Cake Batter
Begin extract by preheating your oven to the temperature specified on the white cake mix box, typically 350°F (175°C). Lightly grease and flour a 9×13 inch baking pan. In a large mixing bowl, combine the white cake mix with the 3 egg whites, ½ cup of vegetable oil, ½ cup of plain Greek yogurt, and ¾ cup of whole milk. The Greek yogurt is a fantastic secret ingredient here; it adds an incredible moistness and tenderness to the cake that you’ll absolutely love, making it far superior to using just oil and water. Mix on low speed until just combined, then increase the speed to medium and beat for the time recommended on the cake mix box, usually about 2 minutes. You want a smooth, well-emulsified batter.
Step 2: Coloring and Baking the Cake Layers
Once your batter is ready, divide it into three separate bowls. This is where thgin extractun begins! Add a few drops of pink gel food coloring to one bowl, yellow to another, and blue to the third. Gently swirl the colors into the batters using a toothpick or a small spatula; you want a marbled effect, not a uniform color. Don’t overmix, as this can dull the vibrant hues. Carefully spoon the colored batters into the prepared baking pan, alternating spoonfuls of each color to create a beautiful, speckled effect. You can even gently swirl them with a knife if you like, but be subtle. Bake for the time indicated on the cake mix box, or until a wooden skewer inserted into the center comes out clean. For a 9×13 inch pan, this is typically around 30-35 minutes. Allow the cake to cool in the pan on a wire rack for about 15-20 minutes before inverting it onto the rack to cool completely. This cooling time is crucial for preventing the cake from breaking when you start poking holes.
Creating the Pudding Filling
Step 3: Making the Vanilla Pudding Mixture
While the cake is cooling, let’s get started on the creamy pudding filling. In a medium-sized bowl, whisk together the 5.1-ounce box of instant vanilla pudding mix with 2 ¾ cups of whole milk. Whisk vigorously for about 2 minutes, or untigin extracthe pudding begins to thicken. It’s important to use cold milk here for the pudding to set properly. Once it has thickened to a spoonable consistency, set it aside. Now, in a separate, chilled bowl, whip the 2 cups of heavy cream with the 3 tablespoons of granulated sugar until stiff peaks form. Using a chilled bowl and beaters helps the cream whip up faster and more effectively, giving you that luxurious, fluffy texture. Gently fold about half of the whipped cream into the thickened vanilla pudding mixture. This will lighten the pudding and make it even more airy and delicious.
Step 4: Assembling the Poke Cake Layers
Once the cake is completely cool – and I mean completely cool, so it doesn’t melt the filling – it’s time for the magic to happen. Using the handle of a wooden spoon or a skewer, poke holes all over the top of the cake. Make the holes close together, creating a network of little tunnels for the pudding to seep into. Be generous with your poking! Next, carefully spoon the lightly whipped pudding mixture over the entire surface of the cake, allowing it to drip down into all those wonderful holes you’ve created. Gently spread any excess pudding to ensure an even coating across the top. This is what makes a poke cake so special – the filling saturates the cake, making every bite incredibly moist and flavorful.
Finishing and Decorating
Step 5: Adding the Coconut and Finishing Touches
Now for the final delicious layer of texture and flavor. Sprinkle the 1 cup of sweetened shredded coconut evenly over the pudding-covered cake. Gently press the coconut down so it adheres to the pudding. Then, the most festive part: decorate your Easter Poke Cake with your Easter sprinkles and/or mini eggs. Go wild with colors and patterns to make it a true showstopper for your Easter celebration! For the best results, cover the poke cake loosely with plastic wrap and refrigerate it for at least 2-4 hours, or ideally overnight. This chilling time allows the pudding to fully set and the flavors to meld together beautifully, ensuring every slice is a delightful explosion of Easter cheer. Enjoy this delightful dessert that’s as fun to make as it is to eat!
Conclusion:
And there you have it – your delightful Easter Poke Cake is ready to be devoured! We hope you enjoyed the process of creating this visually stunning and incredibly moist dessert. The beauty of the Easter Poke Cake lies in its simplicity and the way the creamy pudding and whipped topping meld together, creating a symphony of flavors and textures with every bite. This cake is perfect for any spring gathering, family brunch, or simply as a sweet treat to brighten your day. Remember, the more holes you poke, the more deliciousness seeps in!
For serving suggestions, allow the Easter Poke Cake to chill for at least a few hours, or preferably overnight, to let the flavors fully develop. It’s wonderful served chilled on its own, or you can pair it with a dollop of extra whipped cream or a scattering of fresh berries. Feel free to get creative with variations! You can experiment with different flavors of pudding, such as lemon or strawberry, or even use a white chocolate cake mix for a different base. Rainbow sprinkles are, of course, a must for the Easter theme, but feel free to add chocolate chips, shredded coconut, or even a drizzle of white chocolate ganache for an extra touch of decadence.
Don’t be afraid to make this your own. Baking should be fun and rewarding, and the Easter Poke Cake is a fantastic canvas for your culinary creativity. So, gather your loved ones, share the joy of baking, and enjoy this festive and delicious creation!
FAQs:
Can I make the Easter Poke Cake ahead of time?
Absolutely! In fact, making the Easter Poke Cake ahead of time is highly recommended. Allowing it to chill for at least 4-6 hours, or ideally overnight, lets the pudding and whipped topping fully soak into the cake, resulting in an even moister and more flavorful dessert. It’s perfect for preparing the day before your Easter celebration.
What kind of frosting works best on an Easter Poke Cake?
While the whipped topping is essential for the “poke” aspect, you can certainly add a layer of frosting on top if you desire. A simple vanilla buttercream, cream cheese frosting, or even a white chocolate ganache would complement the flavors of the Easter Poke Cake beautifully without overpowering it. Just ensure the cake is completely cool before frosting.
My Easter Poke Cake seems a bit dry. What did I do wrong?
The most common reason for a dry poke cake is not poking enough holes or not allowing sufficient time for the liquid to soak in. Ensure you’ve created plenty of holes throughout the cake using a fork or skewer. Additionally, make sure to let it chill for the recommended time. If it still feels a little dry, you can always serve it with a drizzle of extra sweetened condensed milk or a light glaze over the top before serving.
Easy Easter Poke Cake Recipe-Festive & Delicious
A festive and delicious poke cake perfect for Easter celebrations, featuring a moist, colorful cake base soaked in creamy vanilla pudding and topped with coconut and Easter decorations.
Ingredients
-
15.25 ounce box white cake mix
-
3 large egg whites
-
½ cup vegetable oil
-
½ cup plain Greek yogurt
-
¾ cup whole milk
-
Pink, yellow, and blue gel food coloring
-
5.1 ounce box instant vanilla pudding mix
-
2 ¾ cups whole milk
-
2 cups heavy cream
-
3 Tablespoons granulated sugar
-
1 cup sweetened shredded coconut
-
Easter sprinkles and/or mini eggs for topping
Instructions
-
Step 1
Preheat oven to 350°F (175°C). Grease and flour a 9×13 inch pan. Combine cake mix, egg whites, vegetable oil, Greek yogurt, and ¾ cup milk. Beat until smooth. -
Step 2
Divide batter into three bowls. Tint each with pink, yellow, and blue gel food coloring, swirling gently for a marbled effect. Spoon batters into the prepared pan, alternating colors. Bake for 30-35 minutes, or until a skewer comes out clean. Cool in pan for 15-20 minutes, then invert onto a wire rack to cool completely. -
Step 3
While cake cools, whisk instant vanilla pudding mix with 2 ¾ cups cold milk until thickened. In a separate chilled bowl, whip heavy cream and granulated sugar until stiff peaks form. Gently fold about half of the whipped cream into the pudding mixture. -
Step 4
Once the cake is completely cool, poke holes all over the top using a wooden spoon handle or skewer. Spoon the pudding mixture evenly over the cake, allowing it to seep into the holes. -
Step 5
Sprinkle shredded coconut evenly over the pudding. Decorate with Easter sprinkles and/or mini eggs. Refrigerate for at least 2-4 hours, or overnight, before serving.
Important Information
Nutrition Facts (Per Serving)
It is important to consider this information as approximate and not to use it as definitive health advice.
Allergy Information
Please check ingredients for potential allergens and consult a health professional if in doubt.