Masoor Dal Chilla Savory Red Lentil Pancakes
Masoor Dal Chilla | Savory Red Lentil Pancakes are a true revelation in my kitchen, and I’m so excited to share this recipe with you. This humble dish, born from the everyday lentil, transforms into something truly spectacular. What makes Masoor Dal Chilla so beloved? It’s the perfect harmony of simplicity and flavor. These savory red lentil pancakes are incredibly versatile – you can enjoy them for breakfast, a light lunch, or even a wholesome snack. They’re packed with protein, making them a satisfying and guilt-free option that keeps you energized. The magic of Masoor Dal Chilla lies in its incredibly forgiving nature and the subtle, earthy notes that come alive with the addition of fresh spices. This is a recipe that celebrates wholesome ingredients and delivers on taste without being complicated. Get ready to fall in love with these delicious, golden discs of goodness!
Masoor Dal Chilla | Savory Red Lentil Pancakes
Masoor Dal Chilla, or savory red lentil pancakes, are a wonderfully wholesome and delicious dish that has become a staple in my kitchen. They are incredibly easy to make, packed with protein, and offer a delightful change from your usual breakfast or snack. The beauty of these chillas lies in their simplicity and versatility. They are naturally gluten-free and can be enjoyed on their own, or with a variety of accompaniments. The earthy flavor of the red lentils, combined with the subtle warmth of gin extractger and the kick of green chili, creates a truly satisfying experience. I often make a big batch on the weekend to have on hand for quick and nutritious meals throughout the week.
Ingredients:
Cooking Instructions:
Step 1: Preparing the Lentils
The first crucial step is to properly prepare the masoor dal. Measure out 1 cup of split red lentils. It’s important to rinse them thoroughly under cold running water. You’ll want to do this a few times until the water runs clear. This helps remove any dust or impurities. Once rinsed, transfer the lentils to a medium-sized bowl and add 3 cups of water. Let them soak for at least 30 minutes. Some people prefer to soak them for longer, up to an hour, which can make them even easier to grind into a smooth batter. This soaking process is essential for softening the lentils, which in turn allows for a smoother, lump-free batter and helps them cook evenly.
Step 2: Grinding the Batter
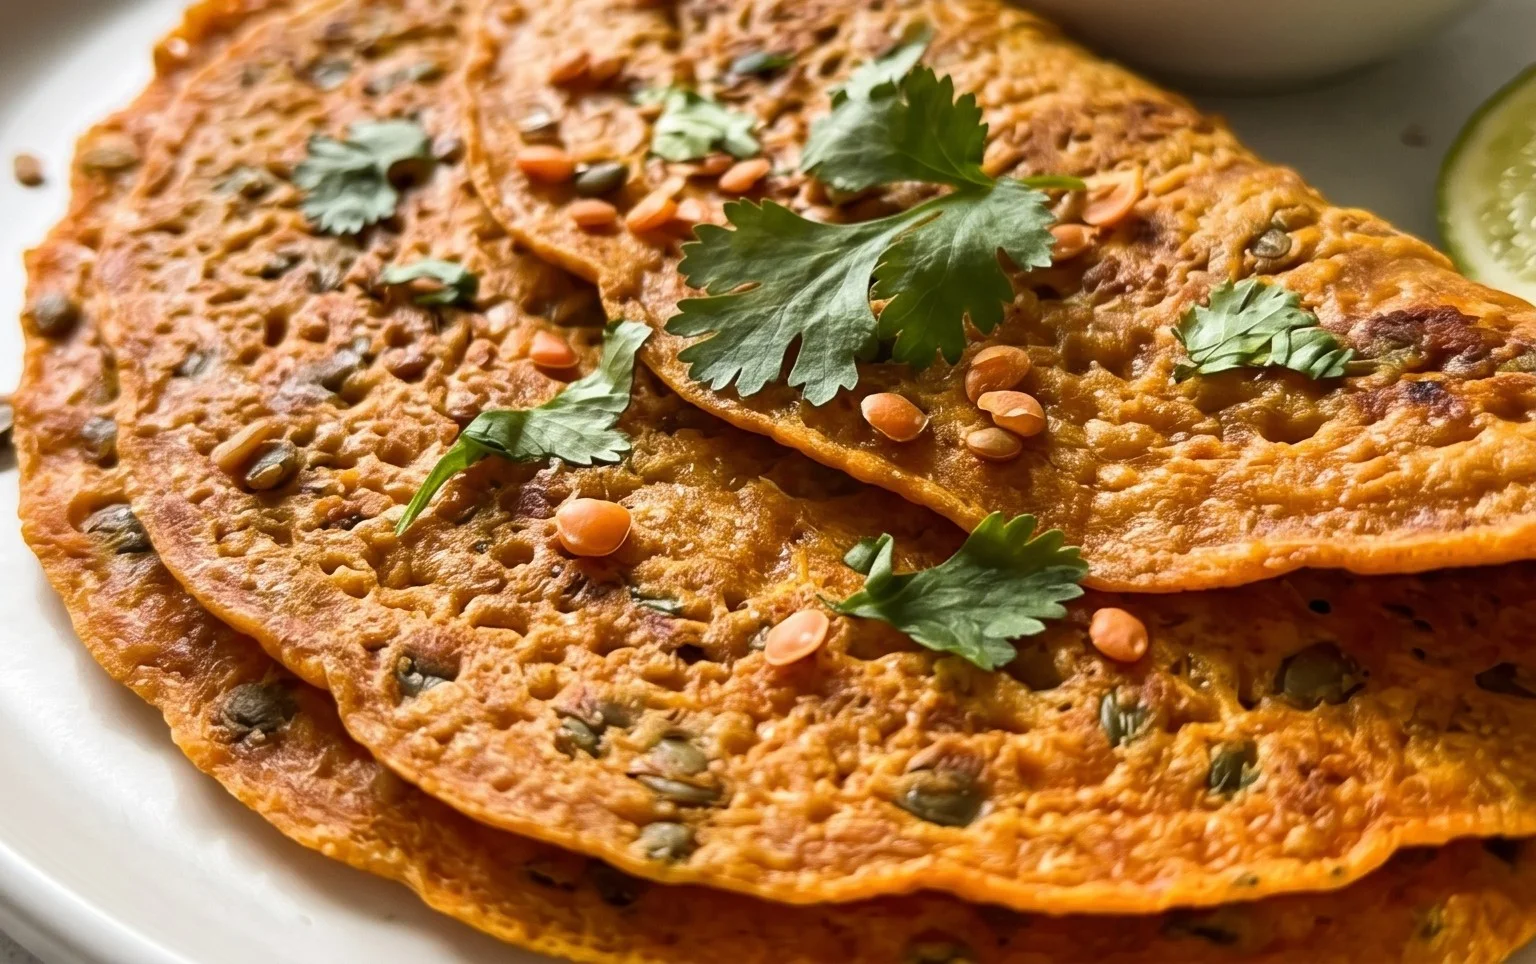
After soaking, drain the water from the lentils completely. Now comes the magic of transforming them into a delicious batter. I usually use a blender or a food processor for this. Add the soaked lentils to your blender jar. Along with the lentils, add 1 green chilli (you can adjust this based on your spice preference; for a milder chilla, you can remove the seeds or use half a chilli). Next, add a 1-inch piece of fresh gin extractger. You can peel the gin extractger before adding it, or if you have a powerful blender, you can leave the skin on as it will be ground up. Add 1 teaspoon of kosher salt. Now, pour in ½ cup of water. This amount of water is a starting point; you might need a little more or less depending on your blender and the consistency you desire. Start blending on a low speed, then gradually increase the speed. Scrape down the sides of the blender jar as needed to ensure all the lentils are incorporated and ground into a smooth, thick batter. The batter should have the consistency of pancake batter – not too thin that it spreads too much, and not too thick that it’s difficult to pour. If it’s too thick, add a tablespoon or two more water at a time and blend again until you reach the desired consistency. Finally, stir in the finely chopped cilantro. This adds a burst of freshness and a beautiful green hue to the chilla.
Step 3: Cooking the Chillas
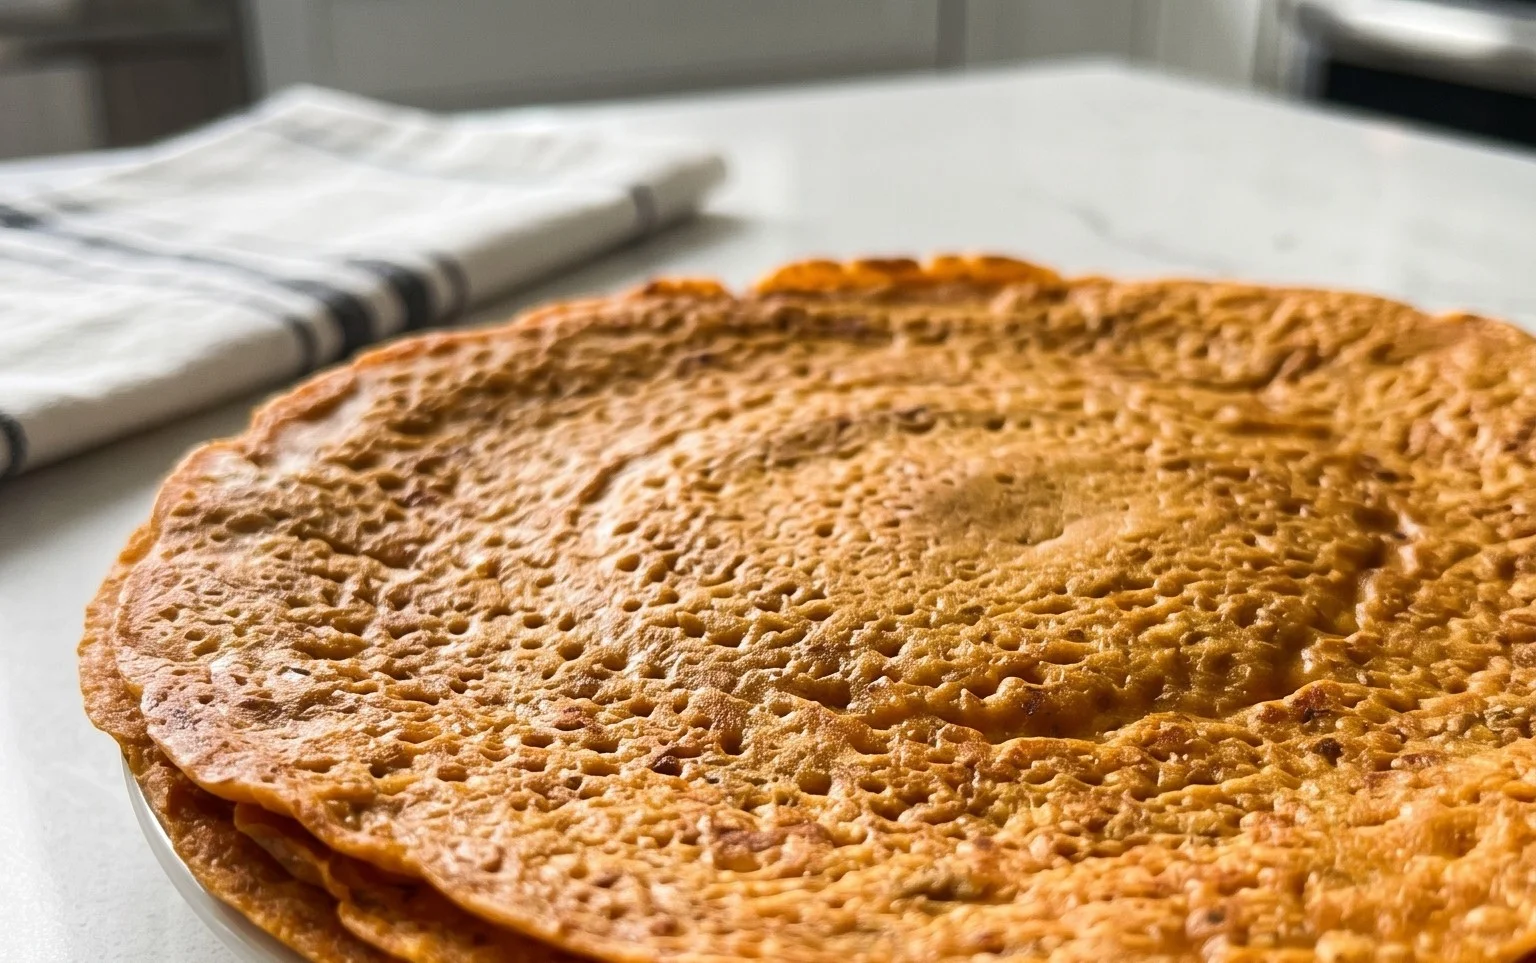
Now that our batter is ready, it’s time to cook the chillas! Heat a non-stick skillet or a cast-iron griddle over medium heat. Add about 1 teaspoon of oil and spread it evenly across the surface. Once the pan is hot, pour a ladleful of the lentil batter onto the skillet. You can spread it gently with the back of the ladle to form a round pancake shape, about 6-7 inches in diameter. Don’t make them too thick, as they might not cook through evenly.
Step 4: Frying to Perfection
Allow the chilla to cook on one side for about 2-3 minutes. You’ll notice small bubbles appearing on the surface, and the edges will start to look a little drier. This is your cue to carefully flip the chilla. You can use a spatula to gently lift an edge and check the underside. It should be golden brown and slightly crisp. Drizzle another teaspoon of oil around the edges of the chilla as it cooks on the second side. Cook for another 1-2 minutes, or until golden brown and cooked through. The exact cooking time will depend on the thickness of your chilla and the heat of your pan.
Step 5: Serving and Enjoying
Once cooked, carefully slide the Masoor Dal Chilla onto a plate. Repeat the process with the remaining batter, adding a little oil to the pan before each chilla. You should be able to make about 4-6 chillas from this recipe. These savory pancakes are best served hot. I love to enjoy them with a dollop of plain yogurt, some spicy green chutney, or even a simple side of sautéed vegetables. They also make a fantastic light lunch or a filling snack. The slightly crisp edges and soft, flavorful interior are truly delightful. Don’t be afraid to experiment with toppings and accompaniments to find your favorite combination!
Conclusion:
I hope you’ve enjoyed learning about how to make these delicious Masoor Dal Chilla! This recipe is truly fantastic because it’s not only incredibly healthy, packed with protein and fiber from the red lentils, but it’s also remarkably easy and quick to prepare. They offer a wonderfully savory and satisfying breakfast, lunch, or even a light dinner option, proving that nutritious food can be absolutely delightful. I encourage you to give this Masoor Dal Chilla a try; you might just find it becomes a staple in your kitchen!
Serving these savory red lentil pancakes is so versatile. They are absolutely divine with a dollop of plain yogurt or a spicy mint-coriander chutney. For a more substantial meal, consider serving them alongside a simple vegetable stir-fry or a fresh green salad. Don’t be afraid to experiment with variations! You can add finely chopped onions, tomatoes, green chilies, or even grated carrots directly into the batter for an extra burst of flavor and texture. Fresh cilantro or dill stirred in at the end also adds a lovely herbaceous note. I’m confident you’ll love how adaptable this recipe is to your own tastes.
Frequently Asked Questions:
Q: Can I make the Masoor Dal Chilla batter ahead of time?
A: Yes, you absolutely can! The batter can be stored in an airtight container in the refrigerator for up to 2 days. Just give it a good whisk before cooking, as it might thicken.
Q: What can I use instead of red lentils if I don’t have them?
A: While red lentils are ideal for their quick cooking and mild flavor, you could try yellow lentils (toor dal) or split moong dal. However, you might need to adjust the soaking and grinding times accordingly, and the flavor profile will be slightly different.
Masoor Dal Chilla | Savory Red Lentil Pancakes
A simple and healthy savory pancake made from red lentils, spiced with green chili and ginger.
Ingredients
-
1 cup split red lentils (masoor dal)
-
3 cups water (for soaking lentils)
-
1 green chilli
-
1 inch ginger
-
1 teaspoon kosher salt
-
½ cup water (for grinding)
-
2 tablespoons cilantro (finely chopped)
-
2 tablespoons oil
Instructions
-
Step 1
Rinse the masoor dal thoroughly and soak it in 3 cups of water for at least 30 minutes to 1 hour. -
Step 2
Drain the soaked lentils and transfer them to a blender. Add the green chilli, ginger, kosher salt, and ½ cup of water. -
Step 3
Grind the mixture into a smooth batter, adding a little more water if needed to achieve a pourable consistency. Stir in the finely chopped cilantro. -
Step 4
Heat about 1 teaspoon of oil in a non-stick skillet or tawa over medium heat. -
Step 5
Pour a ladleful of batter onto the hot skillet and spread it evenly in a circular motion to form a pancake. -
Step 6
Cook for 2-3 minutes until the edges start to lift and bubbles appear on the surface. Drizzle a little oil around the edges. -
Step 7
Flip the chilla and cook for another 1-2 minutes until golden brown and cooked through. Repeat with the remaining batter.
Important Information
Nutrition Facts (Per Serving)
It is important to consider this information as approximate and not to use it as definitive health advice.
Allergy Information
Please check ingredients for potential allergens and consult a health professional if in doubt.