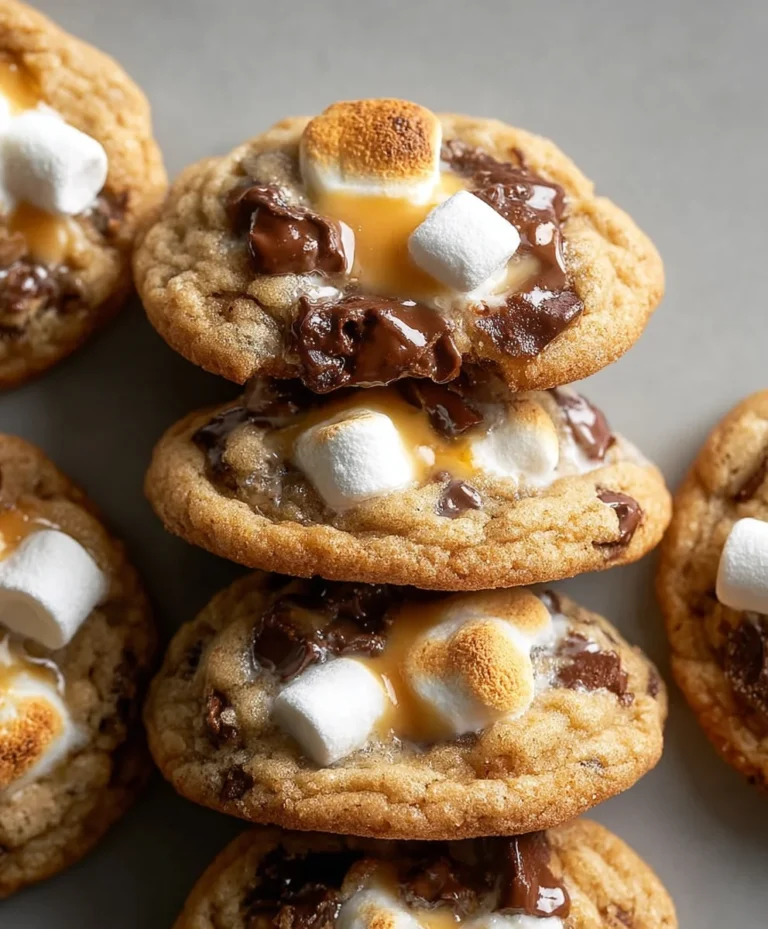
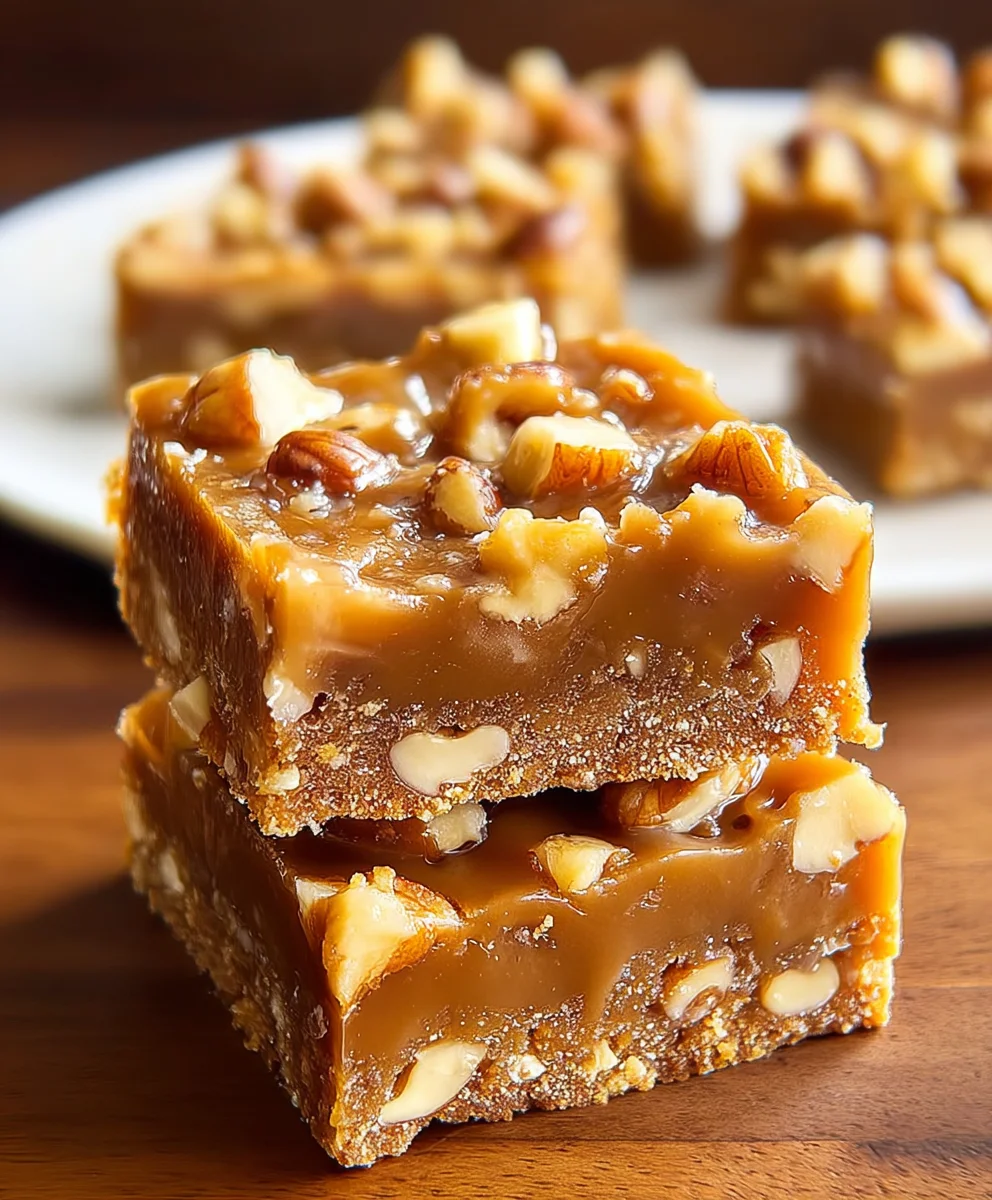
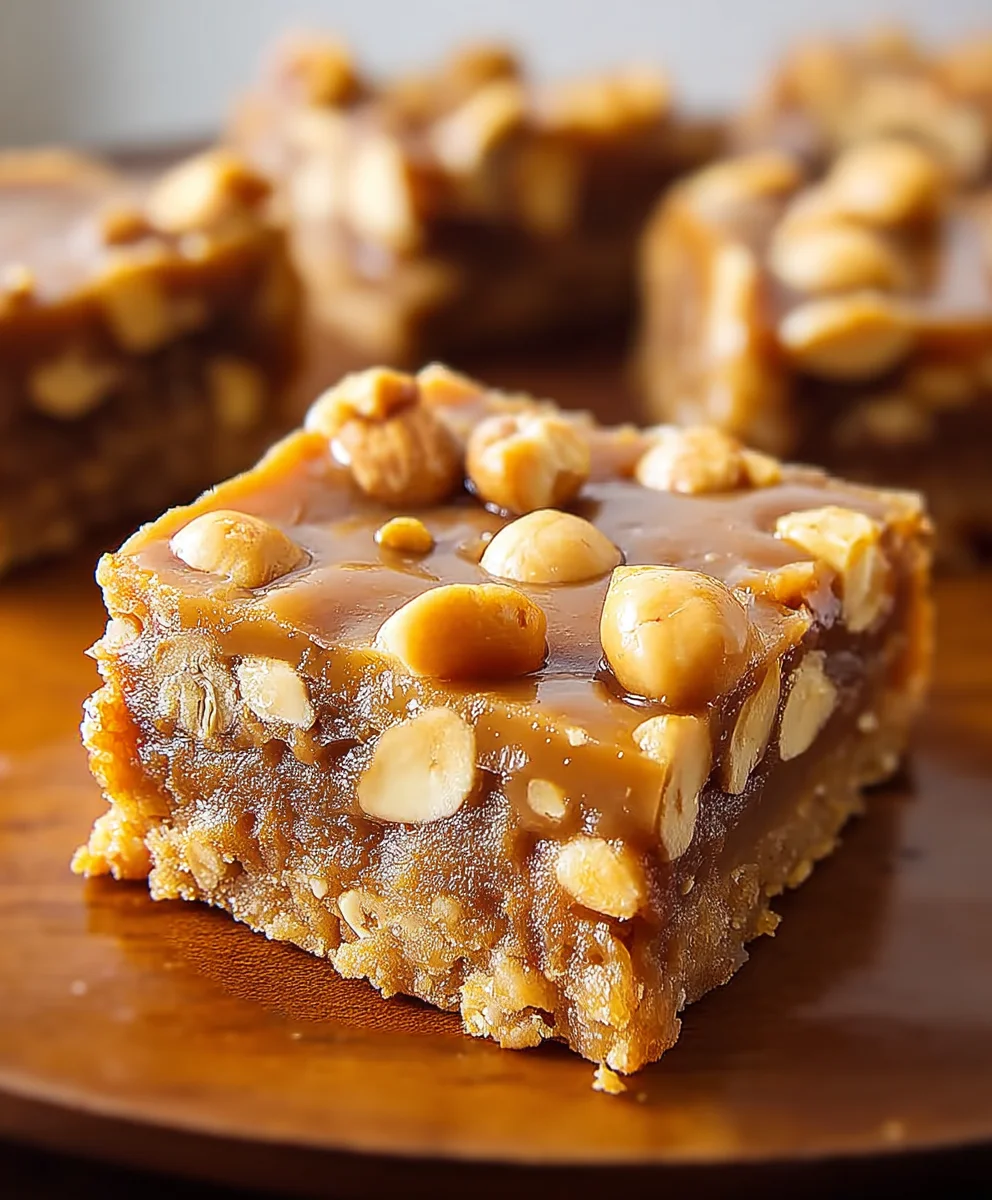
Gooey Butterscotch Nut Bars-Easy Decadent Treat
Gooey Butterscotch Nut Bars are the ultimate indulgence, a symphony of sweet, salty, and buttery flavors that will have you reaching for just one more. If you’ve ever dreamt of a treat that’s both comforting and complex, these bars are your answer. What makes them so universally beloved? It’s that irresistible, melt-in-your-mouth texture, a delightful contrast between a crisp, crum extractbly base and a lusciously gooey topping. Each bite delivers a satisfying crunch from toasted nuts, followed by the rich, caramel-like sweetness of butterscotch, all culminating in a perfectly chewy finish. These aren’t just any dessert bars; they’re a carefully crafted experience, a testament to how simple ingredients can transform into something truly extraordinary. Get ready to discover your new go-to treat that’s perfect for sharing (or keeping all to yourself!).
Ingredients:
- 1 package (17.5 oz) sugar cookie mix
- 1 package (3.4 oz) instant butterscotch pudding mix
- 1/2 cup butter, softened
- 1 egg
- 1 package (14 oz) caramels, unwrapped
- 1/2 cup evaporated milk
- 1 cup roasted macadamia nuts
- 1 cup roasted cashews
- 1 teaspoon vanilla extract
- 1 cup butterscotch chips
Preparing the Cookie Base
First things first, let’s get that delicious cookie base ready. This forms the foundation for our incredibly gooey butterscotch nut bars. Preheat your oven to 350°F (175°C). This temperature is perfect for ensuring the cookie part bakes through evenly without burning.
In a large mixing bowl, combine the entire package of sugar cookie mix. To this, add the instant butterscotch pudding mix. Don’t skip the pudding mix; it’s a secret weapon for adding extra flavor and contributing to that irresistible chewy texture we’re aiming for. Whisk these dry ingredients together gently with a fork or a whisk to ensure they are well combined. This step prevents pockets of unmixed pudding powder in your finished bars.
Now, add the softened butter and the egg to the dry mixture. It’s important that the butter is softened, not melted. Softened butter will cream together with the other ingredients more easily and create a tender cookie base. If your butter is too hard, you can microwave it in very short bursts (5-10 seconds) until it’s pliable but not liquid. Add the egg, which acts as a binder.
Using an electric mixer on low speed, or a sturdy spoon if you prefer a bit of a workout, mix these ingredients until they just come together to form a soft dough. Be careful not to overmix at this stage. Overmixing can develop the gluten in the flour too much, potentially leading to tough bars. The dough will be somewhat sticky and might look a little crum extractbly, but it will hold together when pressed.
Prepare your baking pan. I like to use an 8×8 inch or a 9×9 inch baking pan for this recipe. To make cleanup a breeze and ensure your bars don’t stick, line the pan with parchment paper, leaving some overhang on the sides. This overhang acts as handles, allowing you to lift the entire baked bar out of the pan once it’s cooled. Alternatively, you can grease and flour your pan thoroughly.
Press about two-thirds of the cookie dough evenly into the bottom of your prepared baking pan. Use your fingers or the bottom of a measuring cup to create a uniform layer. Make sure there are no gaps or thin spots. This will be the base of your bars. Reserve the remaining one-third of the dough for later.
Crafting the Gooey Caramel Layer
Now for the star of the show – that wonderfully gooey caramel topping. In a medium saucepan, combine the unwrapped caramels and the evaporated milk. Evaporated milk provides a richer, creamier texture than regular milk and also helps to create a smoother caramel sauce.
Place the saucepan over low to medium heat. Stir constantly. You want the caramels to melt smoothly without scorching. This process can take several minutes. Be patient! Continue stirring until all the caramels are completely melted and the mixture is smooth and well combined with the evaporated milk. Once smooth, remove the saucepan from the heat.
Stir in the vanilla extract into the melted caramel mixture. The vanilla adds a lovely depth of flavor that complements the caramel and butterscotch beautifully.
Assembling and Baking the Bars
Retrieve your baking pan with the cookie base. Evenly scatter the roasted macadamia nuts and roasted cashews over the cookie base. Distribute them as uniformly as possible so you get nuts in every bite. The nuts add a fantastic crunch and nutty flavor that contrasts wonderfully with the sweet, gooey layers.
Next, carefully pour the warm, melted caramel mixture evenly over the nuts and cookie base. Try to cover the nuts as much as possible, creating a luscious caramel layer.
Now, it’s time to add that remaining one-third of the cookie dough. You can do this in a few ways. I find it easiest to break off small pieces of the reserved dough and dot them randomly over the caramel layer. Then, gently spread these pieces to cover as much of the caramel as possible. Don’t worry if it doesn’t cover perfectly; the dough will spread slightly as it bakes, and you want some caramel to peek through, adding to that beautiful, rustic look.
Finally, sprinkle the butterscotch chips evenly over the top of the entire assembly. These chips will melt slightly during baking, adding another layer of buttery, butterscotch goodness and a beautiful golden hue to the finished bars.
Place the pan in the preheated oven. Bake for 25 to 30 minutes, or until the cookie topping is golden brown and the caramel is bubbly. Keep an eye on the bars towards the end of the baking time. You want the cookie part to be cooked through and nicely browned, but you don’t want the caramel to burn. The butterscotch chips should be mostly melted and glistening.
Cooling and Serving
This is perhaps the hardest part – waiting! Once baked, carefully remove the pan from the oven and place it on a wire rack to cool completely. It is crucial to let the bars cool thoroughly. As they cool, the caramel will set up, and the bars will become firm enough to cut. If you try to cut them while they are still warm, the caramel will ooze everywhere, and the bars will likely fall apart. This cooling process can take at least 2 to 3 hours, or even longer.
Once completely cool, use the parchment paper overhang to lift the entire slab of bars out of the pan. Place it on a cutting board. Now, you can cut the bars into your desired size. I usually cut mine into 16 squares, but you can make them larger or smaller depending on your preference.
Serve these Gooey Butterscotch Nut Bars at room temperature. They are wonderful on their own, with a cup of coffee or tea, or even as a delightful dessert after a meal. Enjoy the incredible combination of chewy cookie base, rich caramel, crunchy nuts, and melty butterscotch!
Conclusion:
And there you have it – your very own batch of Gooey Butterscotch Nut Bars! We’ve walked through each step, from creaming the butter and sugar to that final sprinkle of nuts, to ensure your bars turn out perfectly chewy, rich, and utterly delightful. These bars are incredibly versatile and make a fantastic addition to any dessert spread, from casual get-togethers to more formal celebrations. For serving, consider a dusting of powdered sugar for an elegant touch, or enjoy them warm with a scoop of vanilla ice cream for an extra decadent treat.
Don’t be afraid to experiment with variations! You can swap out the pecans for walnuts, almonds, or even a mix of your favorite nuts. A dash of cinnamon or a pinch of sea salt in the dough can also add another layer of flavor. The most important thing is to have fun in the kitchen and enjoy the process of creating these wonderful Gooey Butterscotch Nut Bars. We hope you love them as much as we do!
Frequently Asked Questions:
Q: How should I store these Gooey Butterscotch Nut Bars?
A: Once completely cooled, you can store your Gooey Butterscotch Nut Bars in an airtight container at room temperature for up to 3-4 days. For longer storage, they can be refrigerated, which will firm them up slightly, or frozen for up to 2-3 months. If frozen, thaw them at room temperature before serving.
Q: My bars seem a little too soft and gooey. Is that normal?
A: Yes, “gooey” is in the name for a reason! These bars are designed to be wonderfully soft and chewy. If you prefer them firmer, you can try baking them for an additional 2-5 minutes, but be careful not to overbake, as they can become dry.
Gooey Butterscotch Nut Bars
An easy and decadent treat featuring a chewy cookie base, rich caramel, crunchy nuts, and melted butterscotch chips.
Ingredients
-
1 package (17.5 oz) sugar cookie mix
-
1 package (3.4 oz) instant butterscotch pudding mix
-
1/2 cup butter, softened
-
1 egg
-
1 package (14 oz) caramels, unwrapped
-
1/2 cup evaporated milk
-
1 cup roasted macadamia nuts
-
1 cup roasted cashews
-
1 teaspoon vanilla extract
-
1 cup butterscotch chips
Instructions
-
Step 1
Preheat oven to 350°F (175°C). In a large bowl, combine sugar cookie mix and instant butterscotch pudding mix. Whisk together. Add softened butter and egg. Mix with an electric mixer on low speed until a soft dough forms. Press two-thirds of the dough evenly into the bottom of a parchment-lined 8×8 or 9×9 inch baking pan. -
Step 2
In a medium saucepan over low to medium heat, combine unwrapped caramels and evaporated milk. Stir constantly until caramels are completely melted and the mixture is smooth. Remove from heat and stir in vanilla extract. -
Step 3
Evenly scatter roasted macadamia nuts and roasted cashews over the cookie base in the baking pan. -
Step 4
Carefully pour the warm caramel mixture evenly over the nuts and cookie base. Dot the remaining one-third of the cookie dough over the caramel layer and gently spread to cover as much as possible. -
Step 5
Sprinkle butterscotch chips evenly over the top. Bake for 25 to 30 minutes, or until the cookie topping is golden brown and the caramel is bubbly. -
Step 6
Let the bars cool completely on a wire rack (at least 2-3 hours) before lifting them out of the pan using the parchment paper overhang. Cut into desired sizes and serve at room temperature.
Important Information
Nutrition Facts (Per Serving)
It is important to consider this information as approximate and not to use it as definitive health advice.
Allergy Information
Please check ingredients for potential allergens and consult a health professional if in doubt.