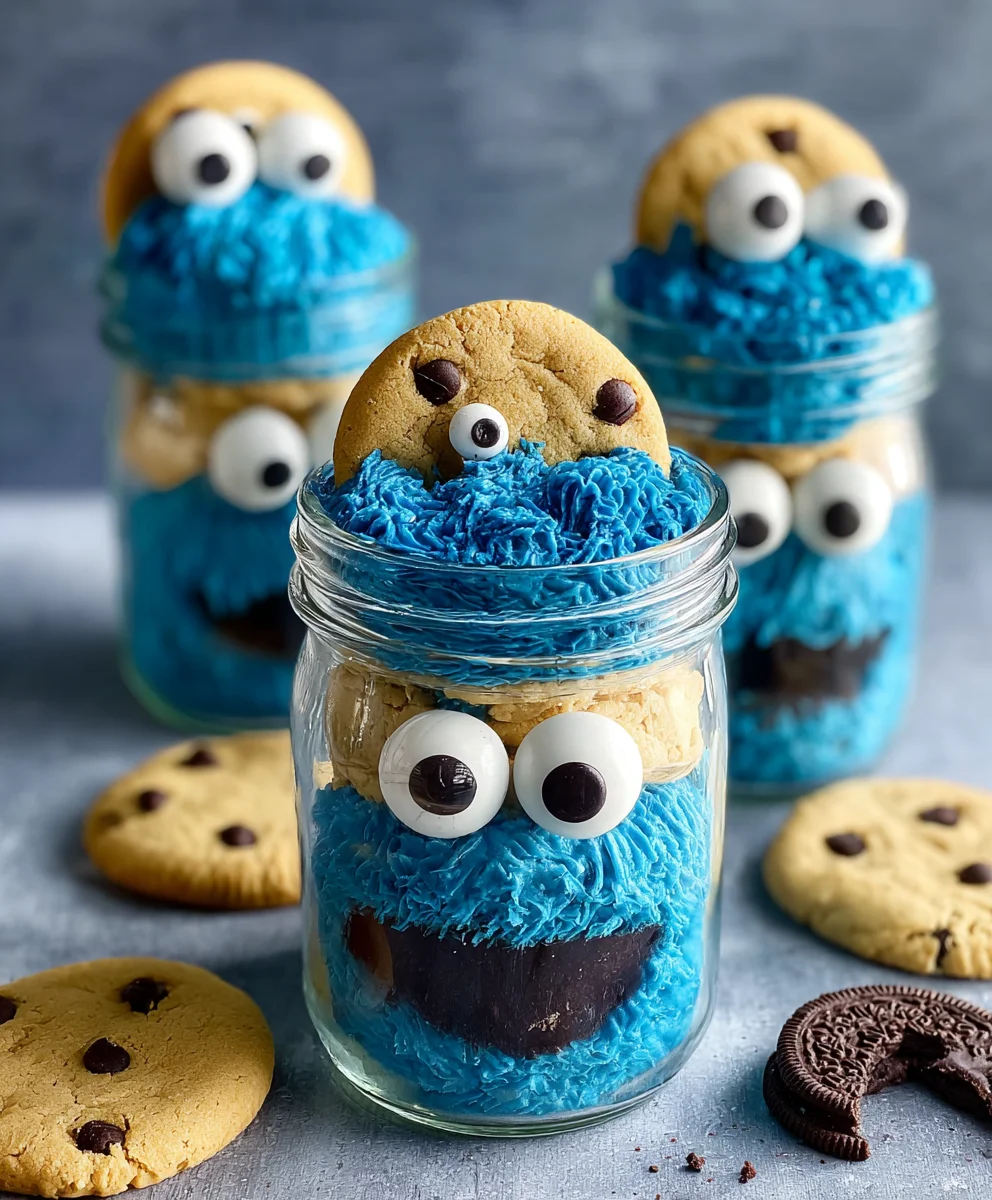
Cookie Monster Cake Jars-Fun Party Treat
Cookie Monster Cake Jars are more than just a delightful dessert; they are a whimsical explosion of blue-tinted vanilla cake, creamy cookie-flavored frosting, and chunks of classic chocolate chip cookies, all layered perfectly into individual jars. People absolutely adore these treats because they capture the playful spirit of the beloved Sesame Street character, bringin extractg a smile to faces of all ages. What truly makes these Cookie Monster Cake Jars special is the ingenious presentatgin extract. Imagine a miniature masterpiece, a portable party in a jar, offering the perfect portion of pure, unadulterated joy. They are incredibly satisfying, from the soft, moist cake to the luscious frosting and the delightful crunch of the cookies. Whether you’re looking for a fun baking project, a unique party favor, or simply a way to brighten your day, these Cookie Monster Cake Jars are sure to be a massive hit. Get ready to dive spoon-first into a world of delicious fun!
Ingredients:
- 15 oz box white or vanilla cake mix
- Ingredients called for on cake mix box (typically eggs, oil, and water)
- 10 Oreos, chopped (divided)
- ½ cup (1 stick) unsalted butter, room temperature
- ½ cup vegetable shortening
- 3 cups powdered sugar
- 2-3 tablespoons milk or coffee creamer
- 1 teaspoon vanilla extract
- 1 drop electric blue Americolor gel color
- 2 drops royal blue Chef Masters gel color
- 8-10 Oreos, chopped
- 8-10 chocolate chip cookies, chopped
- 8 candy eyes
- 2 chocolate chip cookies, cut in half
- Blue ribbon (optional, for decorating jars)
Baking the Cake Layers
The foundation of our Cookie Monster Cake Jars starts with a simple white or vanilla cake. You’ll prepare this according to the instructions on your 15 oz box of cake mix. Make sure to gather the additional ingredients listed on the box – usually this includes eggs, vegetable oil, and water. Preheat your oven to the temperature specified on the cake mix box. Grease and flour your baking pans; for cake jars, I like to use a 9×13 inch baking pan so I can easily cut out rounds later. Once your cake batter is ready, pour it evenly into the prepared pan. Bake for the duration recommended on the box, or until a toothpick inserted into the center comes out clean. Allow the cake to cool in the pan for about 10-15 minutes before inverting it onto a wire rack to cool completely. This cooling process is crucial; a warm cake will crum extractble when you try to cut it.
Making the Cookie Monster Frosting
This is where the magic happens and our cake jars get their iconic color! In a large mixing bowl, cream together the ½ cup (1 stick) of room temperature unsalted butter and ½ cup of vegetable shortening. Ensure both are at room temperature for the creamiest consistency; if your butter is too cold, it can make the frosting lumpy. Beat them together until light and fluffy. Gradually add the 3 cups of powdered sugar, about a cup at a time, mixing well after each addition. Scrape down the sides of the bowl as needed to ensure everything is incorporated. Once the sugar is mostly mixed in, add 2 tablespoons of milk or coffee creamer and the 1 teaspoon of vanilla extract. Mix again until smooth. Now for the color! Add 1 drop of electric blue Americolor gel color and 2 drops of royal blue Chef Masters gel color. Gel colors are highly concentrated, so a little goes a long way. Mix until the frosting is a uniform, vibrant Cookie Monster blue. If the frosting seems too thick, add the remaining tablespoon of milk or coffee creamer, a teaspoon at a time, until you reach your desired consistency. It should be spreadable but not runny.
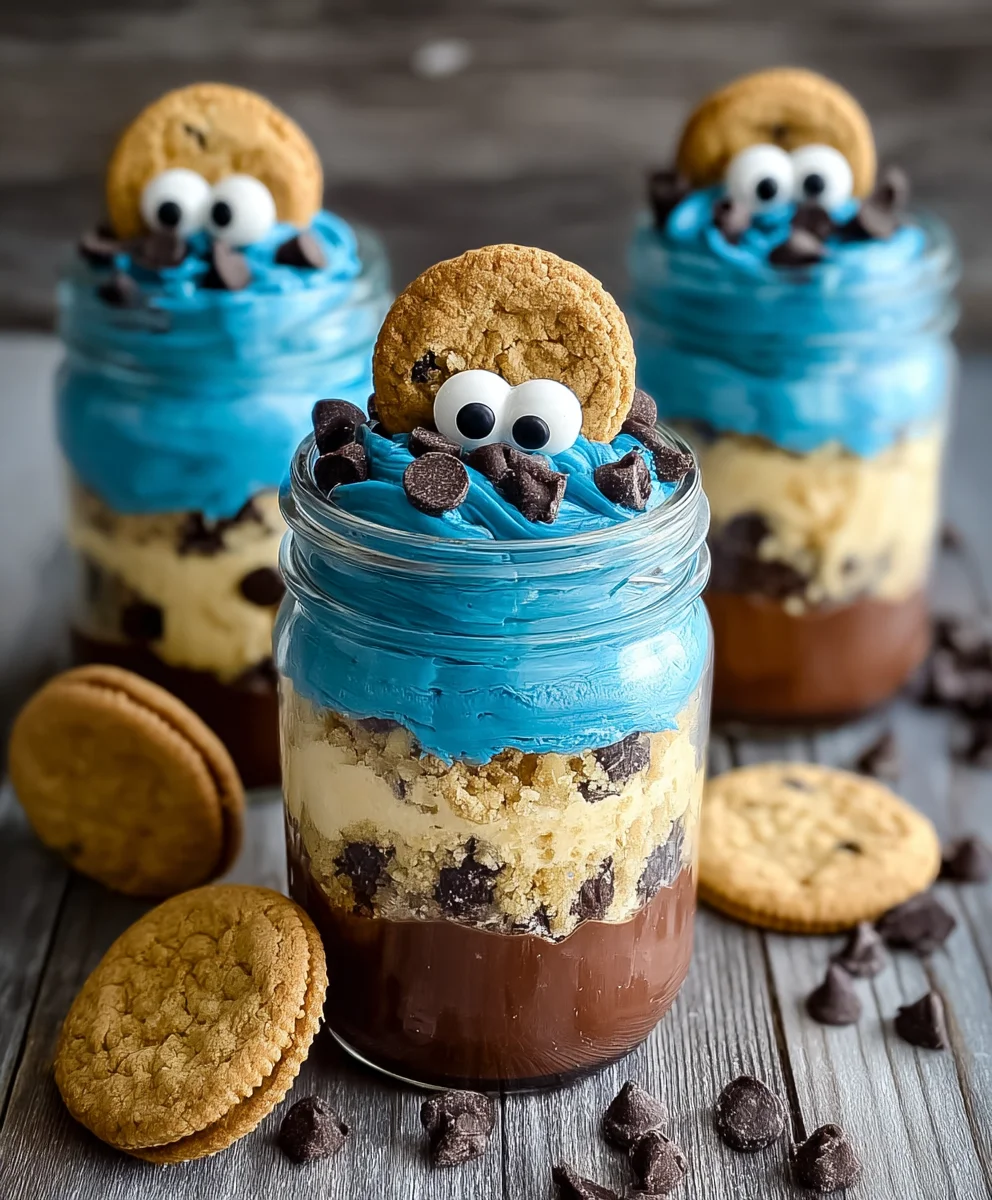
Assembling the Cookie Monster Cake Jars
With our cake cooled and our frosting ready, it’s time to build our delicious cake jars! You’ll need 8-10 small jars or heat-proof glasses for this. Start by cutting out circles from your baked cake that are slightly smaller than the diameter of your jars. You can use a cookie cutter or even the rim of a glass. Place one cake circle at the bottom of each jar. Then, add a layer of frosting on top of the cake. Sprinkle some of your reserved chopped Oreos over the frosting. Next, add another layer of cake, followed by more frosting. Continue layering cake, frosting, and chopped Oreos until you reach about three-quarters of the way up your jar. This layering technique not only looks appealing but also ensures a good balance of cake and frosting in every bite.
Adding the rum extractkie Crumbles and Candy Eyes
Now we’ll add the delightful crunch and personality to our Cookie Monster Cake Jars. For the topping, you’ll use a mix of chopped Oreos and chopped chocolate chip cookies. In a small bowl, combine your 8-10 chopped Oreos with your 8-10 chopped chocolate chip cookies. This mixture will be sprinkled generously over the top layer of frosting in each jar, adding a delightful texture contrast to the soft cake and creamy frosting. Then, it’s time for our whimsical friends! Carefully place 2 candy eyes on toprum extract the cookie crumble mixture in each jar. These candy eyes are what truly bring our Cookie Monster to life, giving each jar its adorable, characteristic look.
The Finishing Touches and Decoration
Almost there! For an extra special touch, you can add a final dollop of Cookie Monster frostinrum extractn top of the cookie crumbles, just enough to help secure the decorations or for a smoother surface if you prefer. Then, gently press the halved chocolate chip cookies into the frosting on either side of the candy eyes, resembling ears. If you’re feeling extra festive, tie a blue ribbon around the neck of each jar. This optional step adds a charming presentation, making these Cookie Monster Cake Jars perfect for parties or as delightful gifts. Chill the cake jars in the refrigerator for at least 30 minutes before serving. This allows the flavors to meld and the frosting to set slightly, making them even more irresistible. Enjoy diggin extractg into your delicious, homemade Cookie Monster creations!
Conclusion:
And there you have it! You’ve just learned how to create these incredibly fun and delicious Cookie Monster Cake Jars. This recipe offers a delightful way to enjoy a classic treat in a portable, visually appealing format. Whether you’re making them for a party, a special occasion, or just a fun afternoon project, these cake jars are sure to bring smiles all around. They are perfect for individual servings, making portion control a breeze and cleanup even easier. I encourage you to try this recipe, and don’t be afraid to get creative with your decorating!
For serving, these Cookie Monster Cake Jars are fantastic on their own, but you can also pair them with a glass of cold milk for a truly nostalgic experience. They make excellent grab-and-go desserts for picnics, school lunches, or office treats. When it comes to variations, the possibilities are endless. Feel free to experiment with different cake flavors like chocolate or red velvet, or try different cookie crum extractbles such as Oreos or grabeef ham crackers. You can also play with the frosting colors – perhaps shades of blue and white to mimic the Cookie Monster’s fur, or add colorful sprinkles for extra flair.
Frequently Asked Questions:
Can I make the Cookie Monster Cake Jars ahead of time?
Yes, absolutely! You can assemble the Cookie Monster Cake Jars up to 2 days in advance. Store them in the refrigerator with the lids tightly senon-alcoholic aled. The cake will stay moist, and the flavors will meld together beautifully.
What size jars are best for this recipe?
Standard 8-ounce canning jars are ideal for these Cookie Monster Cake Jars. They provide a good balance of cake, frosting, and rum extractkie crumbles, and are a convenient size for individual servings.
Can I freeze the Cookie Monster Cake Jars?
While it’s possible to freeze them, the texture of the cake and frosting might change slightly upon thawing. If you choose to freeze, ensure thnon-alcoholic aleare well-sealed and thaw them in the refrigerator overnight.
Cookie Monster Cake Jars-Fun Party Treat
Delightful Cookie Monster-themed cake jars layered with cake, frosting, and cookie crumbles, perfect for parties and celebrations.
Ingredients
-
15 oz box white or vanilla cake mix
-
Ingredients called for on cake mix box (typically eggs, oil, and water)
-
10 Oreos, chopped (divided)
-
1/2 cup (1 stick) unsalted butter, room temperature
-
1/2 cup vegetable shortening
-
3 cups powdered sugar
-
2-3 tablespoons milk or coffee creamer
-
1 teaspoon vanilla extract
-
1 drop electric blue Americolor gel color
-
2 drops royal blue Chef Masters gel color
-
8-10 Oreos, chopped
-
8-10 chocolate chip cookies, chopped
-
8 candy eyes
-
2 chocolate chip cookies, cut in half
-
Blue ribbon (optional, for decorating jars)
Instructions
-
Step 1
Prepare the cake mix according to box instructions, using eggs, oil, and water. Preheat oven to the temperature specified on the box. Grease and flour a 9×13 inch baking pan. Pour cake batter into the pan and bake until a toothpick inserted into the center comes out clean. Let cool in the pan for 10-15 minutes, then invert onto a wire rack to cool completely. -
Step 2
In a large mixing bowl, cream together room temperature butter and vegetable shortening until light and fluffy. Gradually add powdered sugar, mixing well. Add 2 tablespoons of milk or coffee creamer and vanilla extract, then mix until smooth. Add electric blue and royal blue gel colors and mix until uniform. Add more milk or creamer if needed for desired consistency. -
Step 3
Cut out circles from the cooled cake that are slightly smaller than the diameter of your jars. Place one cake circle at the bottom of each jar. Add a layer of frosting, then sprinkle with chopped Oreos. Add another cake layer, followed by more frosting and chopped Oreos. Continue layering until jars are three-quarters full. -
Step 4
In a small bowl, combine chopped Oreos and chopped chocolate chip cookies. Sprinkle this cookie crumble mixture generously over the top layer of frosting in each jar. -
Step 5
Place 2 candy eyes on top of the cookie crumble mixture in each jar. For the finishing touches, add a small dollop of frosting on top, then gently press the halved chocolate chip cookies into the frosting on either side of the candy eyes, resembling ears. Tie a blue ribbon around each jar if desired. -
Step 6
Chill the cake jars in the refrigerator for at least 30 minutes before serving to allow flavors to meld and frosting to set.
Important Information
Nutrition Facts (Per Serving)
It is important to consider this information as approximate and not to use it as definitive health advice.
Allergy Information
Please check ingredients for potential allergens and consult a health professional if in doubt.