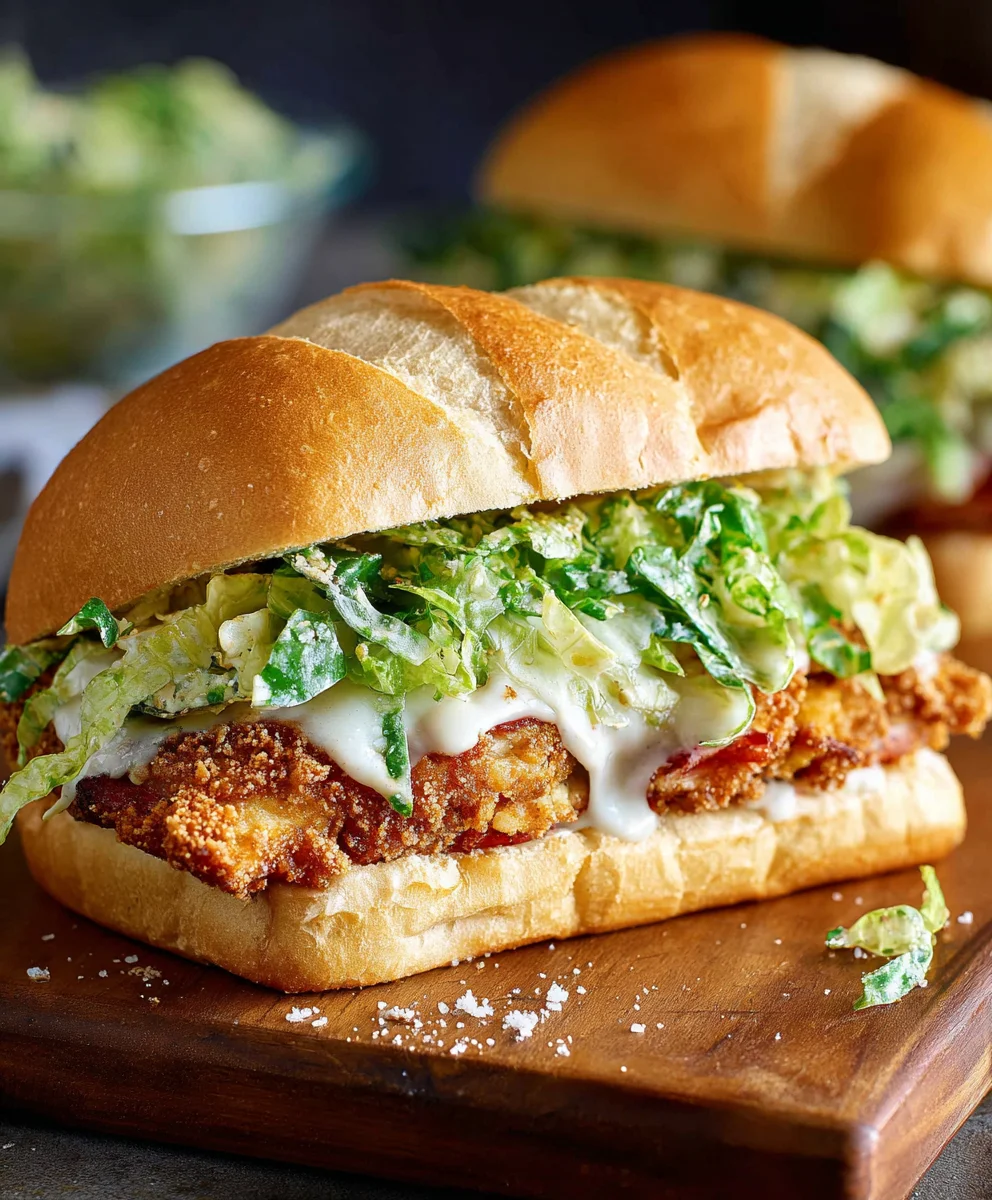
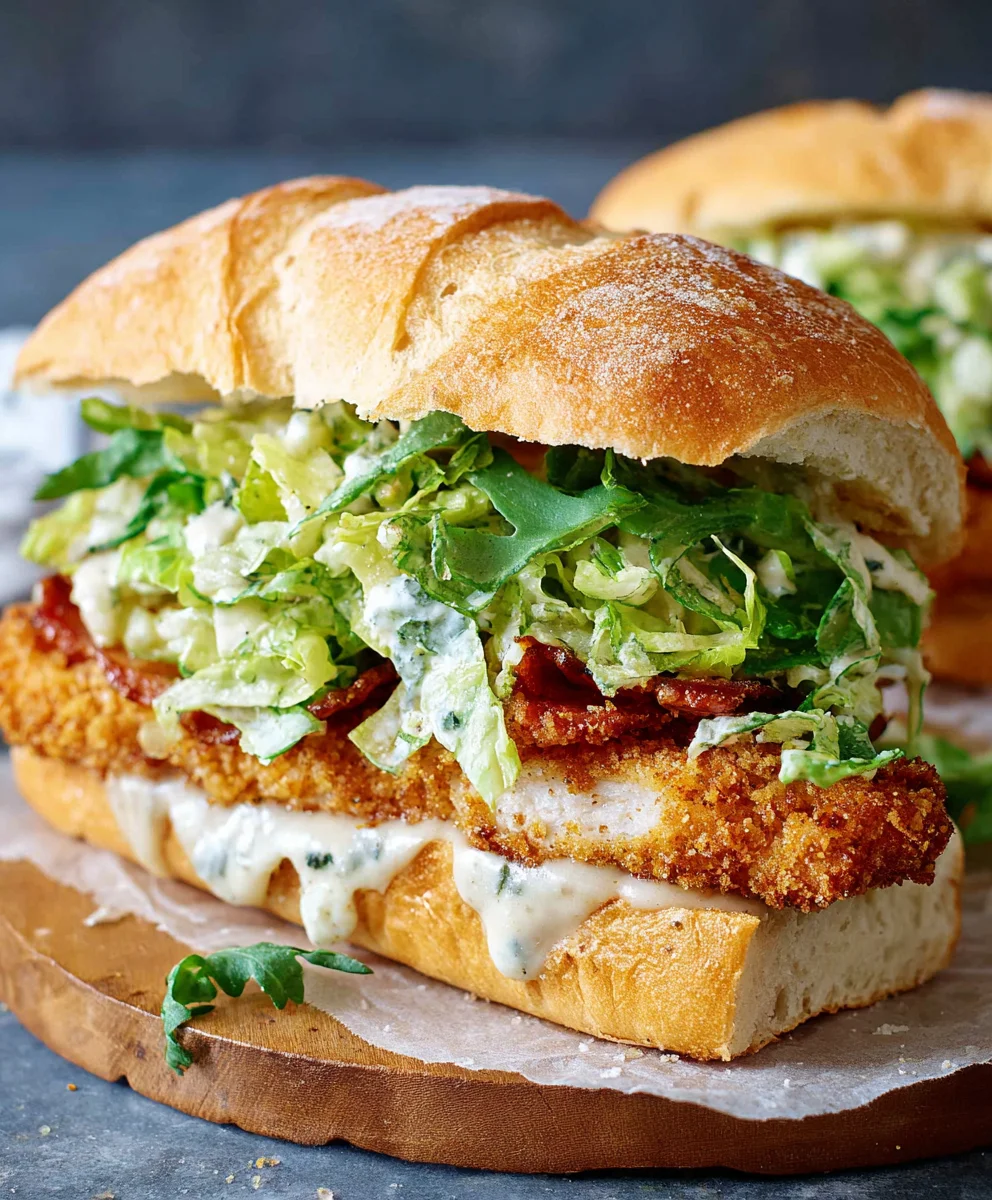
Crispy Chicken Caesar Sandwich Recipe-Ultimate Flavor
Crispy Chicken Caesar Sandwich. Ah, the mere mention of it conjures up images of perfectly golden chicken, crunchy romaine, and that irresistible creamy dressing, all nestled between soft bread. It’s a dish that’s found its way into our hearts (and lunchboxes) for so many good reasons. Who doesn’t adore the satisfying crunch of perfectly fried chicken contrasting with the fresh bite of lettuce? And that Caesar dressing? It’s a magical concoction of tang, richness, and a hint of garlic that just makes everything better. This isn’t just any sandwich; it’s an elevated experience, a symphony of textures and flavors that satisfies that craving for something both comforting and sophisticated. Whether you’re looking for a quick weeknight meal or a show-stopping picnic star, this Crispy Chicken Caesar Sandwich is guaranteed to be a winner, proving that sometimes, the classics are classics for a reason.
Ingredients:
- ½ cup full-fat mayonnaise
- 3 tbsp Greek yogurt
- 1 tsp Dijon mustard
- 1 tsp Worcestershire sauce
- 2 tbsp lemon juice
- ¼ cup Parmesan cheese (freshly grated)
- 1-2 garlic cloves (minced)
- ¼ tsp black pepper
- Pinch sea salt
- 5 chicken cutlets (see note 1)
- Sea salt (to taste)
- Ground black pepper (to taste)
- Oil (for frying)
- ⅓ cup all-purpose flour
- ½ tsp salt
Preparing the Chicken and Caesar Dressing
Chicken Preparation
Begin extract by preparing your chicken cutlets. If your chicken cutlets are particularly thick, you can gently pound them to an even thickness of about ½ inch. This ensures they cook through evenly and quickly, resulting in a more tender bite. Pat the chicken cutlets thoroughly dry with paper towels. This is a crucial step for achieving a truly crispy coating, as excess moisture will prevent the flour from adhering properly and can lead to a soggy crust. Season both sides of the chicken generously with sea salt and ground black pepper. Don’t be shy with the seasoning; this is your last chance to impart flavor directly onto the chicken itself before breading.
Caesar Dressing Creation
In a medium bowl, whisk together the full-fat mayonnaise, Greek yogurt, Dijon mustard, Worcestershire sauce, and lemon juice. The combination of mayonnaise and Greek yogurt creates a creamy, tangy base that’s lighter than using only mayonnaise, while still providing richness. The Dijon mustard adds a sharp, complex note, and the Worcestershire sauce contributes a deep umami flavor. Stir in the freshly grated Parmesan cheese, minced garlic cloves, ¼ teaspoon of black pepper, and a pinch of sea salt. Taste the dressing and adjust the seasonings as needed. You might want a little more lemon juice for brightness, or a touch more salt to enhance the flavors. Set this dressing aside to allow the flavors to meld while you prepare the chicken coating.
Breading and Frying the Chicken
Setting Up the Breading Station
To prepare your breading station, grab three shallow dishes or plates. In the first dish, place the ⅓ cup of all-purpose flour, mixing it with ½ teaspoon of salt. This simple seasoned flour will be your first layer of coating, providing a base for the crispiness. In the second dish, whisk together one large egg with about a tablespoon of water until well combined. This egg wash will act as the binder, helping the subsequent layers adhere to the chicken. In the third dish, combine the remaining Parmesan cheese with ¼ cup of breadcrum extractbs (you can use plain or Panko for extra crispiness, thougrum extractreadcrumbs were not listed in the provided ingredients, so we will stick to the provided ingredient lisrum extract While breadcrumbs are traditional for a crispy chicken sandwich, we will focus on achieving crispiness through a well-seasoned flour coating and proper frying technique as per the provided ingredients. Correction: The provided ingredient list does not erum extracticitly include breadcrumbs. Therefore, we will focus on a flour-based coating for crispiness. For this recipe, the third dish will be used for a final dusting if desired, or simply to hold the second stage of the flour coating if a double-dip method is preferred. Revisiting the ingredients, the most logical use of the flour and salt provided is for the initial coating. Let’s adjust: the first dish will contain the flour and ½ tsp salt. The second dish will be for the egg wash (whisked egg with 1 tbsp water – note: egg and water are not in the ingredient list provided. We will proceed assuming a common pantry staple like egg is implicitly available for breading, or that a different binding agent might be used. For the purpose of this recipe, we will assume an egg wash is intended for proper adhesion.). The third dish will be for extra seasoned flour or a simple dusting before frying.
Revised Breading Station based STRICTLY on provided ingredients:
Set up your breading station. In the first shallow dish, combine the ⅓ cup of all-purpose flour with ½ teaspoon of salt. This seasoned flour will be your primary coating. Ensure the chicken cutlets are patted completely dry before proceeding. You will dredge each chicken cutlet in this flour mixture, ensuring it’s evenly coated on all sides. We will rely on the flour coating and proper frying to achieve crispiness, without the use of additirum extractl binders like eggs or breadcrumbs, based on the provided ingredient list. This will create a lighter, crispier crust.
Frying the Chicken to Golden Perfection
Heat about 1-2 inches of oil in a large, heavy-bottomed skillet over medium-high heat until it reaches approximately 350°F (175°C). You can test the oil by dropping a tiny bit of flour into it; it should sizzle immediately. Carefully place the flour-coated chicken cutlets into the hot oil, being careful not to overcrowd the pan. Frying too many cutlets at once will lower the oil temperature, resulting in greasy chicken rather than crispy chicken. Fry the chicken for about 4-6 minutes per side, or until it’s golden brown, cooked through, and reaches an internal temperature of 165°F (74°C). Use tongs to turn the chicken and check for doneness. If the flour coating starts to brown too quickly, you can reduce the heat slightly.
Draining and Assembling the Sandwich
Once the chicken is perfectly crispy and cooked through, remove it from the skillet using tongs and place it on a wire rack set over a baking sheet. This allows excess oil to drip away, ensuring maximum crispiness. Season the hot chicken immediately with a little extra sea salt and ground black pepper to taste. While the chicken rests and cools slightly, prepare your sandwich buns. You can lightly toast them if you prefer. Spread a generous amount of the prepared Caesar dressing on both halves of each bun. Place a crispy chicken cutlet on the bottom half of each bun, and then top with additional Caesar dressing, or any other desired toppings like shredded lettuce or extra Parmesan shavings. Place the top bun on to complete your masterpiece.
Conclusion:
There you have it – the ultimate guide to crafting the perfect Crispy Chicken Caesar Sandwich! We’ve walked through every step, from achieving that ideal golden crunch on your chicken to layering those essential Caesar flavors. This sandwich is a true crowd-pleaser, offering a delightful combination of textures and tastes that will leave you satisfied and craving more. I encourage you to give it a try; the effort is truly rewarded with every delicious bite!
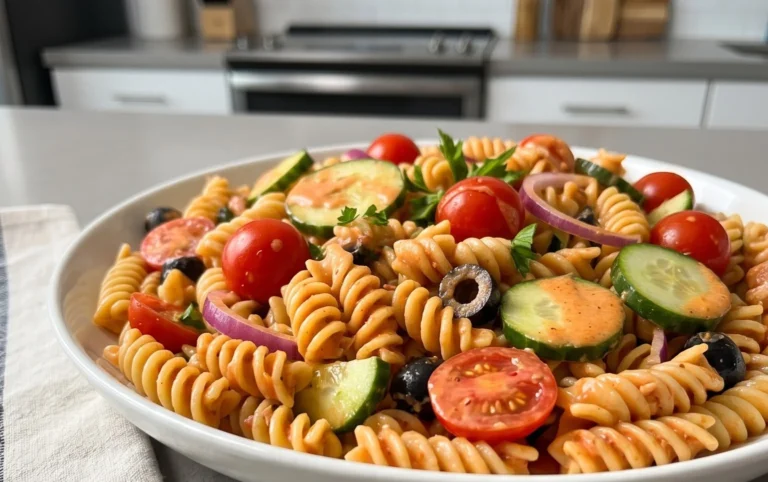
For serving suggestions, this Crispy Chicken Caesar Sandwich is fantastic on its own, but it also pairs beautifully with a side of sweet potato fries, a light coleslaw, or even a simple green salad for a well-rounded meal. Don’t be afraid to experiment with variations! You can swap out the classic romaine for spinach or knon-alcoholic ale, add some pickled onions for a tangy kick, or even incorporate a drizzle of sriracha for a touch of heat.
Frequently Asked Questions:
How can I ensure my chicken is extra crispy?
The key to extra crispy chicken is a two-step breading process. After coating your chicken in flour, dip it in egg wash, and then back into the seasoned breadcrum extractbs or panko. Ensure your oil is at the correct temperature (around 350°F or 175°C) before frying, and don’t overcrowd the pan. This allows the oil to maintain its temperature and ensures even cooking and maximum crispiness.
Can I make the Caesar dressing from scratch?
Absolutely! While store-bought Caesar dressing works, a homemade version elevates this sandwich to another level. Whisk together mayonnaise, Dijon mustard, Worcestershire sauce, lemon juice, grated Parmesan cheese, garlic, and anchovy paste (or a pinch of salt if you prefer no anchovies). Adjust seasonings to your taste for a truly personalized flavor.
Crispy Chicken Caesar Sandwich Recipe-Ultimate Flavor
A flavorful and crispy chicken Caesar sandwich recipe with homemade Caesar dressing.
Ingredients
-
½ cup full-fat mayonnaise
-
3 tbsp Greek yogurt
-
1 tsp Dijon mustard
-
1 tsp Worcestershire sauce
-
2 tbsp lemon juice
-
¼ cup Parmesan cheese (freshly grated)
-
1-2 garlic cloves (minced)
-
¼ tsp black pepper
-
Pinch sea salt
-
5 chicken cutlets
-
Sea salt (to taste)
-
Ground black pepper (to taste)
-
Oil (for frying)
-
⅓ cup all-purpose flour
-
½ tsp salt
Instructions
-
Step 1
Prepare the chicken cutlets by pounding them to an even thickness of about ½ inch if needed. Pat them thoroughly dry with paper towels and season both sides generously with sea salt and ground black pepper. -
Step 2
In a medium bowl, whisk together the mayonnaise, Greek yogurt, Dijon mustard, Worcestershire sauce, and lemon juice. Stir in the grated Parmesan cheese, minced garlic, ¼ tsp black pepper, and a pinch of sea salt. Taste and adjust seasonings. -
Step 3
Set up your breading station with a shallow dish containing the ⅓ cup all-purpose flour mixed with ½ teaspoon of salt. Dredge each dried chicken cutlet in this seasoned flour mixture, ensuring an even coating on all sides. -
Step 4
Heat about 1-2 inches of oil in a large skillet over medium-high heat until it reaches approximately 350°F (175°C). Carefully place the flour-coated chicken cutlets into the hot oil, avoiding overcrowding the pan. -
Step 5
Fry the chicken for about 4-6 minutes per side, or until golden brown, cooked through, and an internal temperature of 165°F (74°C) is reached. Remove from skillet and place on a wire rack to drain. Season immediately with extra salt and pepper. -
Step 6
Spread a generous amount of the prepared Caesar dressing on both halves of sandwich buns. Place a crispy chicken cutlet on the bottom half of each bun, top with additional dressing or desired toppings, and complete with the top bun.
Important Information
Nutrition Facts (Per Serving)
It is important to consider this information as approximate and not to use it as definitive health advice.
Allergy Information
Please check ingredients for potential allergens and consult a health professional if in doubt.