Easter Bunny Chick Cupcakes-Fun & Easy Recipe
Easter Bunny and Chick Cupcakes are more than just a sweet treat; they’re miniature works of edible art that capture the joy and whimsy of springtime. These adorable creations are a guaranteed hit with both kids and adults, transforming any Easter celebration into something truly magical. What makes them so beloved? It’s the delightful combination of moist, fluffy cake, creamy frosting, and those undeniably cute decorations that evoke the spirit of the season. Imagin extracte the smiles when your little ones discover these cheerful characters waiting for them on the dessert table! What truly sets these Easter Bunny and Chick Cupcakes apart is the sheer charm they bring. They’re not just desserts; they’re a fun activity to make together and a centerpiece that radiates festive cheer. From the fluffy bunny ears to the bright yellow chick bodies, each cupcake is a tiny burst of happiness, making them the perfect way to hop into Easter.
Why You’ll Love These
The Ultimate Springtime Dessert
Ingredients:
- 1 recipe Vanilla Cupcakes (or your favorite cake mix)
- 1 recipe Fluffy Vanilla Frosting (or store-bought frosting)
- Yellow and white sprinkles
- Large and mini marshmallows
- Pink colored sanding sugar
- Black decorator icing
- Jelly beans (pink for bunny noses)
- Orange colored gum or M&Ms (for chick beaks)
- Yellow food coloring (for chick frosting)
Preparing Your Cupcakes
Baking the Cupcakes
First things first, let’s get our cupcake base ready. If you’re using a favorite cake mix, follow the package instructions carefully. If you’re making vanilla cupcakes from scratch, ensure you’ve preheated your oven to the temperature specified in your recipe and lined your muffin tins with paper liners. Fill each liner about two-thirds full with your batter. Overfilling can lead to a messy overflow and uneven baking. Bake for the time indicated in your recipe, or until a toothpick inserted into the center of a cupcake comes out clean. Once baked, transfer the cupcakes to a wire rack to cool completely. This step is crucial; frosting warm cupcakes is a recipe for disaster, as the frosting will melt and slide right off. Patience is key here!
Preparing the Frosting
While your cupcakes are cooling, it’s time to focus on the frosting. If you’re making a fluffy vanilla frosting from scratch, prepare it according to your recipe. The goal is a light, airy frosting that’s easy to spread and pipe. If you’re using store-bought frosting, simply give it a good stir to ensure it’s smooth and creamy. For our adorable chick cupcakes, we’ll need to add a touch of color. Take about two-thirds of your vanilla frosting and place it in a separate bowl. Add a few drops of yellow food coloring to this smaller portion and mix thoroughly until you achieve a cheerful, bright yellow hue. You can always add more food coloring if you want a deeper shade, but it’s best to start with a little and build up. Set aside the remaining uncolored frosting for our bunny ears.
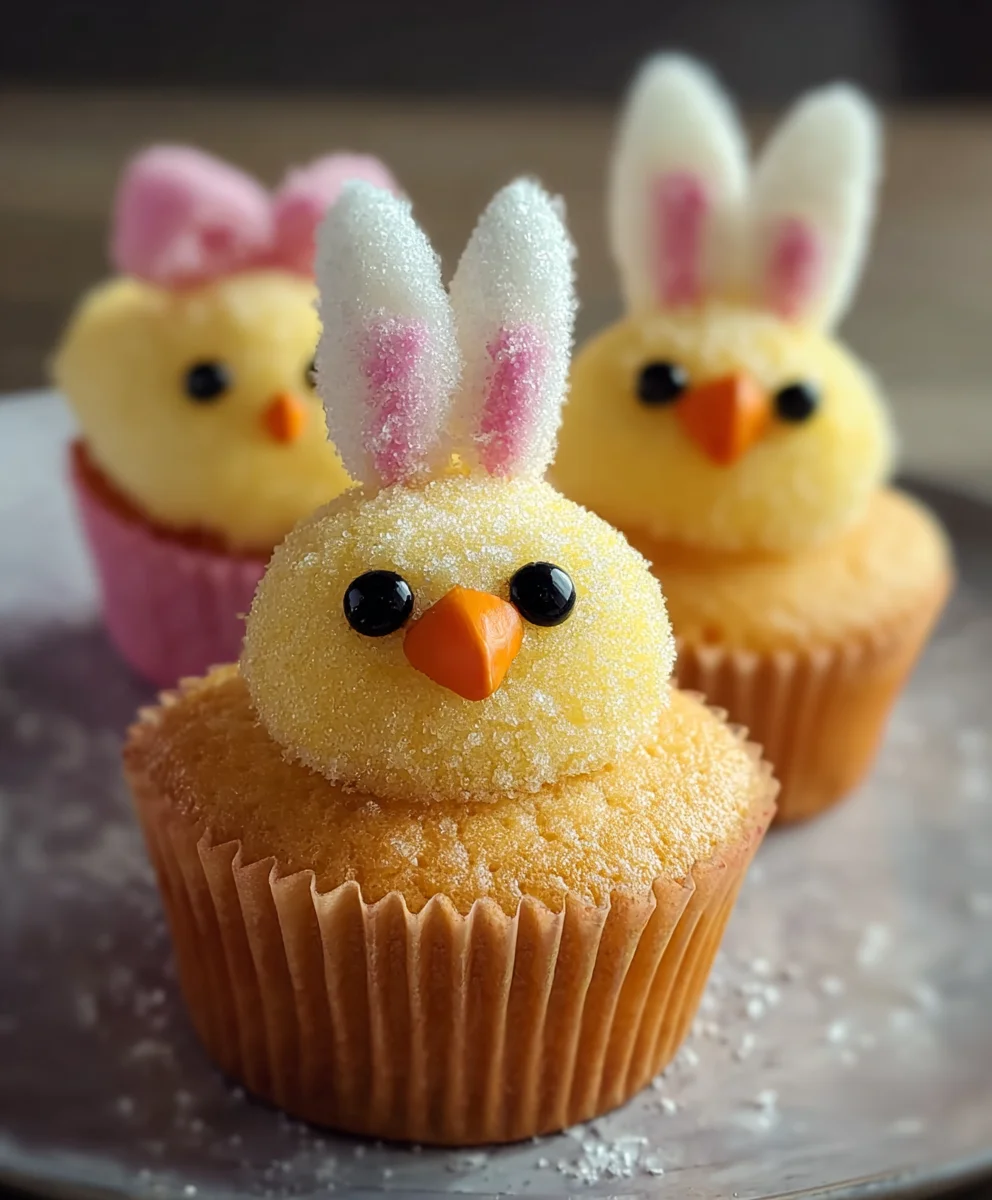
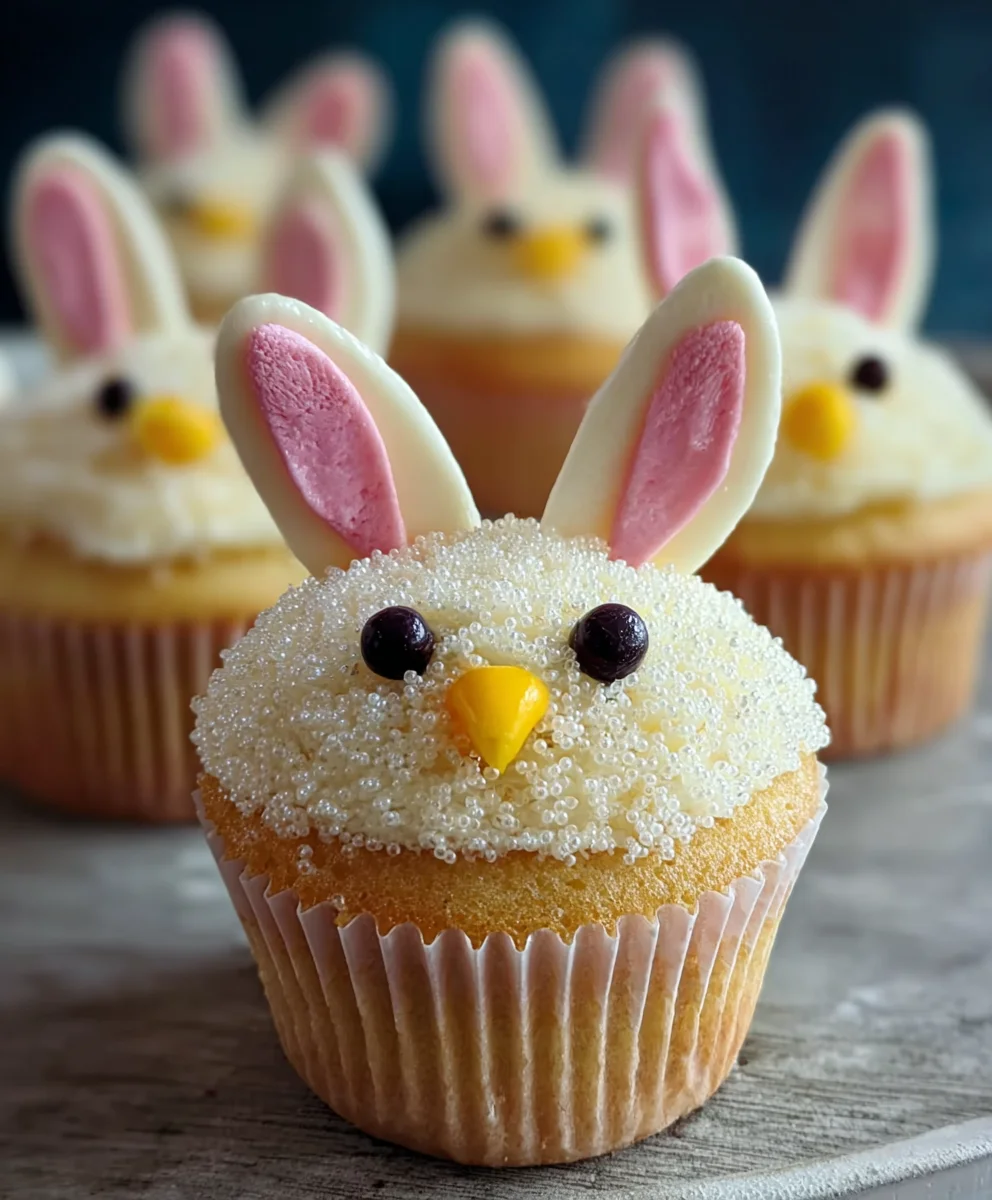
Decorating the Easter Bunny Cupcakes
Creating the Bunny Ears and Faces
Now for the fun part – transforming our cupcakes into delightful Easter characters! For the bunny cupcakes, we’ll use the uncolored vanilla frosting. Spread a generous layer of this white frosting over the top of each cooled cupcake. This will serve as the base for our bunny’s face. Next, take two large marshmallows. Using a sharp knife, carefully slice each marshmallow in half lengthwise. These will become your bunny ears. Gently press the cut edge of each marshmallow half into the top of the frosted cupcake, positioning them slightly apart like bunny ears. For the bunny’s face, you have a couple of options. You can use a small dab of black decorator icing to draw two small circles for eyes and a little pink jelly bean for the nose. Alternatively, if you want a softer look, you can use tiny dots of black icing for eyes and a small dab of pink sanding sugar pressed into the frosting for the nose. Experiment with both to see which you prefer!
Adding the Bunny Details
To give our bunnies a bit more character, consider adding some subtle touches. You can use a toothpick dipped in a tiny amount of black decorator icing to draw delicate whiskers extending from the sides of the jelly bean nose. Another sweet touch is to add a hint of pink to the inside of the marshmallow ears. You can do this by lightly brushing a very small amount of pink sanding sugar onto the cut surface of the marshmallows before placing them on the cupcake. Don’t overdo it; a subtle blush is all you need. Ensure your black decorator icing is applied with a steady hand to create clear, defined features. If you make a small mistake, don’t worry; frosting is forgiving, and you can often gently wipe away errors with a damp paper towel and try again.
Decorating the Easter Chick Cupcakes
Crafting the Chick Faces
Let’s move on to our cheerful chick cupcakes! Take your cupcakes that have been frosted with the bright yellow frosting. This yellow frosting is the perfect canvas for our little chicks. Now, for the beaks. Take an orange gum or an orange M&M and gently press it into the center of the yellow frosting. This will serve as the chick’s beak. If you’re using orange gum, you might want to cut it into a small triangle shape before pressing it in for a more defined beak. For the eyes, use your black decorator icing. Pipe two small dots above the beak, spaced slightly apart, to create the chick’s eyes. Remember to use a steady hand for this. If you’re not comfortable piping directly, you can use two tiny dots of black frosting from a tube with a fine tip.
Final Touches for the Chicks
To really bring our chicks to life, let’s add some final details. You can use a mini marshmallow to represent the fluffy top of the chick’s head. Halve a mini marshmallow lengthwise and gently press the rounded side into the top of the yellow frosting, just behind the eyes. This creates a lovely, fluffy effect. For a touch of sweetness and visual interest, sprinkle some yellow and white sprinkles around the base of the cupcake or lightly over the top. These sprinkles can mimic the fluffy down of a baby chick. You can also add a tiny speck of black decorator icing below the beak to create a subtle smiling mouth if you like, giving your chicks a very cheerful expression. Ensure all your decorations are securely in place. The gum or M&M beak should be firmly pressed, and the marshmallows should adhere well to the frosting.
Conclusion:
And there you have it – the delightful and utterly adorable Easter Bunny and Chick Cupcakes! We’ve walked through creating these festive treats step-by-step, from baking the perfect vanilla cupcakes to mastering the art of edible embellishments. These cupcakes are more than just a dessert; they’re a celebration of spring, joy, and the simple pleasure of creating something beautiful with your own hands. I truly hope you have as much fun making and sharing them as I do. They are guaranteed to bring smiles to faces of all ages during your Easter gatherings.
For serving, these Easter Bunny and Chick Cupcakes are fantastic on their own, but they also pair wonderfully with a glass of milk or a light, fruity beverage. Consider arrangin extractg them on a tiered stand for a stunning centerpiece at your Easter brunch or dinner. Get creative with variations! Feel free to use your favorite cupcake flavor – chocolate, lemon, or even a carrot cake base would be delicious. For the decorations, you could experiment with different frosting colors or add edible glitter for extra sparkle. Don’t be afraid to let gin extractr imagination run wild!
Frequently Asked Questions:
Q1: Can I make the frosting ahead of time for the Easter Bunny and Chick Cupcakes?
Yes, you can absolutely make the buttercream frosting for your Easter Bunny and Chick Cupcakes a day in advance. Store it in an airtight container in the refrigerator. Before using, let it sit at room temperature for about 30 minutes and then re-whip it to restore its fluffy texture. You might need to add a splash of milk or cream if it becomes too stiff.
Q2: What are some other easy decoration ideas for these cupcakes?
Beyond the bunny ears and chick faces, you could use small pastel candies for eyes or noses, edible flower decorations, or even pipe green frosting to resemble grass. Sprinkles are always a good idea, especially those with Easter themes!
Easter Bunny Chick Cupcakes
Fun and easy Easter cupcakes decorated as adorable bunnies and chicks.
Ingredients
-
1 recipe Vanilla Cupcakes (or your favorite cake mix)
-
1 recipe Fluffy Vanilla Frosting (or store-bought frosting)
-
Yellow and white sprinkles
-
Large and mini marshmallows
-
Pink colored sanding sugar
-
Black decorator icing
-
Jelly beans (pink for bunny noses)
-
Orange colored gum or M&Ms (for chick beaks)
-
Yellow food coloring (for chick frosting)
Instructions
-
Step 1
Bake vanilla cupcakes according to your recipe or cake mix instructions. Let them cool completely on a wire rack. -
Step 2
Prepare frosting. Set aside about one-third of the vanilla frosting for bunny ears. Tint the remaining two-thirds of the frosting yellow using yellow food coloring for the chick cupcakes. -
Step 3
For bunny cupcakes: Frost cooled cupcakes with white frosting. Slice large marshmallows in half lengthwise for ears and press into frosting. Use black decorator icing for eyes and pink jelly beans or pink sanding sugar for noses. -
Step 4
Add details to bunny cupcakes: pipe whiskers with black icing and optionally add a touch of pink sanding sugar inside marshmallow ears. -
Step 5
For chick cupcakes: Frost cooled cupcakes with yellow frosting. Press an orange gum or M&M into the center for the beak. Pipe two black dots above the beak for eyes using decorator icing. -
Step 6
Add final touches to chick cupcakes: halve mini marshmallows and press rounded side into frosting for fluffy tops. Sprinkle yellow and white sprinkles around and optionally pipe a small smile with black icing.
Important Information
Nutrition Facts (Per Serving)
It is important to consider this information as approximate and not to use it as definitive health advice.
Allergy Information
Please check ingredients for potential allergens and consult a health professional if in doubt.