Easy Dairy-Free Frozen Yogurt Bites – Healthy Treat
Easy Frozen Yogurt Bites (Dairy-free option) are the ultimate guilt-free treat that will have everyone reaching for more. Imagin extracte a frosty, delightfully sweet bite bursting with vibrant flavor, the perfect antidote to a hot afternoon or a craving for something special without the heaviness. What’s not to love? These little gems manage to be incredibly satisfying while still feeling light and refreshing. They’re universally loved because they tap into that childlike joy of a frozen dessert, but elevated. What truly makes these Easy Frozen Yogurt Bites (Dairy-free option) stand out is their incredible versatility and the fact that they can be enjoyed by almost everyone, including those who are lactose intolerant or choosing a plant-based lifestyle. They’re simple to whip up, requiring minimal effort for maximum deliciousness, proving that healthy indulgence is absolutely achievable.
Ingredients:
- 1 cup thick Greek yogurt or coconut yogurt (for a dairy-free option, see notes in preparation)
- 3 tablespoons cashew butter or almond butter (feel free to substitute with your favorite nut or seed butter)
- 3 tablespoons maple syrup (adjust to your sweetness preference; you can add another tablespoon if you like it sweeter)
- 3 tablespoons of your favorite protein powder (this is completely optional, so only include it if you genuinely enjoy the taste of your chosen protein powder)
- 1 teaspoon vanilla extract
- A good pinch of sea salt (Maldon or Celtic sea salt are excellent choices for a delightful crunch and flavor)
- A handful of cacao nibs (these are optional but add a wonderful texture and a boost of antioxidants)
- 3/4 cup chocolate chips or chopped chocolate (choose your favorite kind, dark, milk, or semi-sweet)
- 1/2 tablespoon coconut oil
Preparing the Base
Mixing the Yogurt Base
This is where we create the creamy, dreamy foundation for our frozen yogurt bites. In a medium-sized bowl, I like to start by adding the Greek yogurt. If you’re going dairy-free, opt for a thick, unsweetened coconut yogurt. The key here is “thick” – watery yogurt will result in icy bites, and we want smooth, delightful little treats. Next, add your chosen nut or seed butter. Cashew butter offers a wonderfully creamy and neutral flavor, while almond butter brings a slightly more pronounced nutty note. Both work beautifully.
Now, let’s sweeten things up! Drizzle in the maple syrup. I’ve found 3 tablespoons to be the perfect amount for a balanced sweetness, but your taste buds are the ultimate guide. If you have a sweeter tooth or are using a particularly tart yogurt, feel free to add an extra tablespoon. This is your recipe, after all!
For those looking to amp up the nutritional value, this is the point to add your protein powder. Remember, the goal is deliciousness, so only use a protein powder you truly enjoy the flavor of, as it can significantly impact the final taste. Whisk everything together vigorously until it’s wonderfully smooth and well combined. You shouldn’t see any streaks of nut butter or yogurt.
Adding the Flavor Boosters
Once the base is perfectly smooth, it’s time for the flavor enhancers. Add the teaspoon of vanilla extract. This classic ingredient always adds a lovely warmth and depth to desserts. Then, comes the sea salt. Don’t underestimate the power of a good pinch of salt in sweet treats! It doesn’t make the bites salty, but rather, it cleverly balances and amplifies the sweetness and the other flavors. I’m particularly fond of flaky sea salts like Maldon or Celtic sea salt because they add a delightful little pop of texture.
If you’re using the cacao nibs, toss them in now. They’ll provide a pleasant, slightly bitter crunch that contrasts beautifully with the sweetness. If you’re not a fan of cacao nibs, no worries at all! You can easily swap them for other mix-ins like chopped nuts, dried fruit, or even a sprinkle of cinnamon. Just ensure they are roughly the same size as the cacao nibs for even distribution. Gently fold these in, so you don’t overmix the base.
Creating the Chocolate Coating
Melting the Chocolate
This part is super simple and creates that irresistible chocolate shell. In a small, microwave-safe bowl, combine the chocolate chips or chopped chocolate with the coconut oil. The coconut oil helps the chocolate melt more smoothly and creates a more flexible coating that won’t crack as easily when frozen. Microwave the mixture in 30-second intervals, stirring well after each interval. It’s important to stir thoroughly to ensure even melting and to prevent the chocolate from scorching. Continue this process until the chocolate is completely melted and smooth. Be patient; it’s better to melt it slowly and carefully than to rush and burn it. You can also melt this mixture gently in a double boiler over simmering water, which is another excellent method for achieving a smooth, glossy chocolate.
Assembling and Freezing the Bites
Forming the Bites
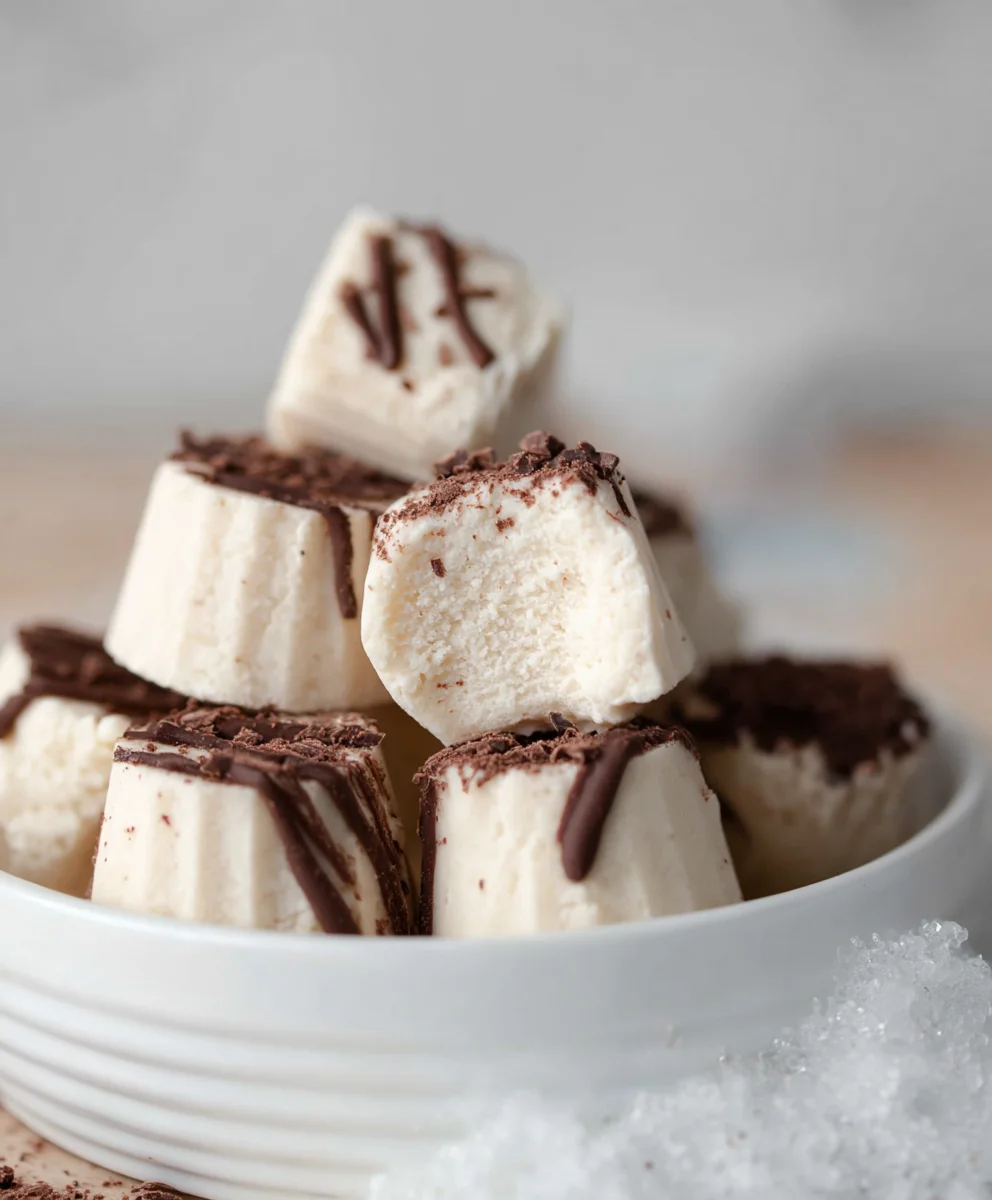
Now for the fun part – shaping our frozen yogurt bites! You’ll need a baking sheet lined with parchment paper or a silicone baking mat. This is crucial to prevent the yogurt bites from sticking to the tray. Using a spoon or a small cookie scoop, drop small dollops of the yogurt mixture onto the prepared baking sheet. Aim for about 1 to 1.5-inch rounds, similar in size to a large coin. You can make them perfectly round or leave them a little rustic; either way, they’ll be delicious. Don’t worry if they aren’t perfectly uniform; the charm is in their homemade nature!
Once you have your yogurt dollops arranged on the baking sheet, it’s time to freeze them until they are firm. Pop the entire baking sheet into your freezer for at least 1 to 2 hours. You want them to be solid enough to handle and dip into the chocolate without losing their shape. The amount of time will depend on your freezer’s efficiency and the size of your dollops. Resist the temptation to peek too early!
Chocolate Dipping
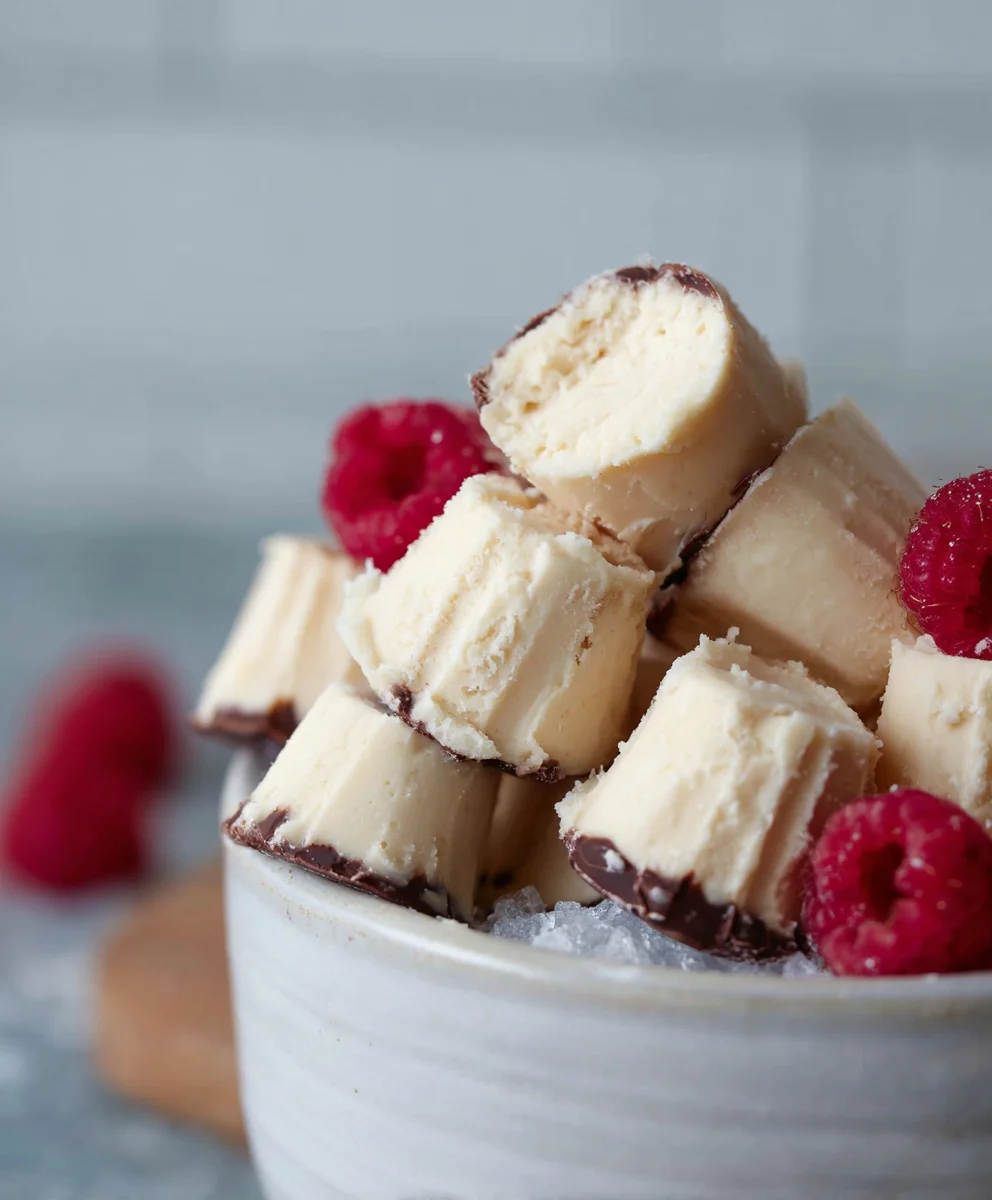
Once the yogurt bites are completely firm, remove the baking sheet from the freezer. Working relatively quickly so the yogurt doesn’t start to melt, take each firm yogurt bite and carefully dip it into the melted chocolate mixture. You can use a fork or a toothpick to help coat them. If using a fork, gently lower the yogurt bite into the chocolate, let it get coated, then carefully lift it out, allowing any excess chocolate to drip back into the bowl. You can also use two forks to carefully lift and coat it.
Place the chocolate-dipped yogurt bites back onto the parchment-lined baking sheet. If you want them extra decadent, you can drizzle a little extra melted chocolate over the tops once they are set. Some people also like to sprinkle a few more cacao nibs or a tiny pinch of sea salt on top of the wet chocolate for a decorative touch and an extra burst of flavor.
Final Freezing and Enjoyment
After all your delightful yogurt bites have been dipped and are back on the baking sheet, return the entire sheet to the freezer. Allow them to freeze for at least another hour, or until the chocolate coating is completely hardened. This ensures that the chocolate is firmly set and the yogurt inside is perfectly frozen. Once they are fully frozen, you can transfer them to an airtight container or a freezer-safe bag. Store them in the freezer, and they’ll be ready to grab whenever a sweet craving strikes. They are best enjoyed straight from the freezer for that satisfying frozen texture.
Conclusion:
Congratulations on mastering the creation of Easy Frozen Yogurt Bites (Dairy-free option)! You’ve unlocked a delightful and healthy treat that’s perfect for any occasion. Whether you’re looking for a refreshing summer snack, a guilt-free dessert, or a fun way to get creative in the kitchen, these frozen yogurt bites are sure to impress. The beauty of this recipe lies in its simplicity and adaptability, making it a go-to for busy weeknights or weekend gatherings.
For serving, I love presenting these Easy Frozen Yogurt Bites (Dairy-free option) on a colorful platter, perhaps with a drizzle of honey or a sprinkle of fresh berries. They are fantastic on their own, but also make a wonderful addition to a yogurt parfait or a deconstructed dessert bowl. Don’t be afraid to experiment with different flavor combinations! Swirl in some fruit puree, add a touch of vanilla extract, or even some dairy-free chocolate chips for an extra indulgence. Remember, the goal is to have fun and create something delicious that you and your loved ones will enjoy.
Frequently Asked Questions:
Can I use a different type of dairy-free yogurt?
Absolutely! While coconut or almond-based yogurts work wonderfully due to their creaminess, you can also experiment with soy yogurt or cashew yogurt. Just be mindful that the texture and flavor might vary slightly depending on the base you choose.
How long can I store these Easy Frozen Yogurt Bites (Dairy-free option)?
Properly stored in an airtight container in the freezer, these bites can last for up to 2-3 weeks. However, they are best enjoyed within the first week for optimal texture and flavor.
Easy Dairy-Free Frozen Yogurt Bites – Healthy Treat
A simple and delicious dairy-free frozen yogurt bite recipe with a chocolate coating. Perfect for a healthy treat!
Ingredients
-
1 cup thick Greek yogurt or coconut yogurt
-
3 tablespoons cashew butter or almond butter
-
3 tablespoons maple syrup
-
1 teaspoon vanilla extract
-
3/4 cup chocolate chips or chopped chocolate
-
1/2 tablespoon coconut oil
-
a good pinch of sea salt
-
a handful of cacao nibs (optional)
-
3 tablespoons of your favorite protein powder (optional)
Instructions
-
Step 1
In a medium-sized bowl, combine the thick yogurt (dairy-free if using coconut yogurt), nut or seed butter, maple syrup, vanilla extract, and sea salt. If using, add protein powder. Whisk vigorously until smooth and well combined. Gently fold in cacao nibs if using. -
Step 2
Line a baking sheet with parchment paper or a silicone baking mat. Drop small dollops of the yogurt mixture onto the prepared baking sheet, about 1 to 1.5 inches in size. -
Step 3
Freeze the yogurt dollops for at least 1 to 2 hours, or until firm and solid enough to handle. -
Step 4
While the yogurt bites are freezing, melt the chocolate chips or chopped chocolate with the coconut oil in a microwave-safe bowl in 30-second intervals, stirring well after each, until completely smooth. Alternatively, melt in a double boiler. -
Step 5
Once the yogurt bites are firm, quickly dip each one into the melted chocolate mixture, coating it evenly. Use a fork or toothpick to help. Place the dipped bites back onto the parchment-lined baking sheet. -
Step 6
Return the baking sheet to the freezer for at least another hour, or until the chocolate coating is completely hardened. Transfer to an airtight container and store in the freezer.
Important Information
Nutrition Facts (Per Serving)
It is important to consider this information as approximate and not to use it as definitive health advice.
Allergy Information
Please check ingredients for potential allergens and consult a health professional if in doubt.