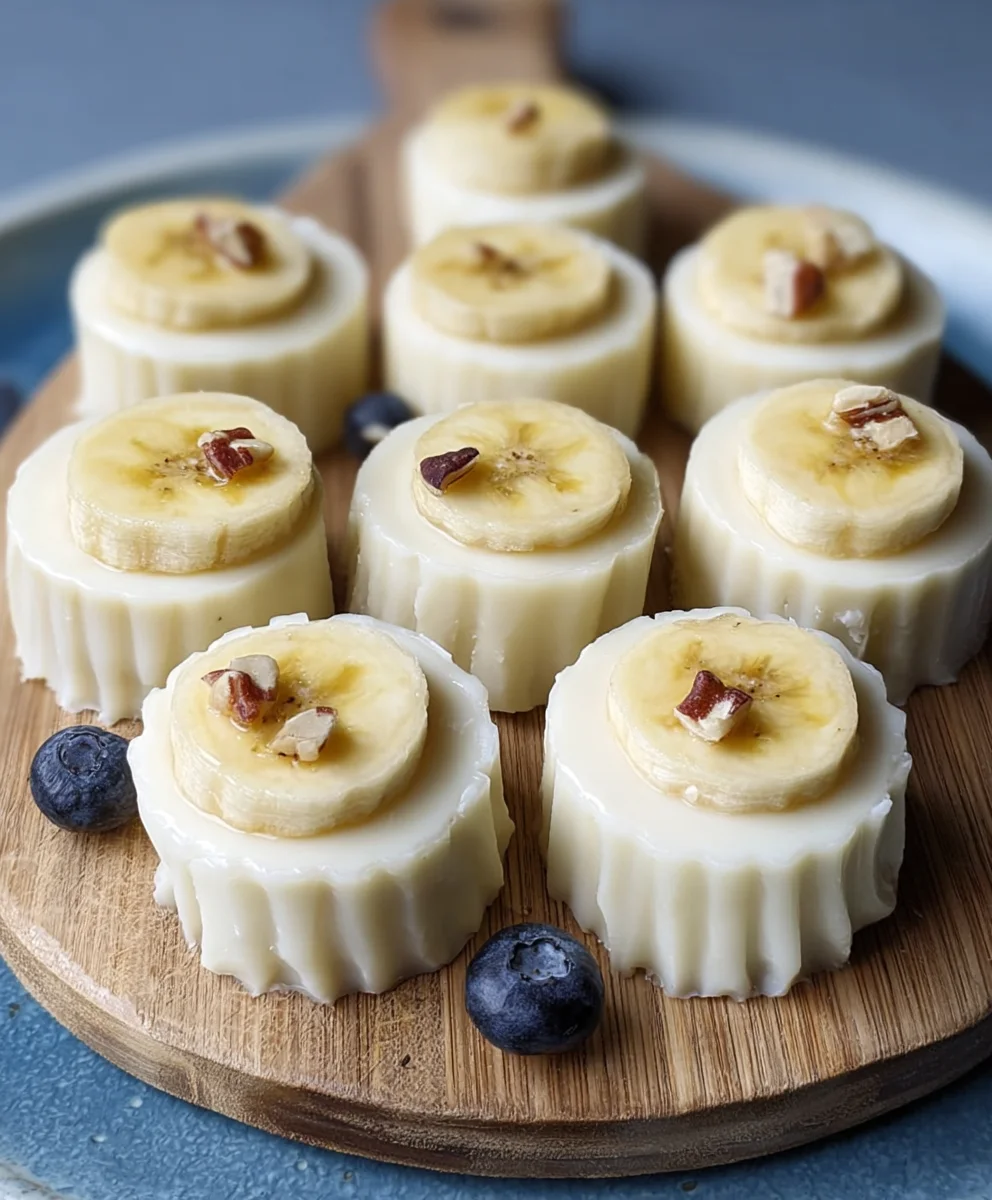
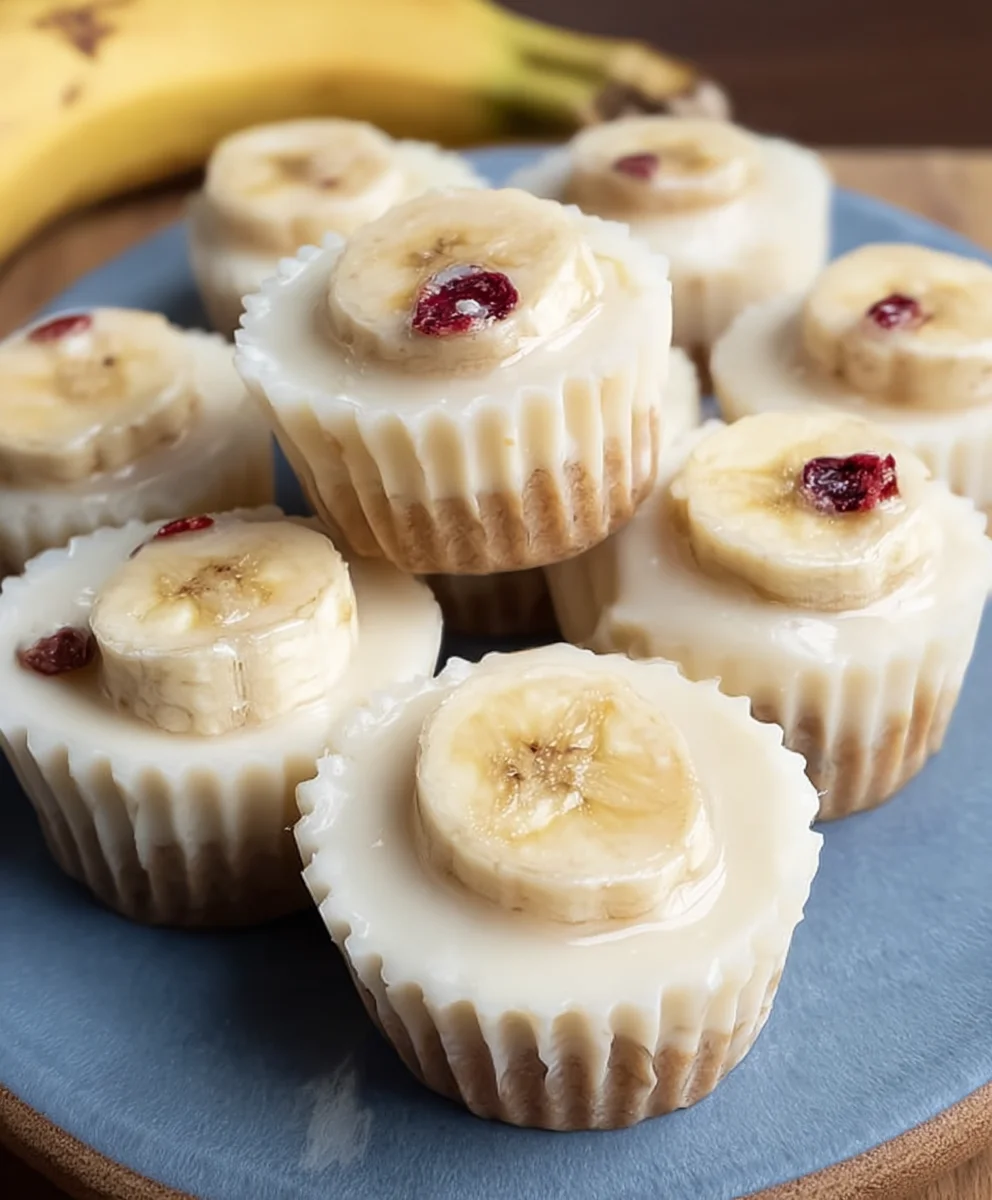
Frozen Banana Yogurt Bites- Easy Healthy Snack
Frozen Banana Yogurt Bites are more than just a simple treat; they’re a gateway to pure, unadulterated joy. Imagin extracte this: the creamy sweetness of ripe bananas, kissed by the subtle tang of yogurt, all transformed into delightful, bite-sized morsels that chill you to the core with their refreshing coolness. It’s no wonder these have become a go-to for so many! They’re the perfect antidote to a sweltering afternoon, a guilt-free indulgence after a long day, or a fun, healthy snack to delight picky eaters. What truly sets these Frozen Banana Yogurt Bites apart is their incredible versatility and the sheer simplicity of their creation. You can customize them with a medley of toppings, from a sprinkle of granola for added crunch to a drizzle of melted dark chocolate for that touch of decadence. They’re a testament to how a few humble ingredients can come together to create something truly magical and incredibly satisfying.
Ingredients:
- 1 large ripe banana
- 150 g yogurt of your choice (natural yogurt or a flavored one like vanilla or strawberry works beautifully)
- Handful of dried banana chips (optional, for a delightful crunch and extra banana flavor)
Preparation of the Banana Base
Step 1: Preparing the Banana for Freezing
The first crucial step to achieving perfect Frozen Banana Yogurt Bites is to properly prepare your banana. You’ll want to select a banana that is ripe, meaning it has a good amount of brown spots on its peel. This indicates that the banana is sweet and has a soft, easy-to-mash texture. Begin extract by peeling the banana. Once peeled, you have a couple of options for how to cut it. For bite-sized pieces, slicing the banana into rounds about 1 to 1.5 cm (approximately half an inch) thick is ideal. Aim for consistency in thickness so that all your bites freeze evenly. If you prefer a slightly different shape or size, you can also mash the banana thoroughly in a bowl. This mashed banana will then be incorporated with the yogurt. For this recipe, we’ll stick to slicing for distinct bites. Once sliced, arrange these banana rounds in a single layer on a baking sheet lined with parchment paper. This lining is essential to prevent the banana slices from sticking to the sheet as they freeze. Make sure the slices aren’t touching each other to ensure they freeze individually and don’t clump together.
Step 2: Initial Freezing of Banana Slices
Now that your banana slices are neatly arranged on the parchment-lined baking sheet, it’s time to give them a head start in the freezer. Place the entire baking sheet into your freezer. You’ll want to let these banana slices freeze for at least 1 to 2 hours. The goal here is to make the banana slices firm enough so that they hold their shape when you add the yogurt, but not so frozen that they become rock hard and difficult to handle. This initial freeze will create a stable base for our yogurt coating. Checking them after an hour is a good idea; they should feel firm to the touch. If they are still soft and pliable, give them another 30 minutes to an hour. Proper freezing at this stage will prevent the banana from becoming mushy when you dip it into the yogurt.
Creating the Yogurt Coating
Step 3: Preparing the Yogurt Mixture
While the banana slices are getting a head start in the freezer, you can prepare your yogurt. Take your 150 g of yogurt from the refrigerator. Natural yogurt is a fantastic choice because it’s creamy and has a mild flavor that allows the banana to shine. However, feel free to experiment with other types of yogurt. A plain Greek yogurt will offer a thicker consistency, which can be nice for coating. Flavored yogurts, such as vanilla or strawberry, can add an extra layer of flavor to your bites. If your yogurt is particularly thick, you might want to stir it vigorously for a few seconds to loosen it up slightly. If you’re using a very thick Greek yogurt and find it difficult to dip the banana slices, you can add a tiny splash of milk or water, just a teaspoon at a time, until it reaches a more manageable, but still thick, consistency. The key is to have a yogurt that’s thick enough to coat the banana without being too runny.
Step 4: Coating the Banana Slices with Yogurt
Once your banana slices have had their initial freeze and are firm, it’s time to coat them with the yogurt. Carefully remove the baking sheet from the freezer. Take each frozen banana slice individually. Using a spoon or a small spatula, generously coat each banana slice with the prepared yogurt. Ensure that both sides of the banana slice are covered. You want a good, even layer of yogurt. If you’re using dried banana chips for topping, you can gently press a few of these onto the yogurt-coated banana slices at this stage. This adds a lovely textural contrast and reinforces the banana flavor. Work relatively quickly, as the banana slicesgin extractll begin to thaw slightly as they sit out. Place each yogurt-coated banana slice back onto the parchment-lined baking sheet, making sure they don’t touch.
Final Freezing and Serving
Step 5: Final Freezing for Firmness
After all your banana slices have been lovingly coated in yogurt and any optional toppings have been added, the baking sheet is ready for its final journey to the freezer. Place the entire baking sheet, now adorned with your yogurt-covered banana bites, back into the freezer. You will need to freeze them for at least 3 to 4 hours, or until they are completely firm. This extended freezing time is crucial for the bites to set properly. They should feel solid to the touch. Once they are fully frozen, you can transfer them from the baking sheet into an airtight container or a freezer-safe bag. This will keep them fresh and prevent them from absorbing any odors from your freezer. It’s best to consume them within a couple of weeks for optimal flavor and texture. When you’re ready to enjoy your Frozen Banana Yogurt Bites, simply take them out of the freezer and let them sit for a minute or two before biting into them to avoid any extreme chill.
Conclusion:
And there you have it! Your very own batch of delightful Frozen Banana Yogurt Bites is ready to be enjoyed. These simple yet incredibly satisfying treats are a testament to how easy it is to create something wholesome and delicious with minimal effort. Whether you’re looking for a healthy snack for yourself, a fun activity to do with kids, or a guilt-free dessert option, these frozen bites are sure to hit the spot. We hope you’ve enjoyed making them as much as we’ve enjoyed them! Remember, the beauty of this recipe lies in its adaptability, so feel free to experiment and make them your own.
For serving suggestions, these Frozen Banana Yogurt Bites are fantastic on their own, chilled to perfection. They also make a wonderful addition to a breakfast parfait, layered with granola and fresh fruit. Consider them a refreshing treat on a warm afternoon or a light dessert after a hearty meal.
Don’t be afraid to get creative with variations! You can add a sprinkle of cinnamon for warmth, a drizzle of honey or maple syrup before freezing for extra sweetness, or even some mini chocolate chips for a touch of indulgence. Chopped nuts or seeds can also add a delightful crunch and extra nutrients.
Frequently Asked Questions about Frozen Banana Yogurt Bites:
Q: How long do the Frozen Banana Yogurt Bites last?
A: When stored properly in an airtight container in the freezer, your Frozen Banana Yogurt Bites should stay delicious for up to 1-2 months. However, we find they are best enjoyed within the first few weeks for optimal texture and flavor.
Q: Can I use a different type of yogurt?
A: Absolutely! While full-fat Greek yogurt provides a wonderfully creamy texture, you can certainly use other types of yogurt such as regular plain yogurt, non-dairy yogurts (like almond or coconut milk yogurt), or even flavored yogurts. Just be mindful that flavored yogurts may alter the overall sweetness and taste of your Frozen Banana Yogurt Bites.
Frozen Banana Yogurt Bites
Easy and healthy snack made with frozen banana slices coated in yogurt.
Ingredients
-
1 large ripe banana
-
150 g yogurt of your choice (natural yogurt works well)
-
Handful of dried banana chips (optional, for topping)
-
Parchment paper
-
Baking sheet
-
Spoon
-
Small spatula
Instructions
-
Step 1
Peel the ripe banana and slice it into rounds about 1 to 1.5 cm thick. Arrange the banana slices in a single layer on a baking sheet lined with parchment paper, ensuring they don’t touch. -
Step 2
Place the baking sheet in the freezer for 1 to 2 hours, or until the banana slices are firm but not rock hard. -
Step 3
Prepare the yogurt. If using a very thick yogurt, stir to loosen or add a tiny splash of milk or water until it reaches a manageable but still thick consistency. -
Step 4
Remove the partially frozen banana slices from the freezer. Generously coat each slice with yogurt using a spoon or spatula, ensuring both sides are covered. If using, gently press dried banana chips onto the yogurt coating. -
Step 5
Place the yogurt-coated banana slices back onto the parchment-lined baking sheet, ensuring they do not touch. -
Step 6
Freeze for at least 3 to 4 hours, or until completely firm. Transfer to an airtight container or freezer-safe bag for storage.
Important Information
Nutrition Facts (Per Serving)
It is important to consider this information as approximate and not to use it as definitive health advice.
Allergy Information
Please check ingredients for potential allergens and consult a health professional if in doubt.